How to Verify KYC on Binance | How to Sign Up
In this blog, I will explain the KYC verification process and how to sign up for Binance. To start trading cryptocurrencies on Binance, creating an account and KYC (Know Your Customer) identity verification are essential. Simply signing up with an email may limit trading limits, making it difficult to trade properly. KYC verification is a process of verifying your identity through your ID and personal information, and upon completion, you can use higher trading limits and various services. However, for those who are doing it for the first time, the required documents and verification procedures can seem complicated. In this article, I will guide you step-by-step from Binance signup to KYC identity verification completion so that even beginners can easily understand.

How to Sign Up for Binance
Let's get started. Please click the Binance shortcut link provided below to access it. If you sign up through this link, you can get a lifetime fee discount.
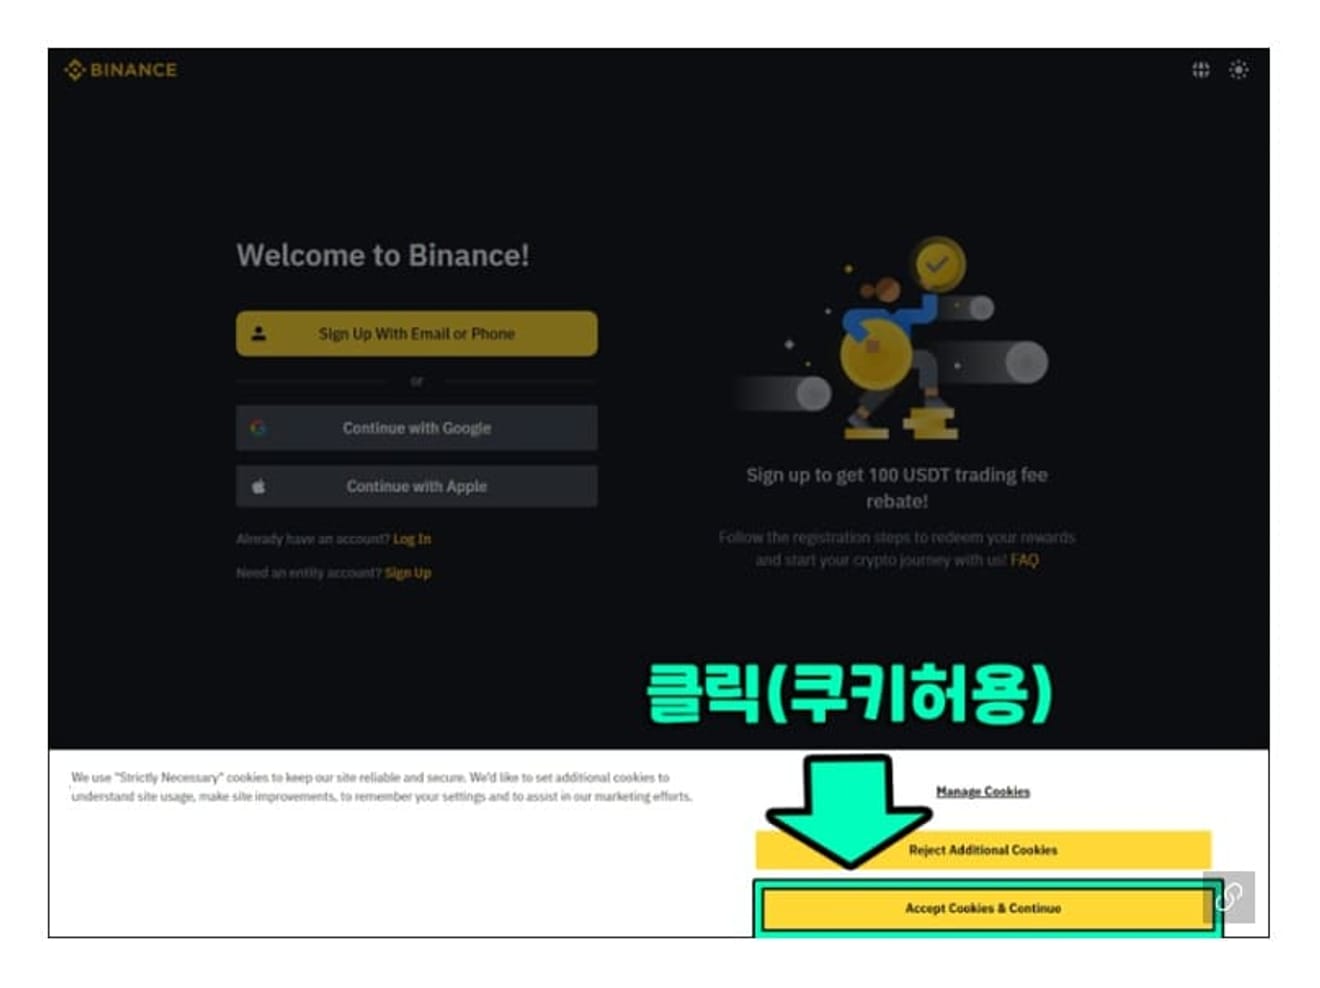
When you first connect via the link above, a cookie consent request pop-up appears. Click the Accept Cookies & Continue button.
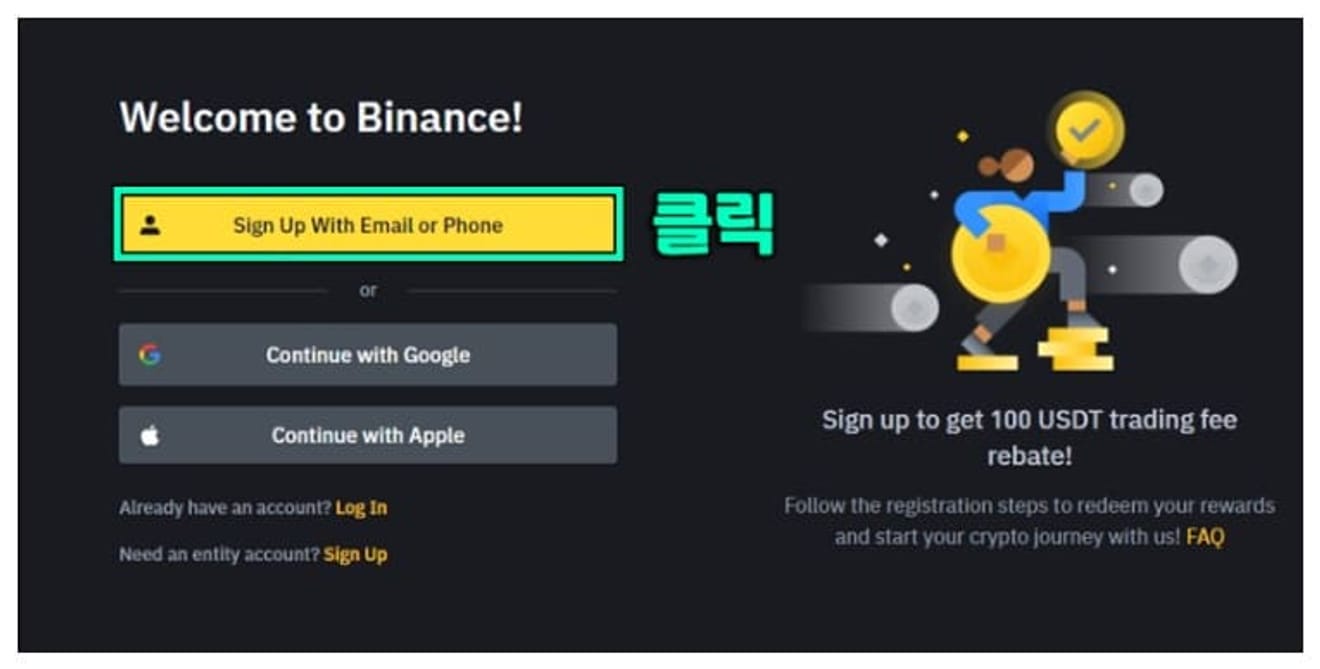
Then the Binance sign-up button appears. Click the yellow button that says, "Sign Up with Email or Phone".

You can sign up with an email or phone number. I signed up via email. Since a verification code is sent to your email, you must enter the email you are actually using. Then, agree to the terms and conditions and click the NEXT button.

A security pop-up appears that distinguishes between the computer and the user. If this pop-up does not appear, you can proceed to the next step. This pop-up usually asks questions about animals and sometimes asks about specific objects. What I had to choose was an elephant. You must select the part with the word "elephant". Select all of the provided views, and click the Verify button.

After that, a screen like this appears, and you will be informed that a verification code will be sent to your email. Check your email and enter the code.
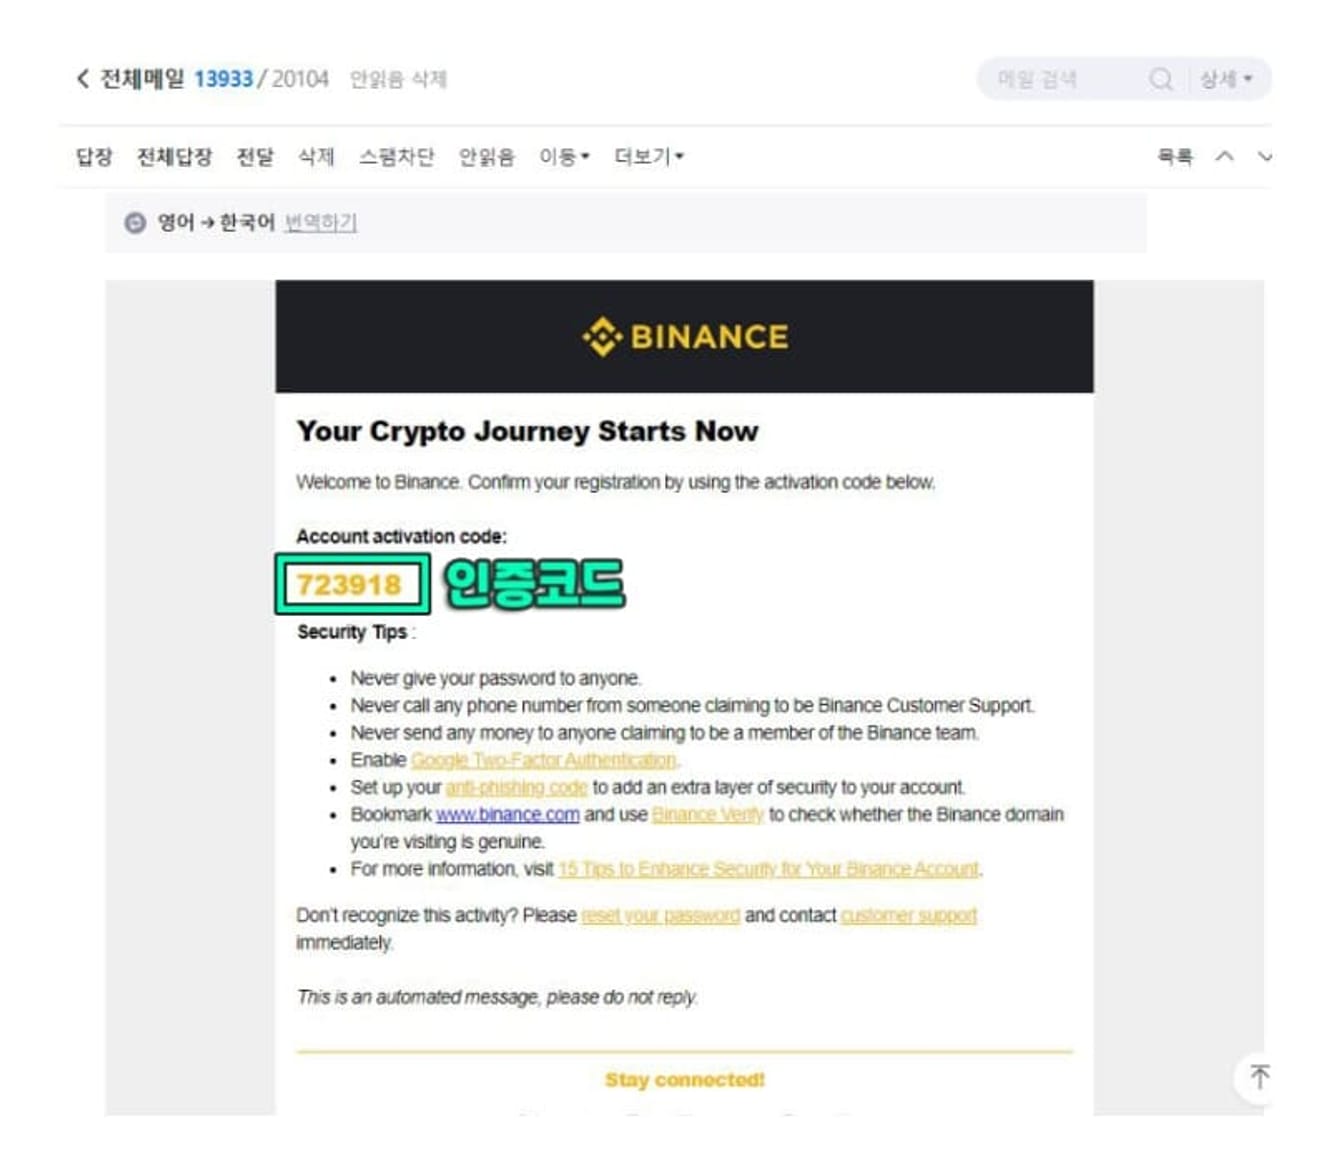
The verification code is sent like this. You can enter the 6-digit number shown above.

In the next step, set your password. Since you have to set it at once, please write it carefully. The password must be at least 8 characters long and must include numbers. Also, it must contain at least one uppercase alphabet. You can proceed by clicking NEXT right on the next screen.

The next pop-up asks whether to auto-login. You can click NOT NOW at first, but it is better to select YES for convenient use. This pop-up appears every 5 days.
How to Verify KYC on Binance
Now, let's move on to the KYC verification stage.
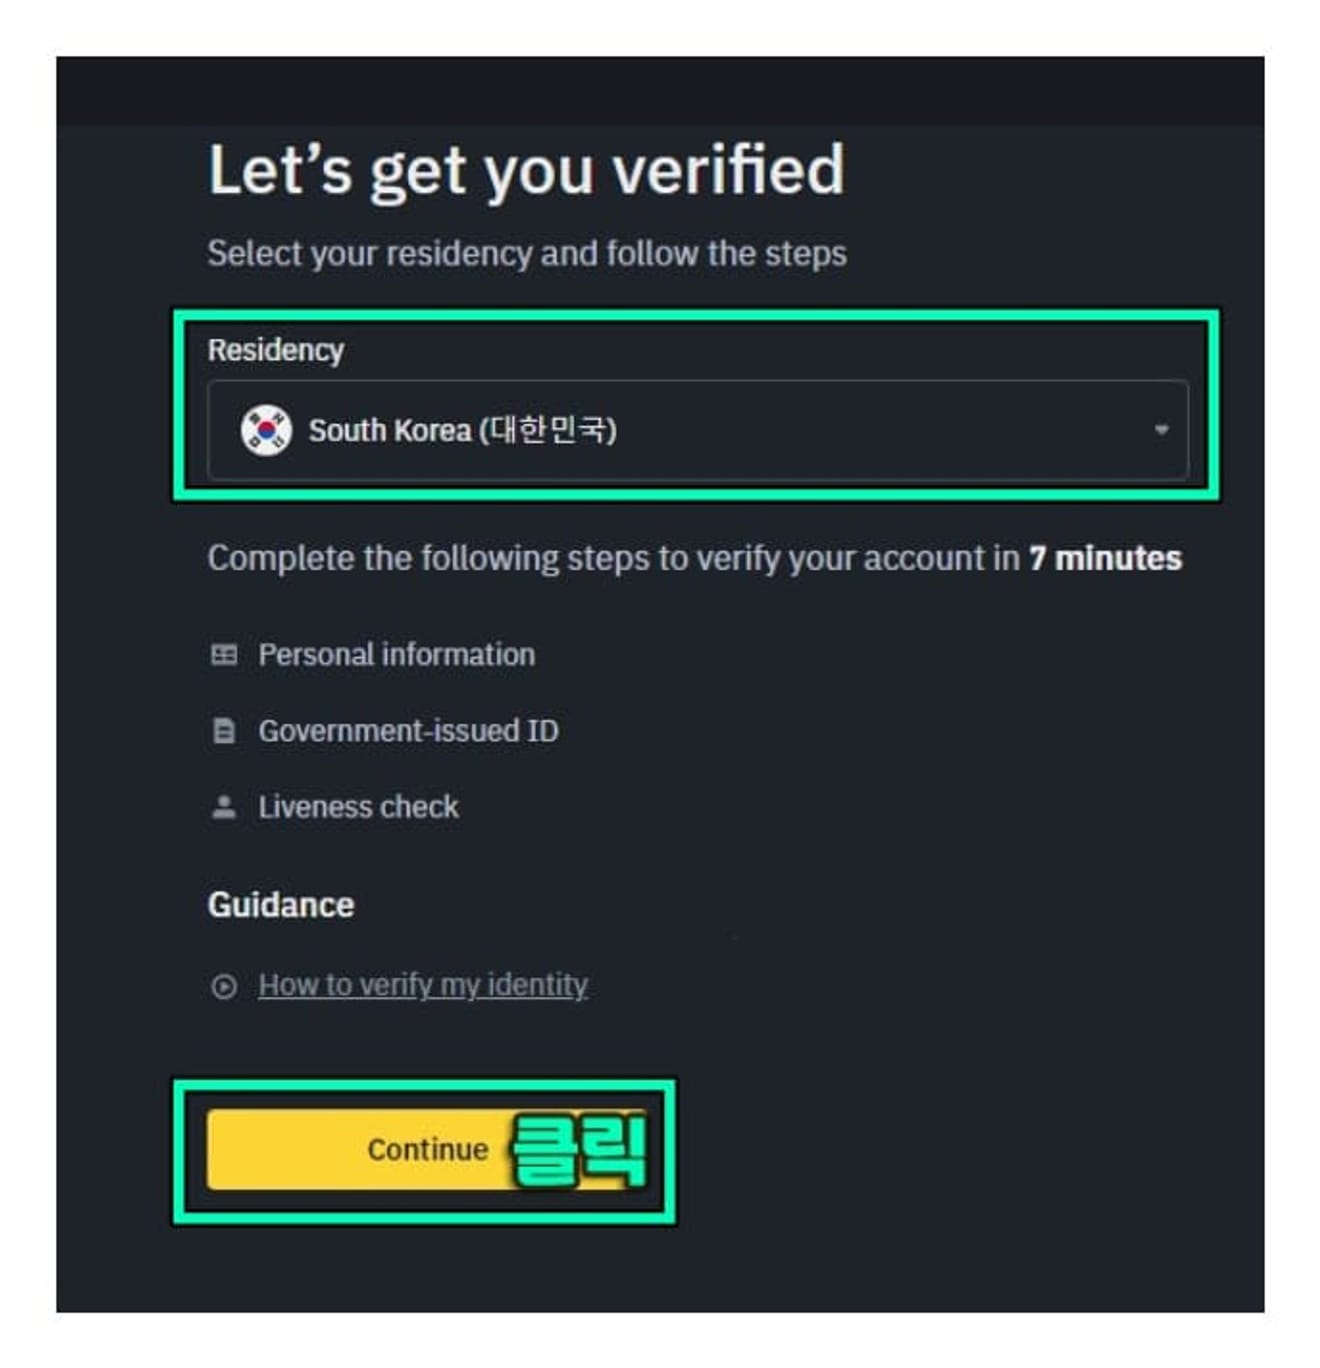
You can proceed with the verification now or later. The verification process is the same, so you can proceed by referring to this guide later. First, you have to select the country, and South Korea will be selected automatically. Click the Continue button to go to the next step.
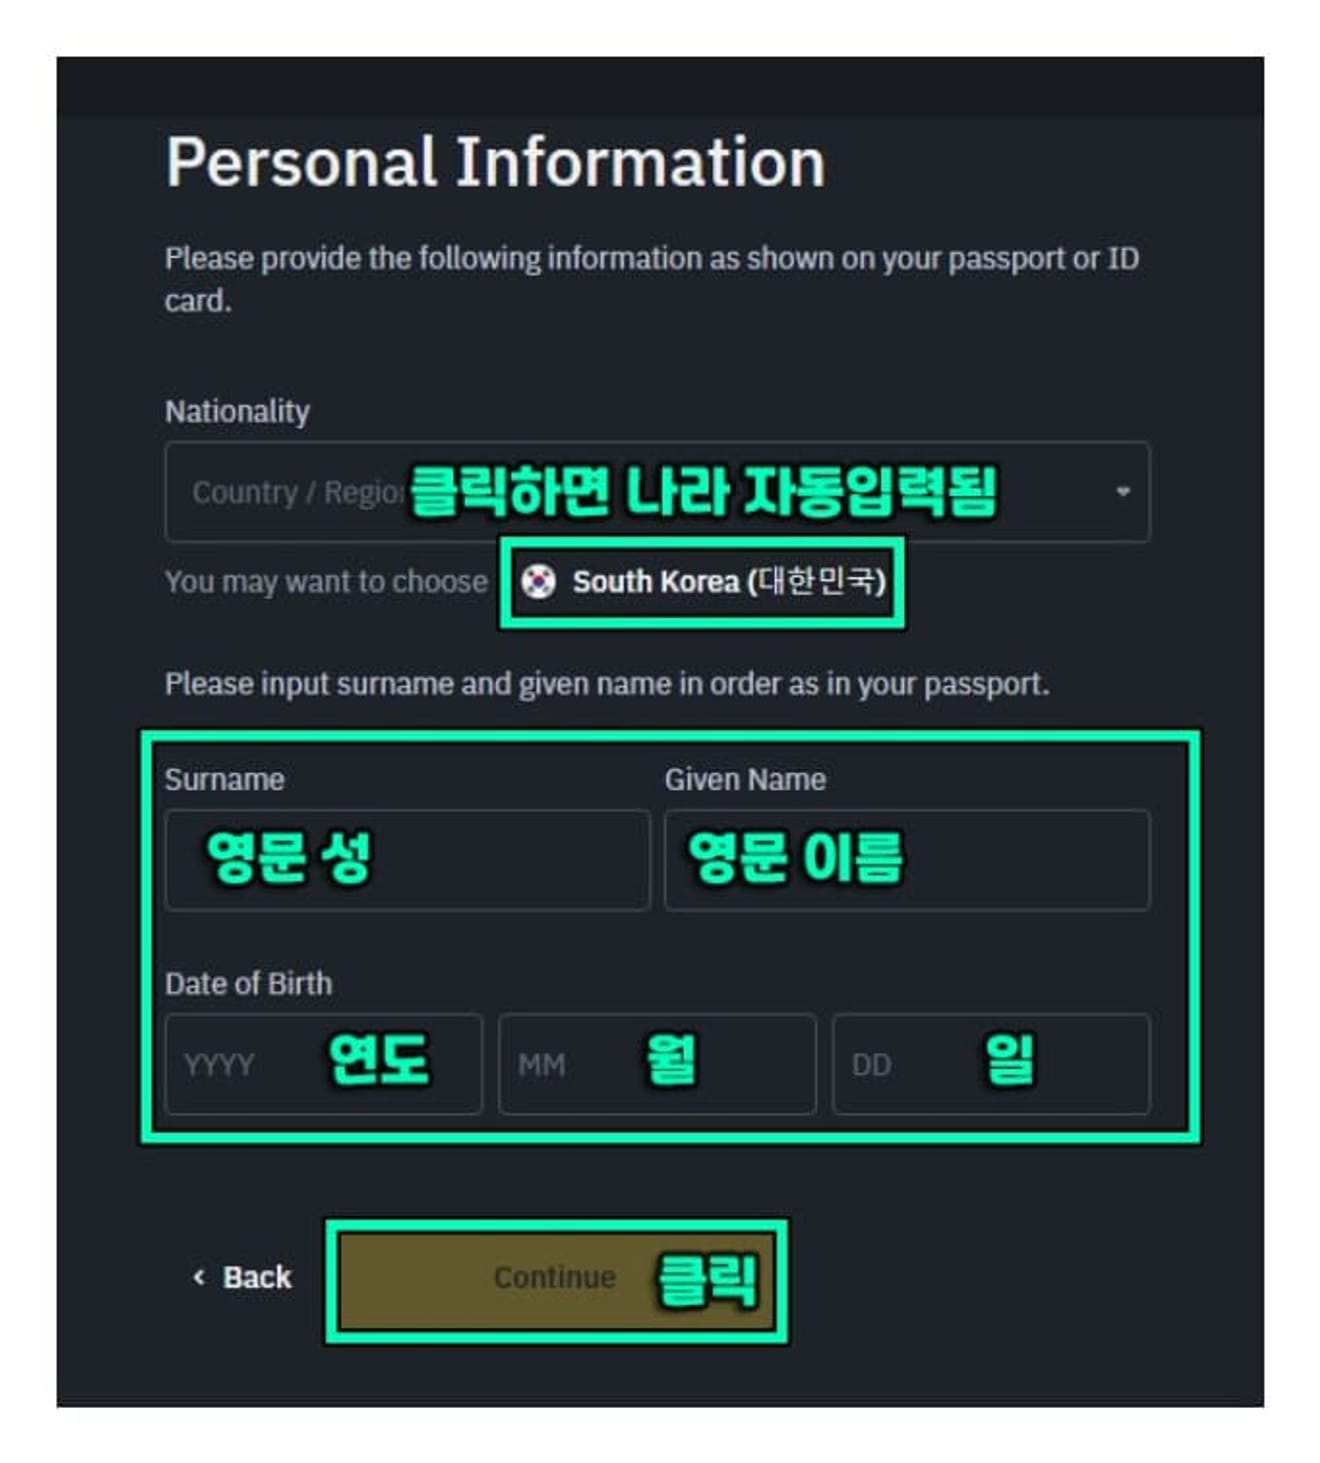
Next is the information input screen. Here, you must also select a country (earlier, they asked about the country you live in, and now they are asking about your nationality). Click on the part that says "South Korea" with the Taegeukgi, and it will be entered automatically. Then, enter your English first and last name and date of birth.

Next is the address input step. An address search input field appears, where you enter the street name address or dong name in English. Click on the one that matches from the values that appear, and then click the Continue button. If the corresponding content does not appear, select anything and proceed to the next step. This step is to assist with address input, so it is not very important.

Proceed to the next step. Here, you must enter your actual English address. You can search for [English Address Conversion] on Naver to find an address converter. Enter the Korean address and click the convert button to generate the English address. Copy and paste this English address, and also enter the zip code and city name. Click Continue after entering all the information.

Next is the most important ID verification step. Select the ID you have and click Continue. Residence Permit means a visa, so we do not have that, so select ID Card or Driver's License.

There is an explanation that you must upload photos of the front and back of your ID. Proceed to the next step.

There is a method to upload a pre-taken photo (Upload photos) and a Take picture with phone button to take a photo right now. Since we are using a PC, click Upload Photos and upload the saved photo. You can continue through the app in this step.

You must upload photos of the front and back respectively. Please upload it even if there is no information on the back. If you are taking the photo directly with your cell phone, first take a picture of the front and then flip it over to take a picture of the back. It will be recognized automatically, and since the instruction to turn it over will appear, if it seems that the front has been taken, turn it over and show the back.

Finally, there is an explanation that real-time authentication is required. Proceed to the next step.

Scan the QR code with your phone to connect to the real-time authentication page. In the real-time authentication process, you can fit your face within the circle and perform the required actions. You can turn your head left and right, rotate up and down, blink, and open and close your mouth. Then the authentication process is complete. Now, a message will appear that Binance will proceed with the review, and the result will be out in less than 5 minutes. If you don't have another account that has already been verified, approval will be given immediately. Then you can use it right away.