How to Deposit to Bitget | Upbit | Causes and Solutions for Delays
In today's blog post, we will explore how to deposit to Bitget, matters related to Upbit, and the causes of delays and how to deal with them. To start cryptocurrency trading, you must first deposit funds into the exchange. You may have experienced frustration when the deposit process to Bitget took longer than expected or when problems occurred. In particular, many people feel uneasy when transferring cryptocurrencies from Upbit, a major domestic exchange, to Bitget. In reality, various factors such as blockchain network conditions, exchange policies, and security verification processes can cause deposit delays. In this article, we will explain the entire process of depositing to Bitget step by step and guide you on how to safely transfer from Upbit to Bitget. We will also analyze the main causes of deposit delays and provide practical solutions to deal with each situation. It is structured with screenshots for easy understanding, even for beginners, and will also cover various error situations that can occur during the deposit process and how to solve them.

How to Deposit to Bitget
Bitget exchange is an exchange that complies with the Travel Rule in cooperation with Upbit. If you withdraw an amount of 1 million won or more, you can withdraw it after confirming your account information. Therefore, today we will withdraw Ripple for more than 1 million won, along with checking the Travel Rule.
1. Register for Bitget
If you don't have a Bitget account, please register through the link below.
You can receive the maximum fee benefits and influencer bonus benefits when you sign up.
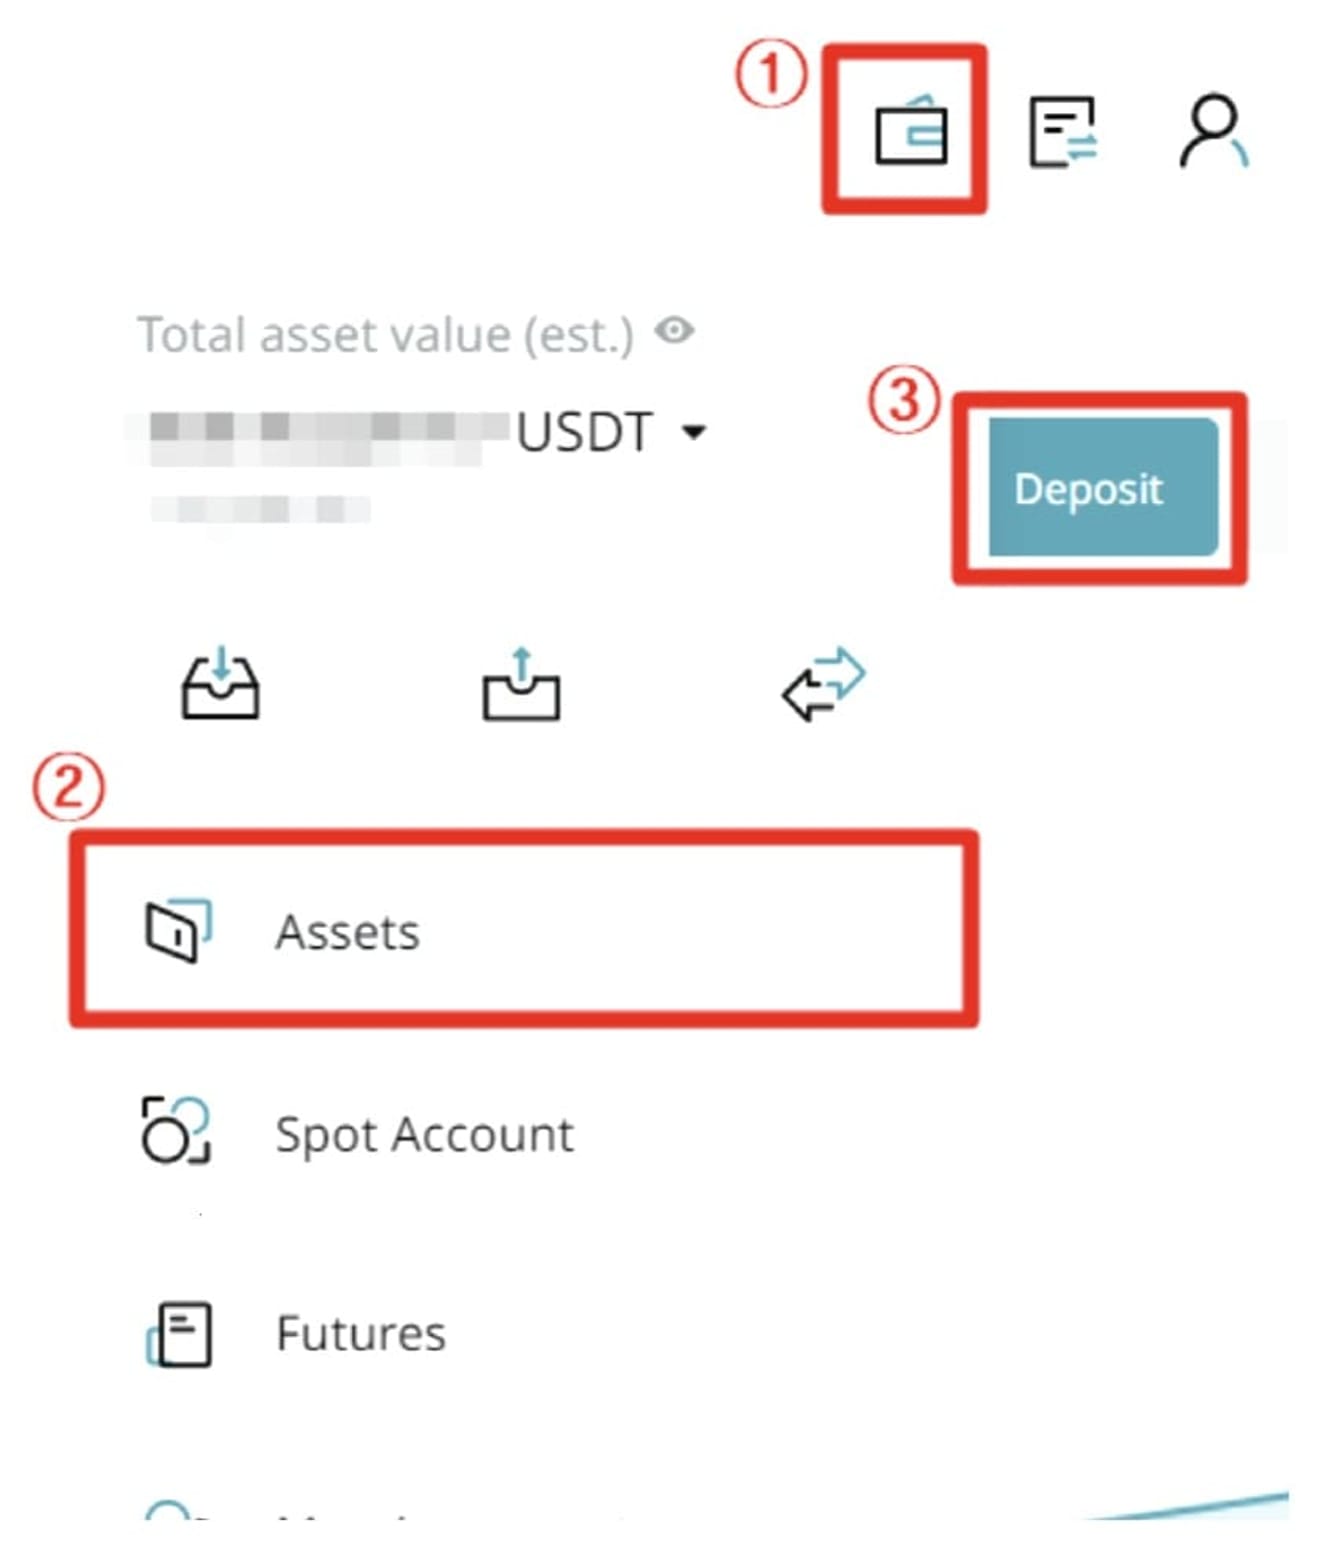
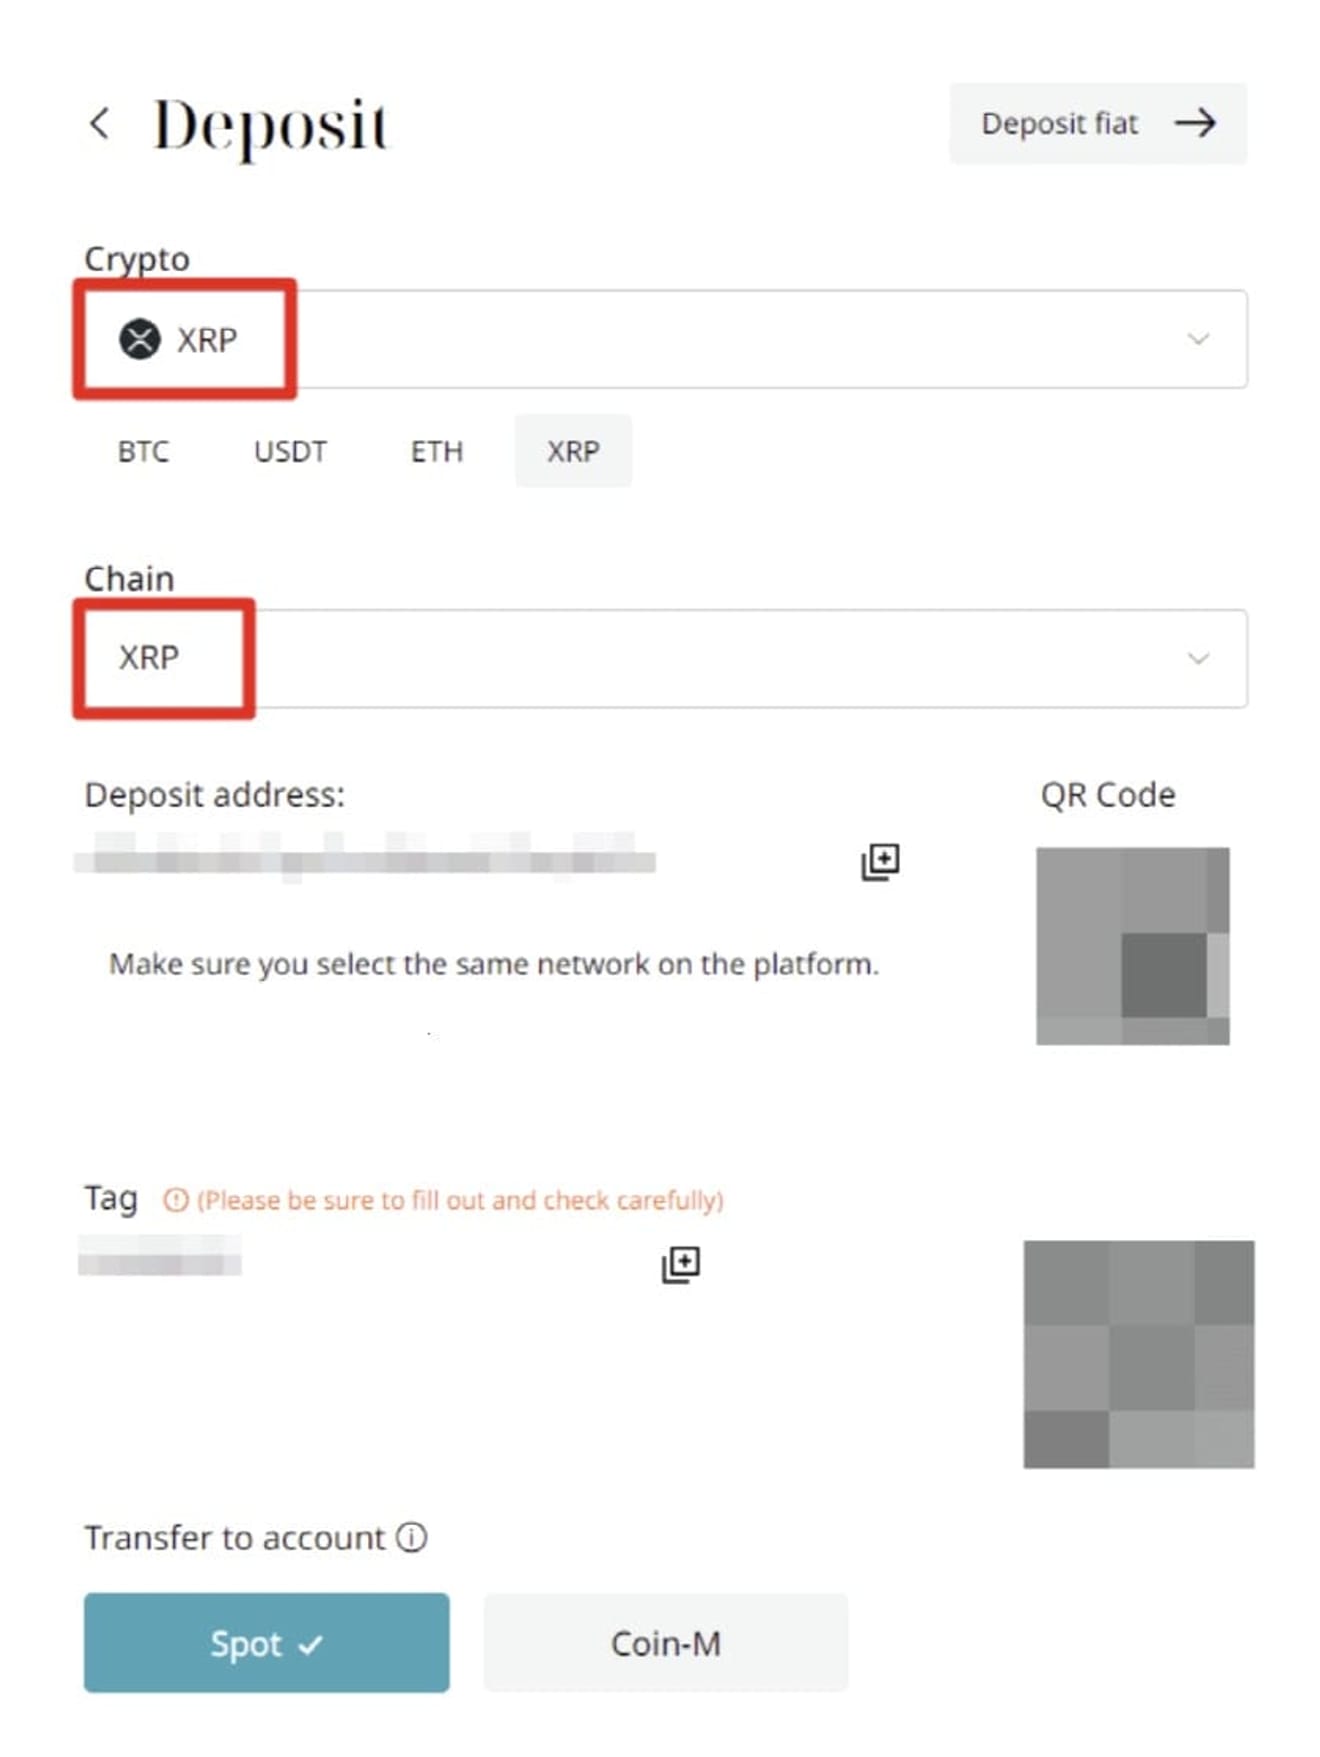
2. Create Ripple Deposit Address
Click the 'Assets' tab from the top menu, and then enter the 'Deposit' option.
After selecting both the coin name and Chain (network) as XRP, we will move to Upbit while maintaining this screen. The reason for choosing Ripple instead of Tron for the transfer is because Ripple's order book is dense, so you can avoid slippage losses during the purchase process.
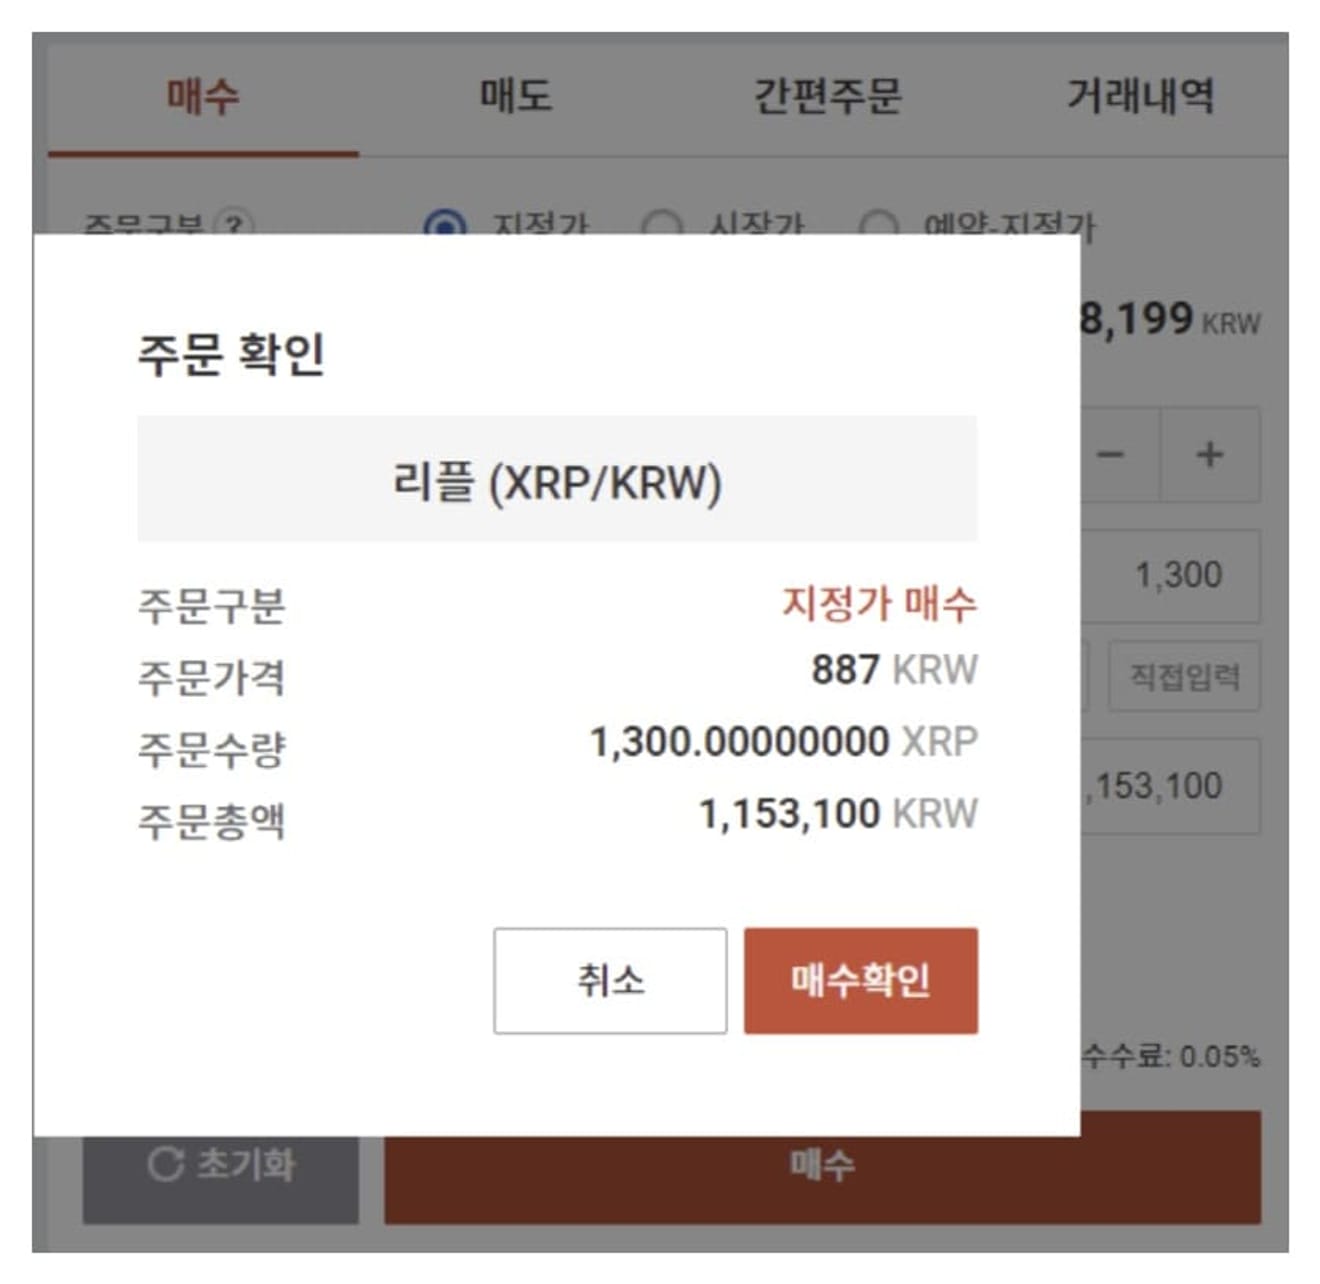
3. Buy Ripple
You usually buy Ripple on Upbit. We will buy more than 1 million won for the Travel Rule withdrawal test.
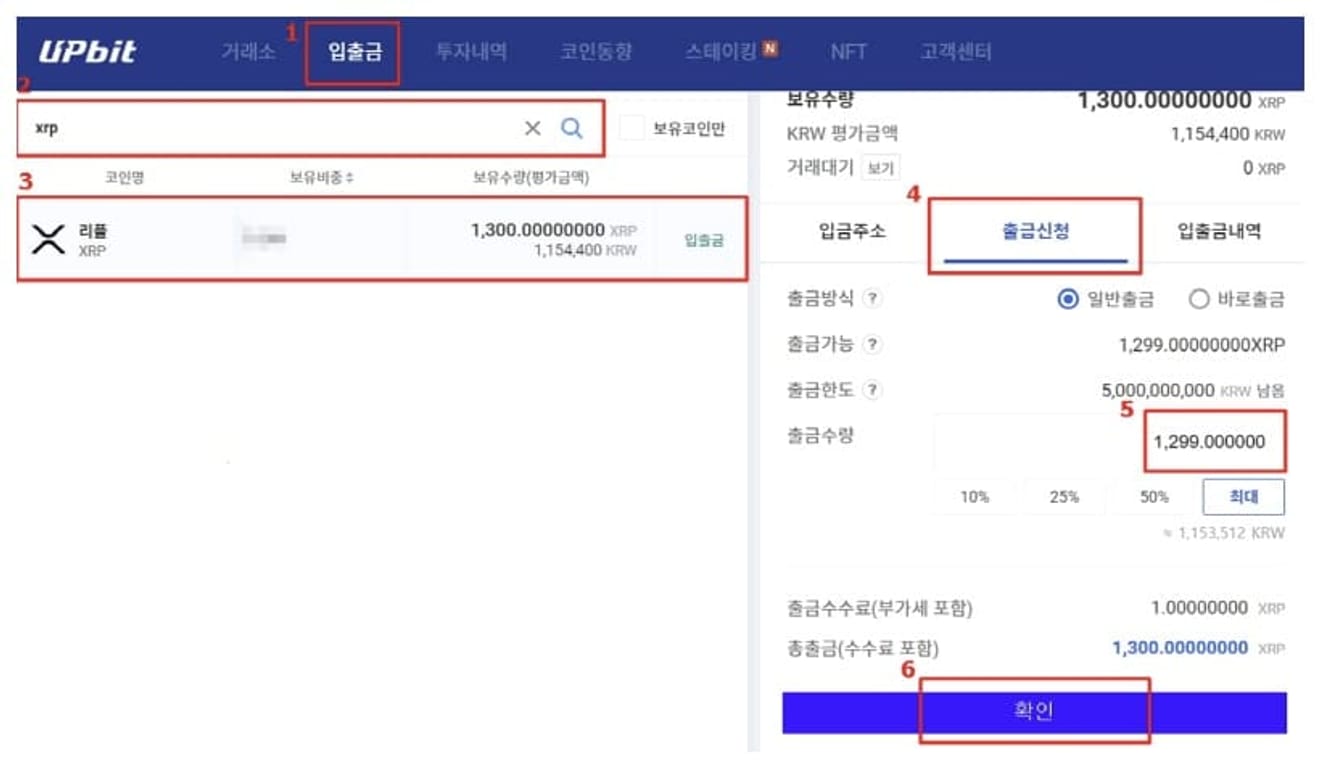
4. Withdraw Ripple
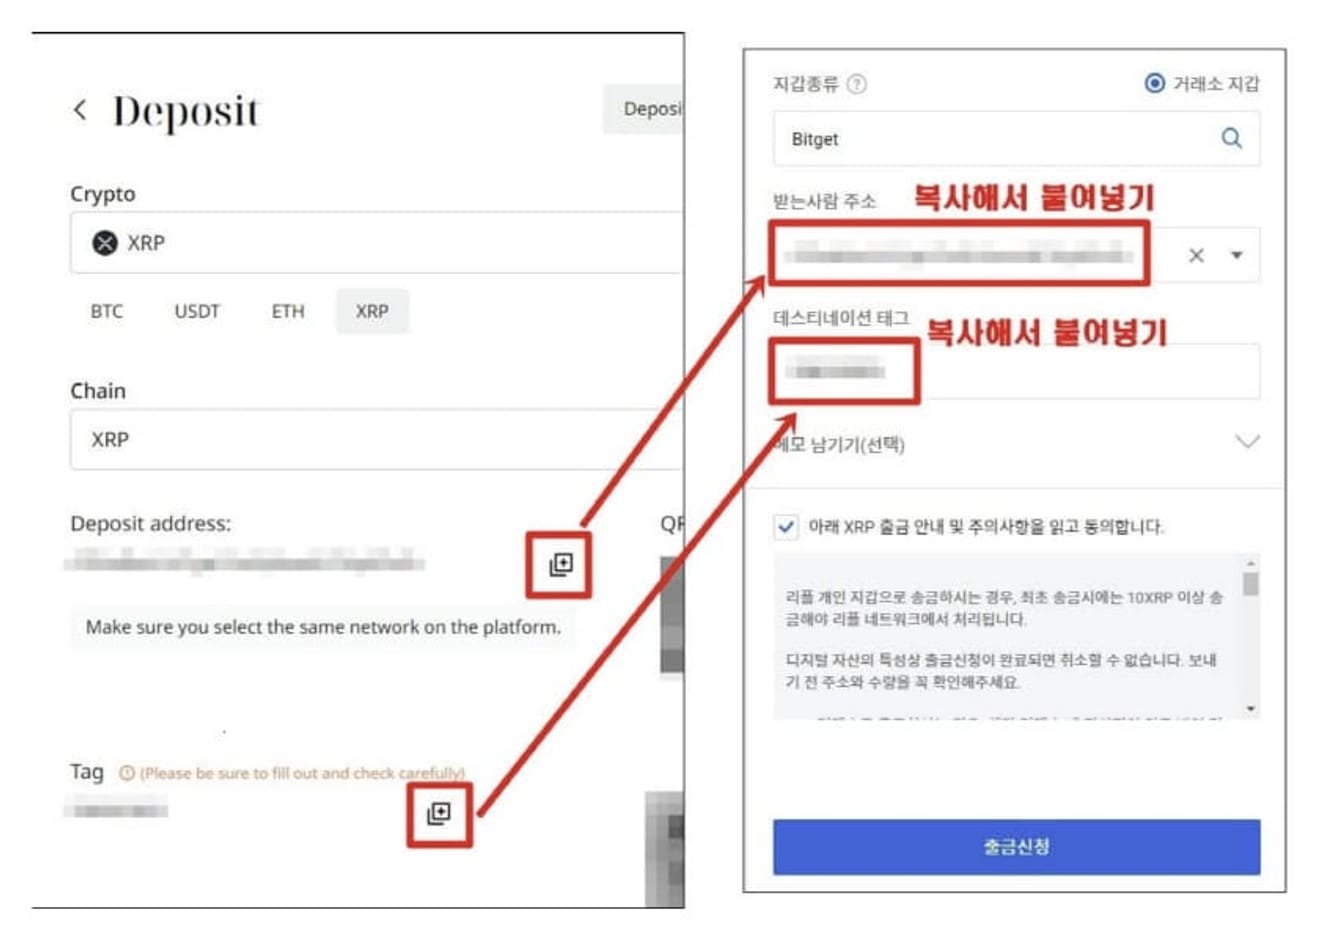
Select Deposits/Withdrawals from the top menu of Upbit and search for XRP. Click the Ripple row, then move to the withdrawal application tab, enter the withdrawal quantity (1 XRP is required as a fee), and click the 'Confirm' button.
Select 'Bitget' from the wallet type, paste the Ripple wallet address and memo you copied from Bitget into the recipient's address and destination tag, and click the 'Withdrawal Application' button. If a suspicious withdrawal request confirmation message appears, click 'No'.
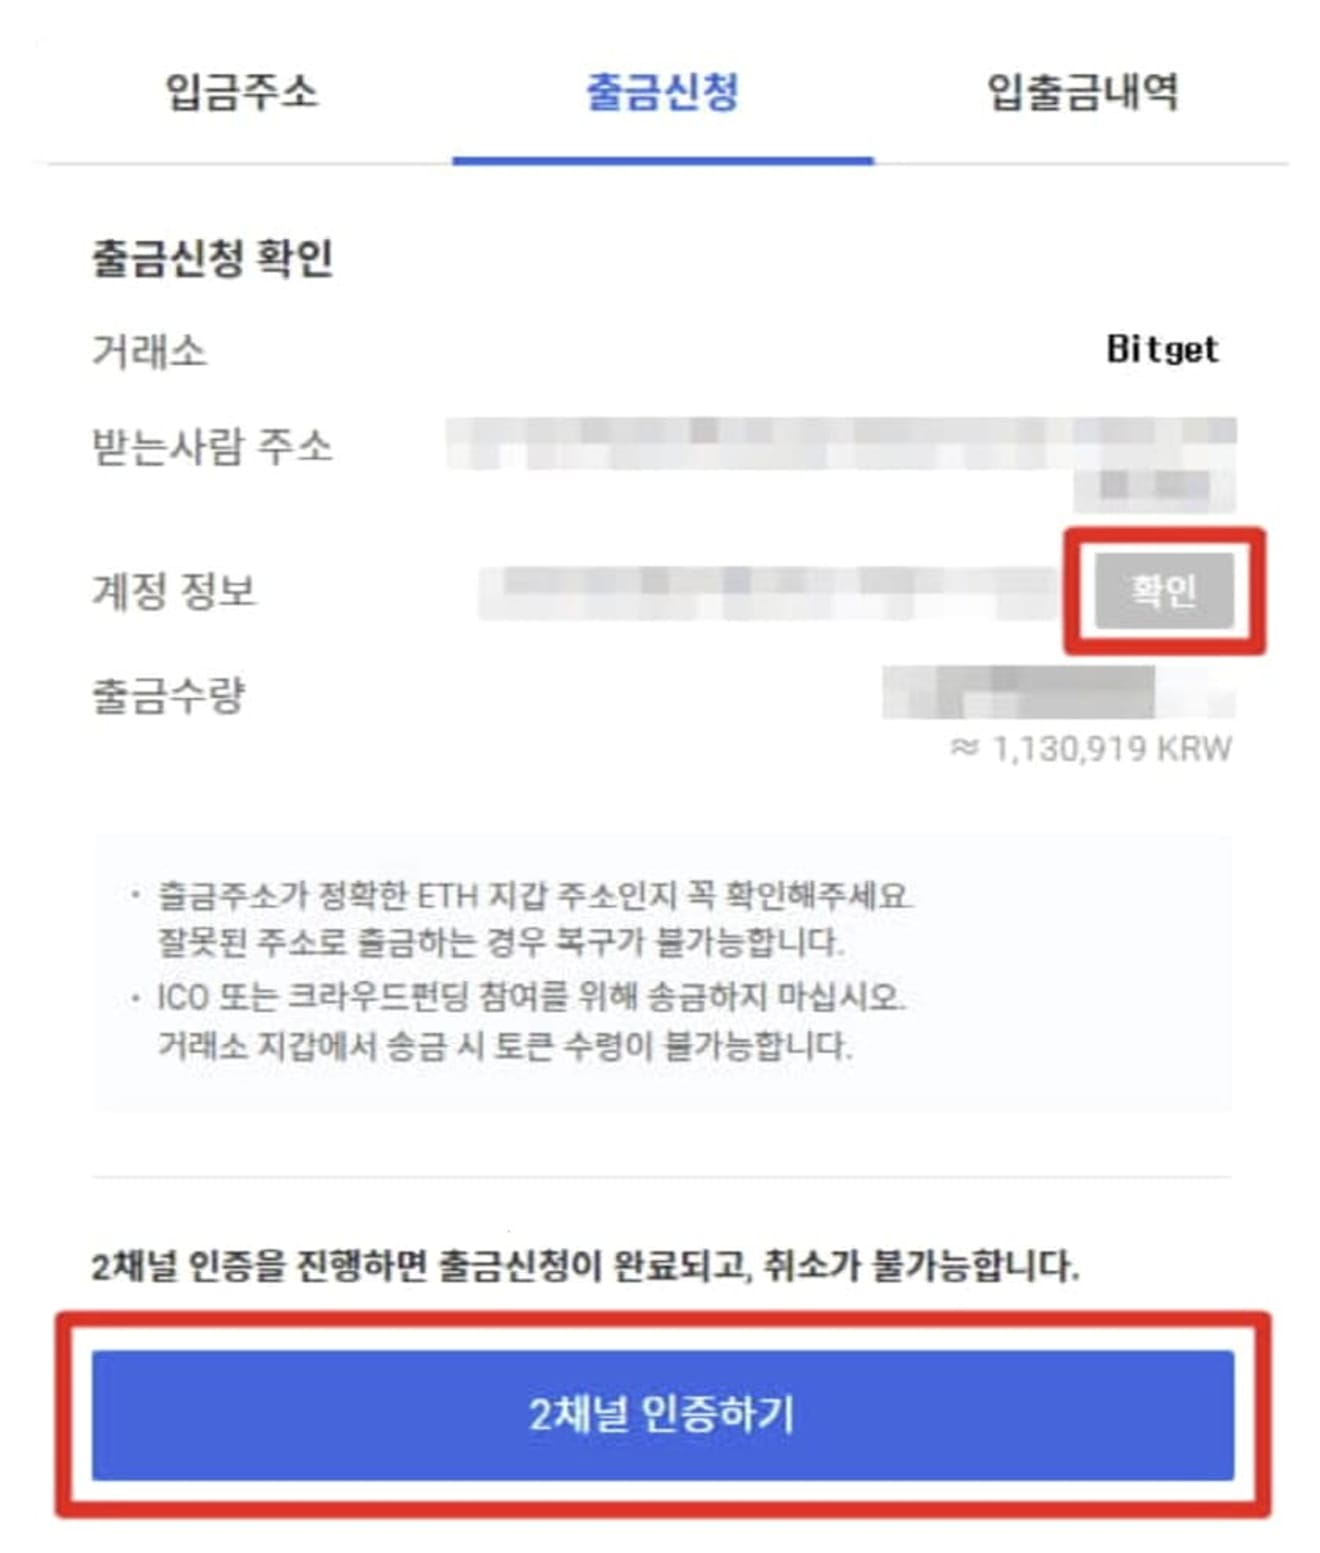
Now, we will proceed with the withdrawal application confirmation. If you click the 'Confirm' button on the right side of your account information, a '2-channel authentication' button will be created at the bottom. After clicking this button and completing 'Naver' or 'KakaoPay' authentication, the withdrawal application is completed. Now wait for 1-2 minutes and go to Bitget.
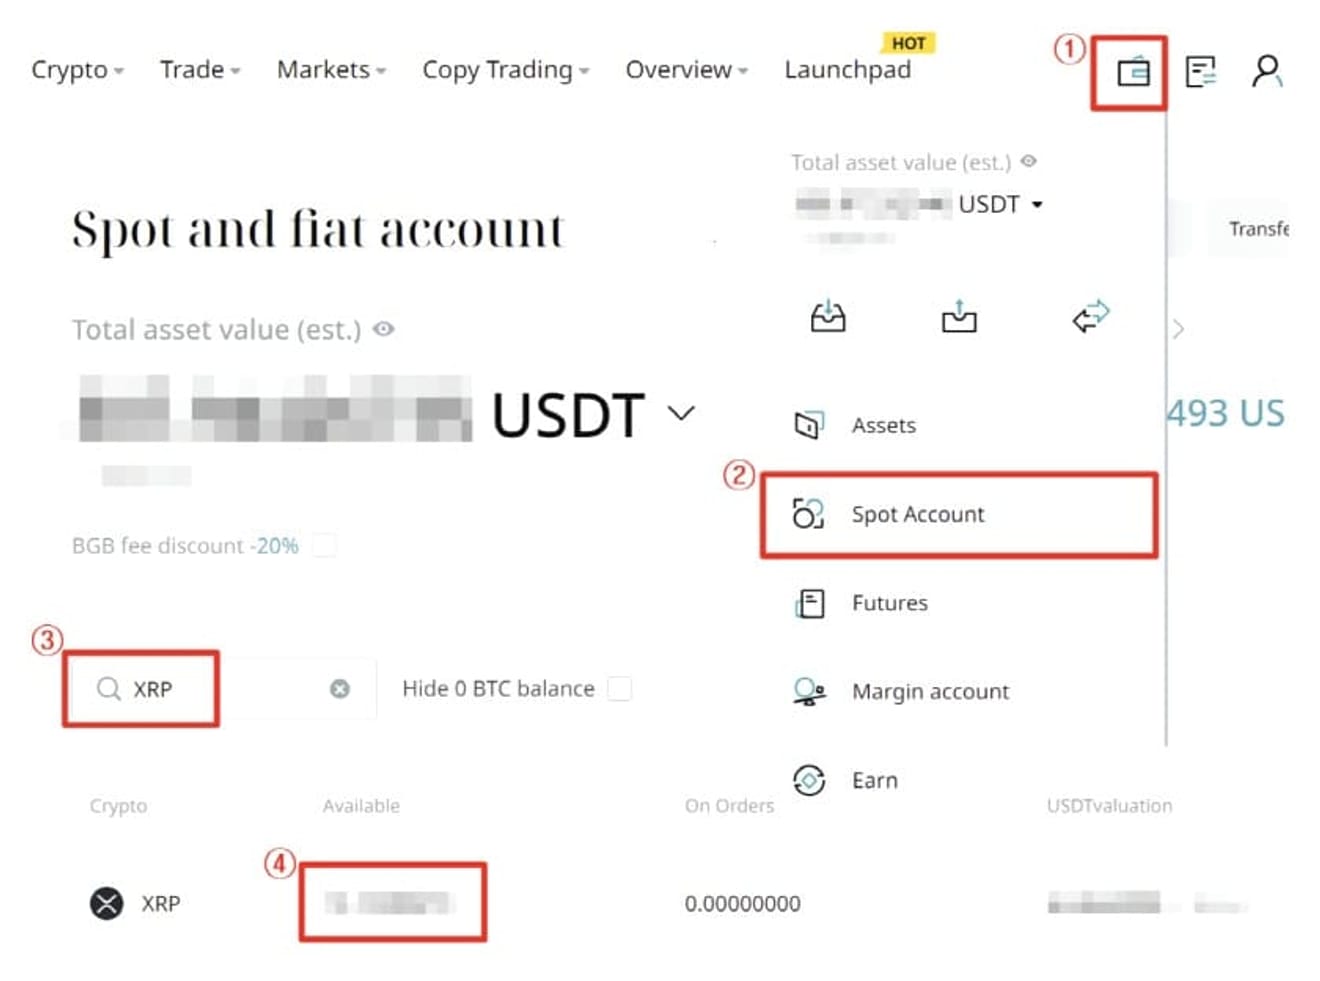
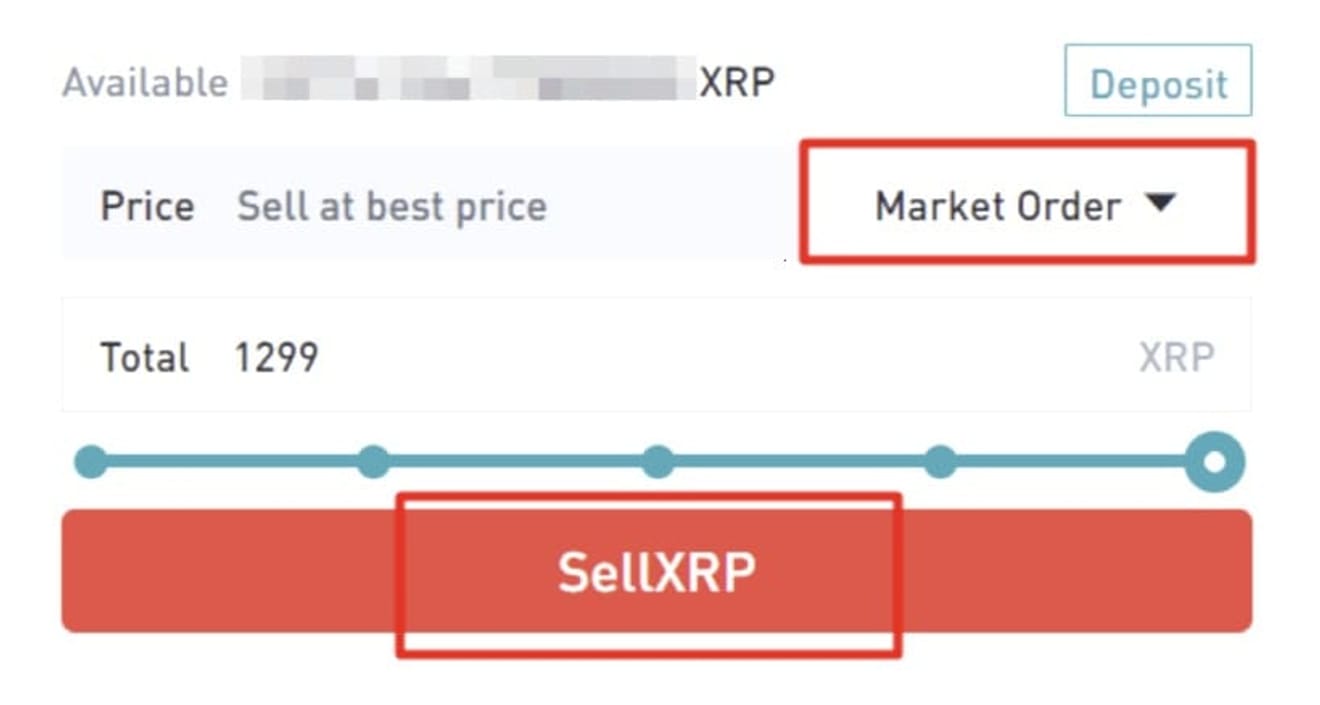
5. Sell Ripple and Check Balance
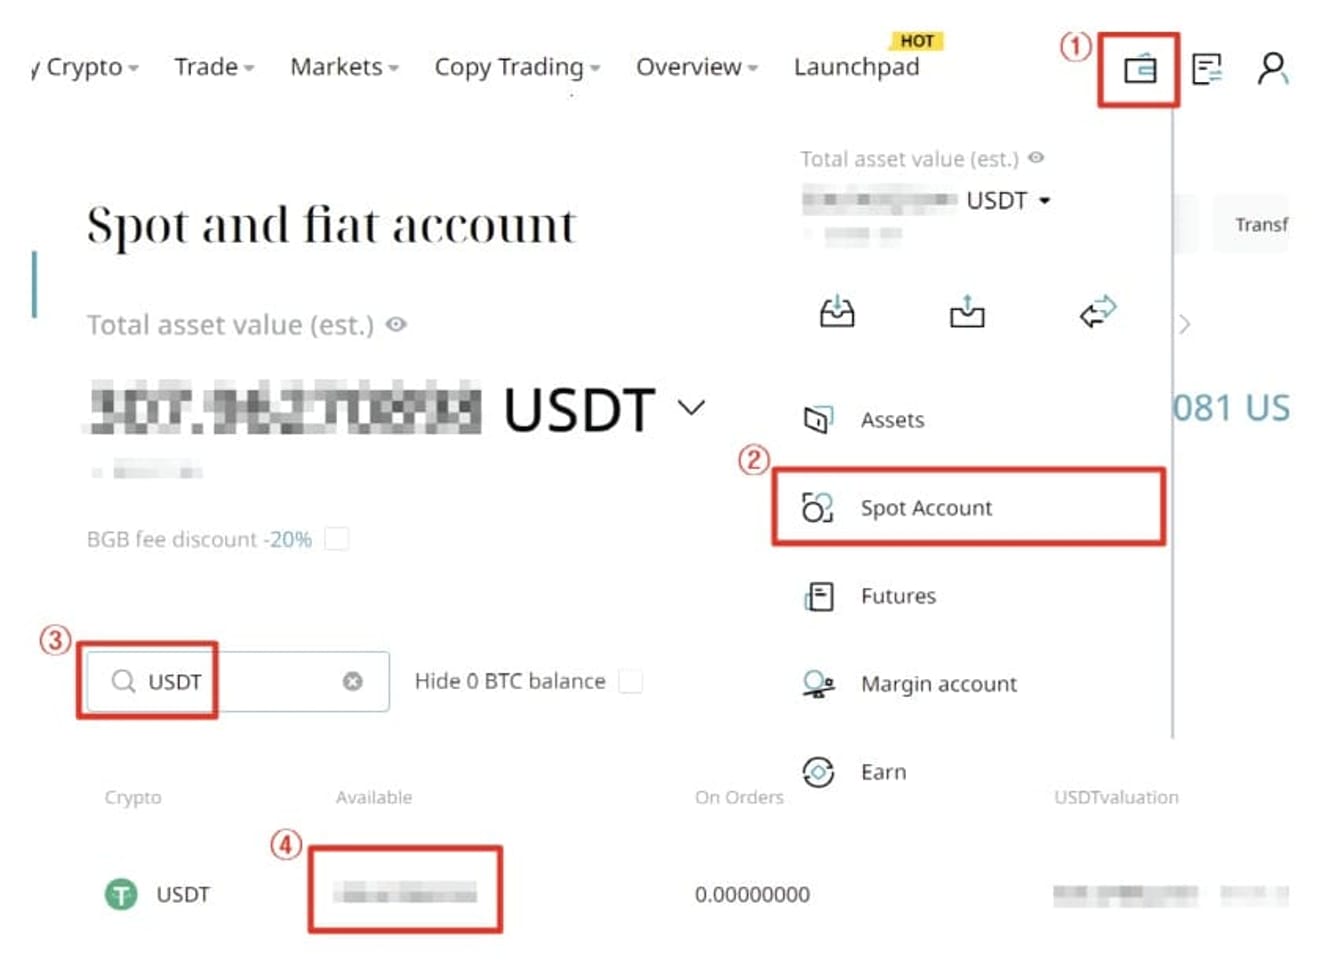
Go to 'Spot Account' from the top menu of Bitget, and then check if the Ripple (XRP) you sent has arrived properly.
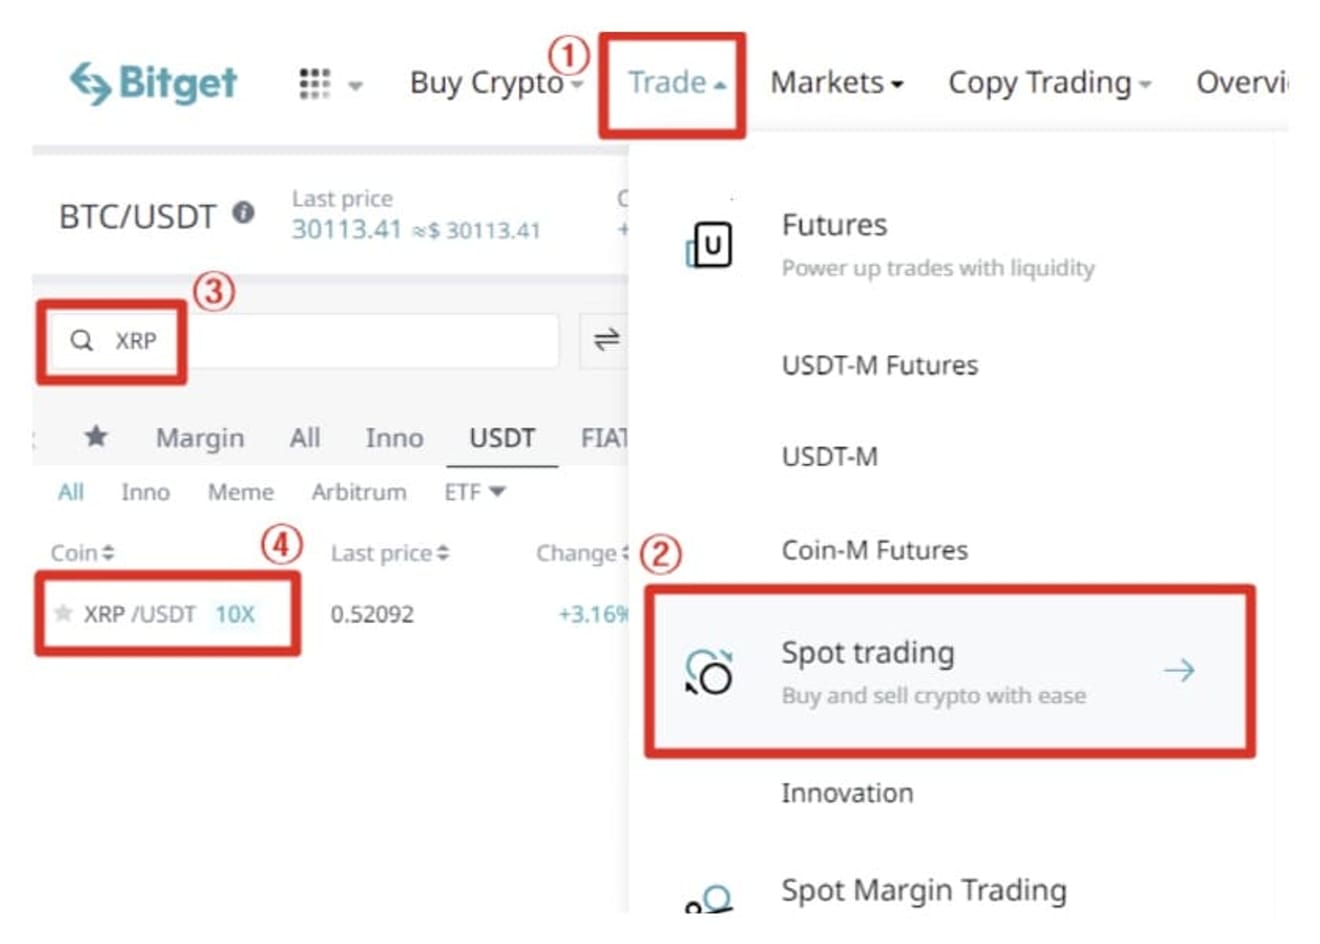
Then, search for Trade → Spot Trading → XRP, and then click the XRP/USDT row to enter.
After that, adjust the slider to sell the XRP you have. I will sell as much as I brought from Upbit at market price (Market Order). Click 'SellXRP'.
6. Bitget Deposit Completed
If you go back to 'Spot Account' (Spot Account), you can see that USDT has come in as much as you sold. You can now use this fund to conduct spot trading or futures trading. Here, USDT is a stable coin with almost the same value as the dollar. You can think of it as dollars at first for convenience.
Causes and Solutions for Bitget Deposit Delays
Deposit delays in Bitget (Bitget Exchange) mainly occur due to various reasons such as blockchain network congestion, exchange processing delays, incorrect use of deposit addresses, and smart contract errors.
- Network congestion: If the blockchain network (e.g., Tron, Ethereum, Ripple, etc.) is congested, the transaction processing speed will slow down. In this case, the deposit may generally be delayed from 1 to 24 hours.
- Exchange processing time: Additional time may be required for Bitget's internal confirmation and reflection during peak trading hours. Usually within 30 minutes, but it may take longer depending on the situation.
- Deposit address error: If you enter the address incorrectly or specify the network type (e.g., ERC-20, TRC-20, BEP-20, etc.) incorrectly, the deposit will not be processed properly. In this case, it is very difficult to return, so you must reconfirm the address.
- Smart contract and system check: Issues with smart contract compatibility, system checks, or errors of the exchange may also be the cause when depositing specific coins.
In most cases, if it is a simple network or system delay, it is automatically resolved within 1 to 24 hours, but if the deposit is not made for more than 24 hours, you need to contact the exchange's customer support ticket.