How to trade Bitget futures | Sign up | Deposit | How to short
In this article, we will organize the Bitget futures trading process. We will introduce step by step, from signing up, depositing, and utilizing short positions. Futures trading has the advantage of being able to make profits not only in a rising market but also in a falling market. Bitget is famous for leveraged trading, but it can be difficult and risky for beginners. Therefore, basic understanding and safety measures are required. We have concisely summarized the essentials, including signing up and authentication, the deposit process, leverage settings, long/short entry methods, and stop-loss and risk management.

How to trade Bitget futures
Let's take a look at how to trade futures on Bitget. We will organize the process of taking a Bitcoin short position based on the USDT futures market.
Sign up for Bitget
When you click the signup link, the screen will open. You can easily create an account with Google, email, or your mobile phone.
If you sign up through the link, you can receive commission discounts and event benefits without entering a referral code.
KYC identity verification
After the first login, proceed with KYC and OTP settings for security.
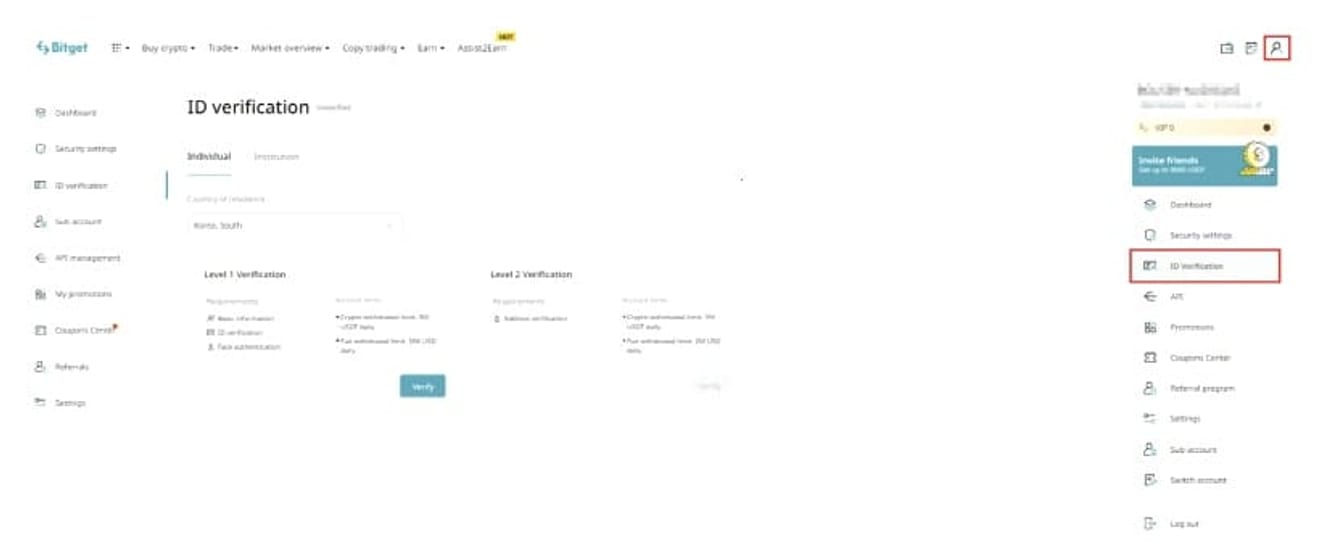
You can complete the ID verification by clicking ID verification in your profile and authenticating your ID and face. You can choose from a resident registration card, passport, or driver's license, and camera authentication is required. Make sure to set up OTP as well.
Deposit funds for futures trading to Bitget
Futures trading is not possible in domestic exchanges, so you must purchase coins from Upbit, etc., and send them. The most common method is to purchase Tether (USDT) and send it via the Tron network.
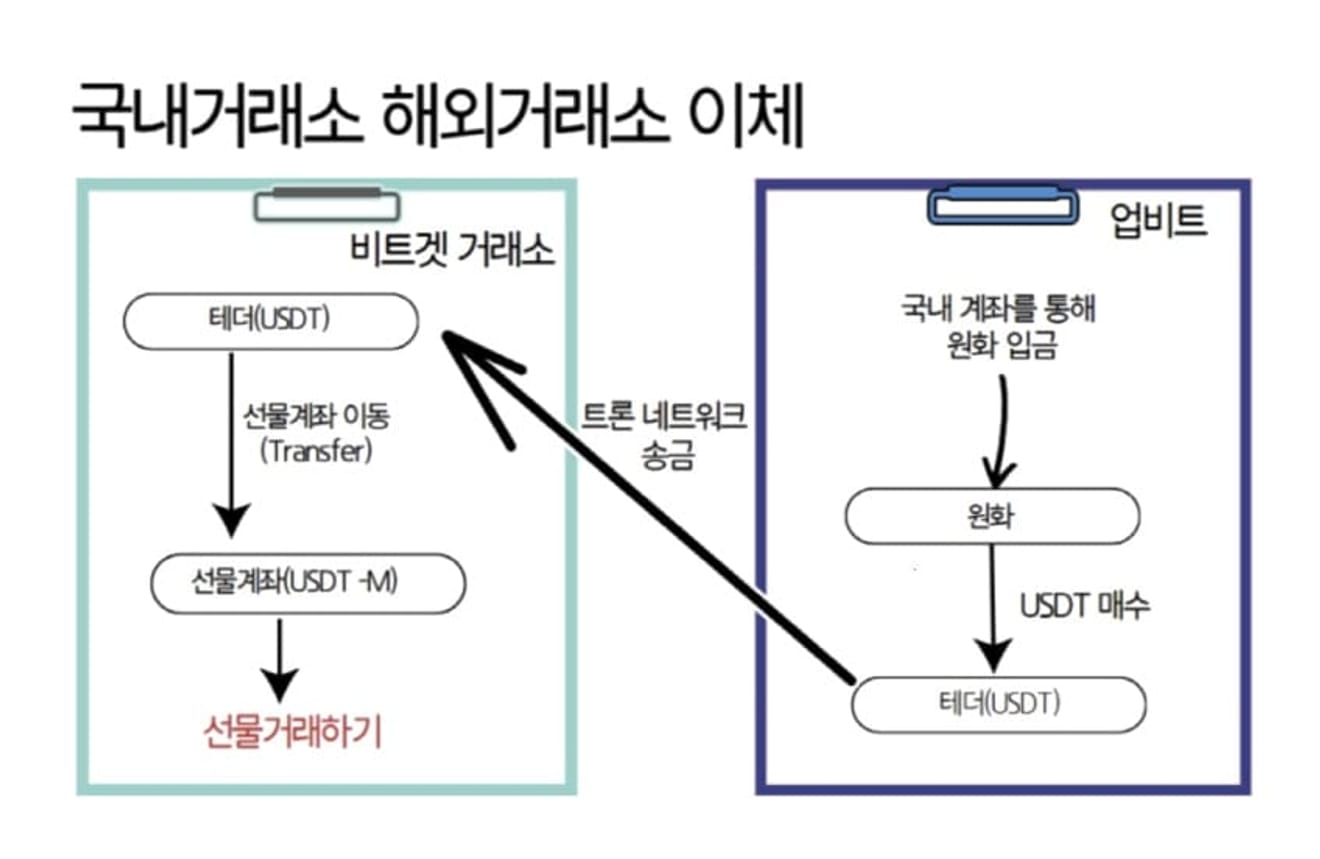
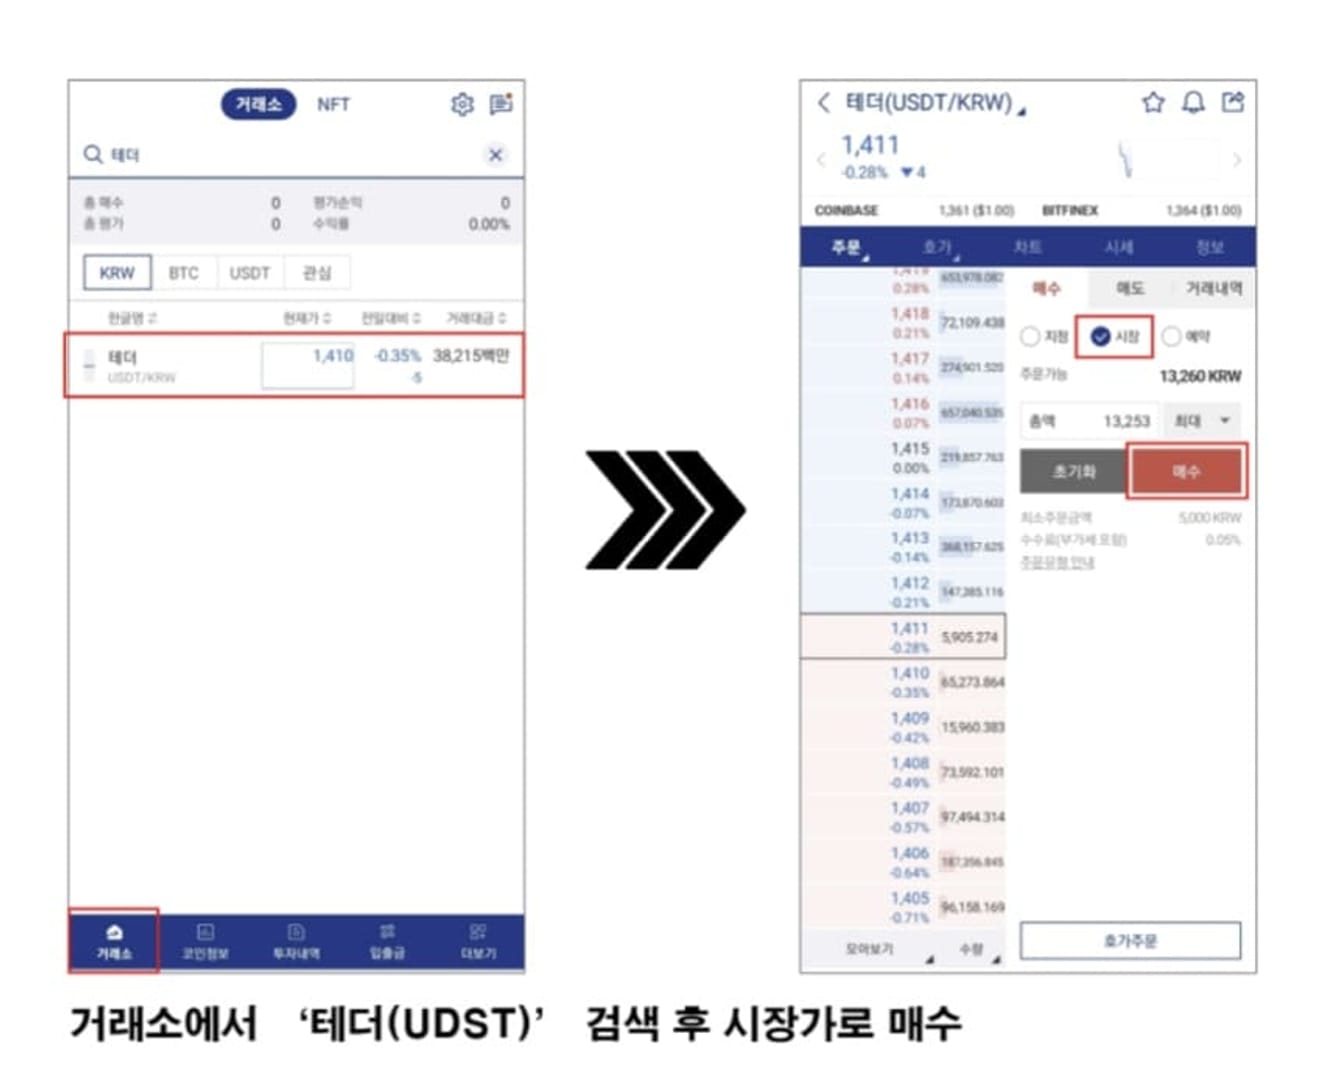
After logging in to Upbit, purchase Tether and select the Tron network in the withdrawal menu.
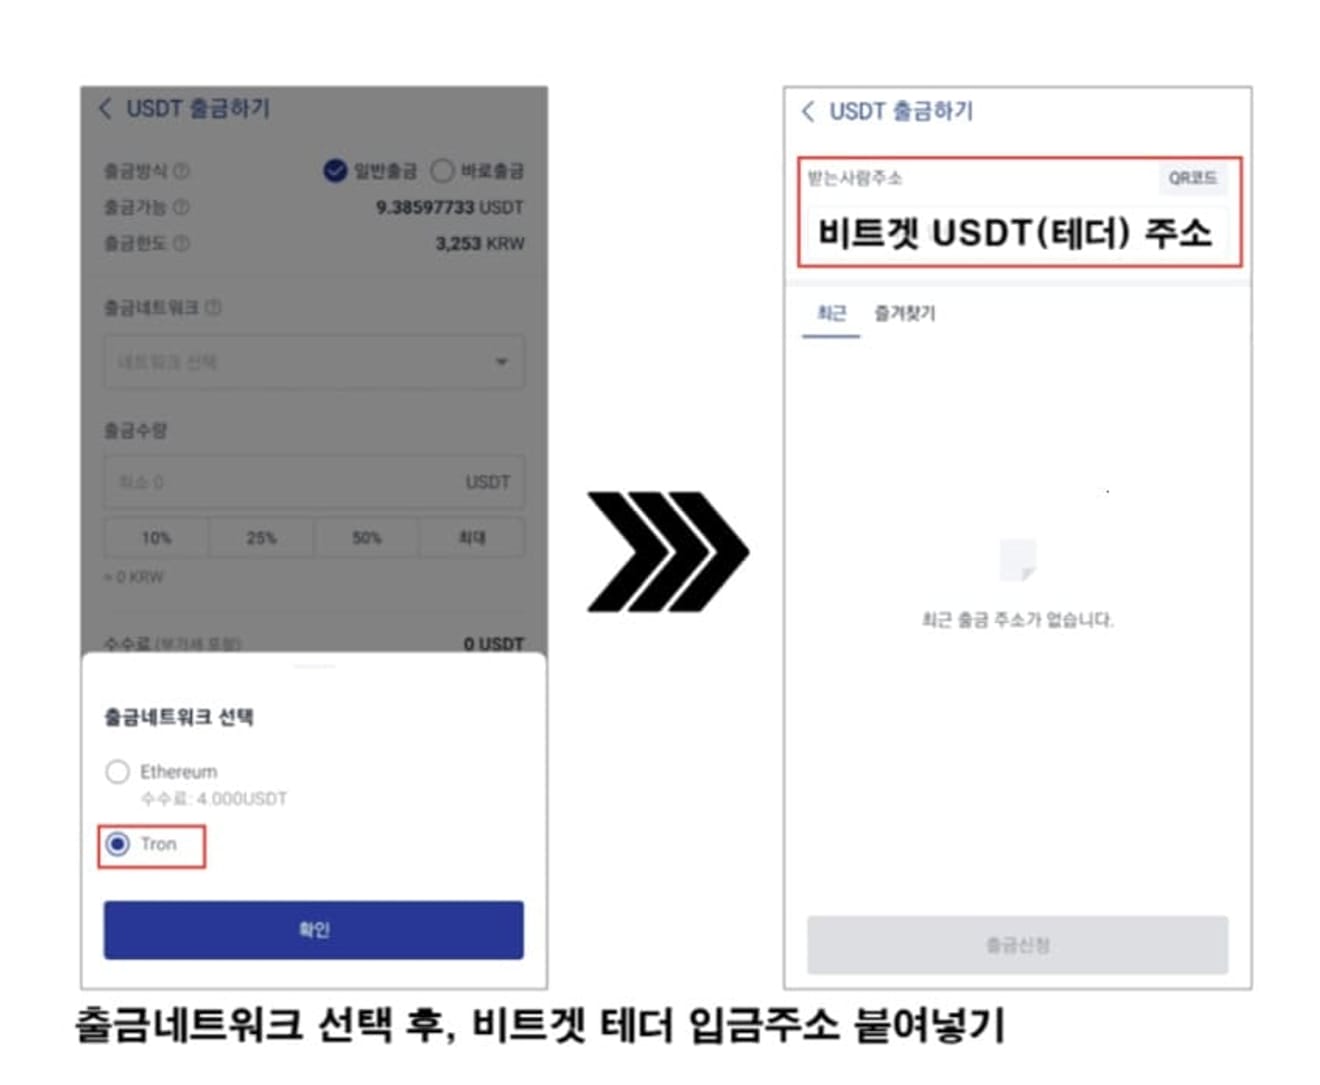
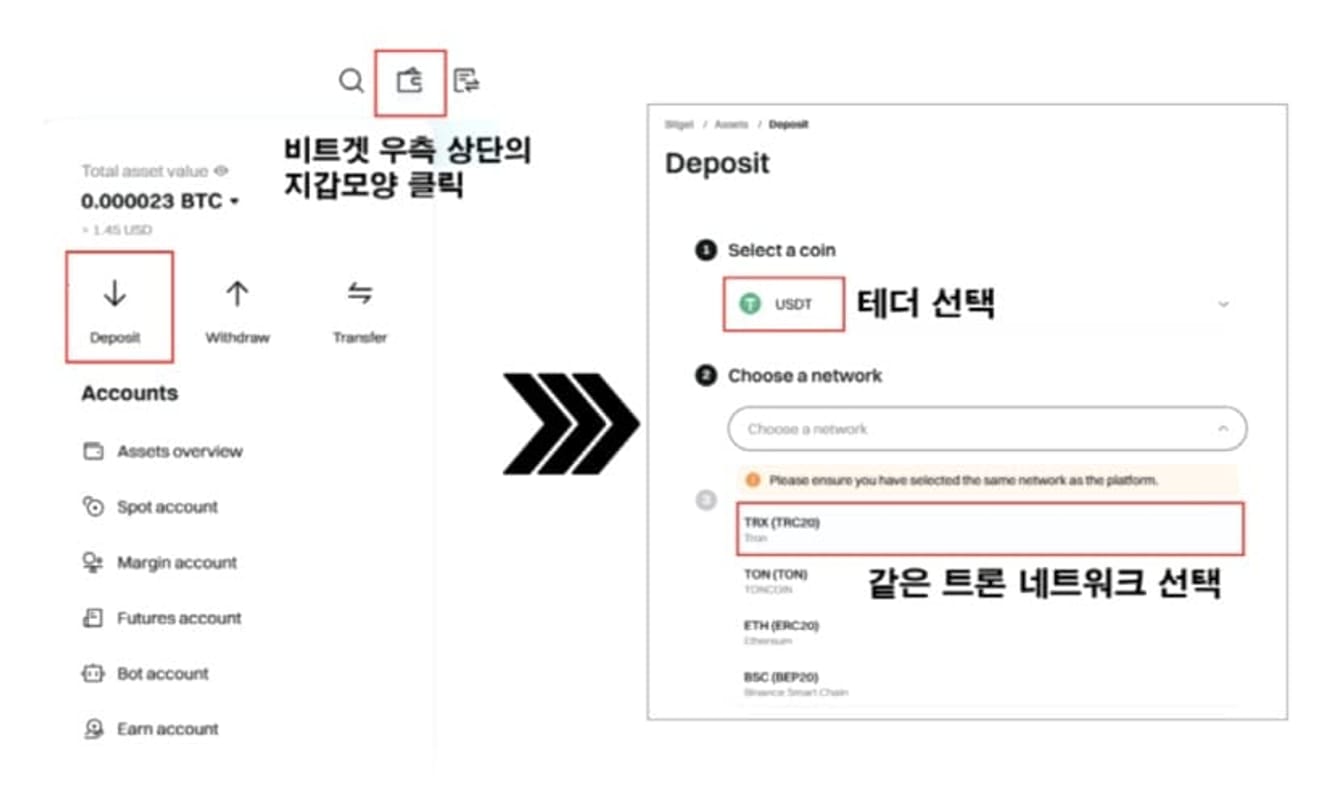
After logging in to Bitget, confirm and copy the USDT address in the Deposit menu. You must select the same network to avoid loss of assets.
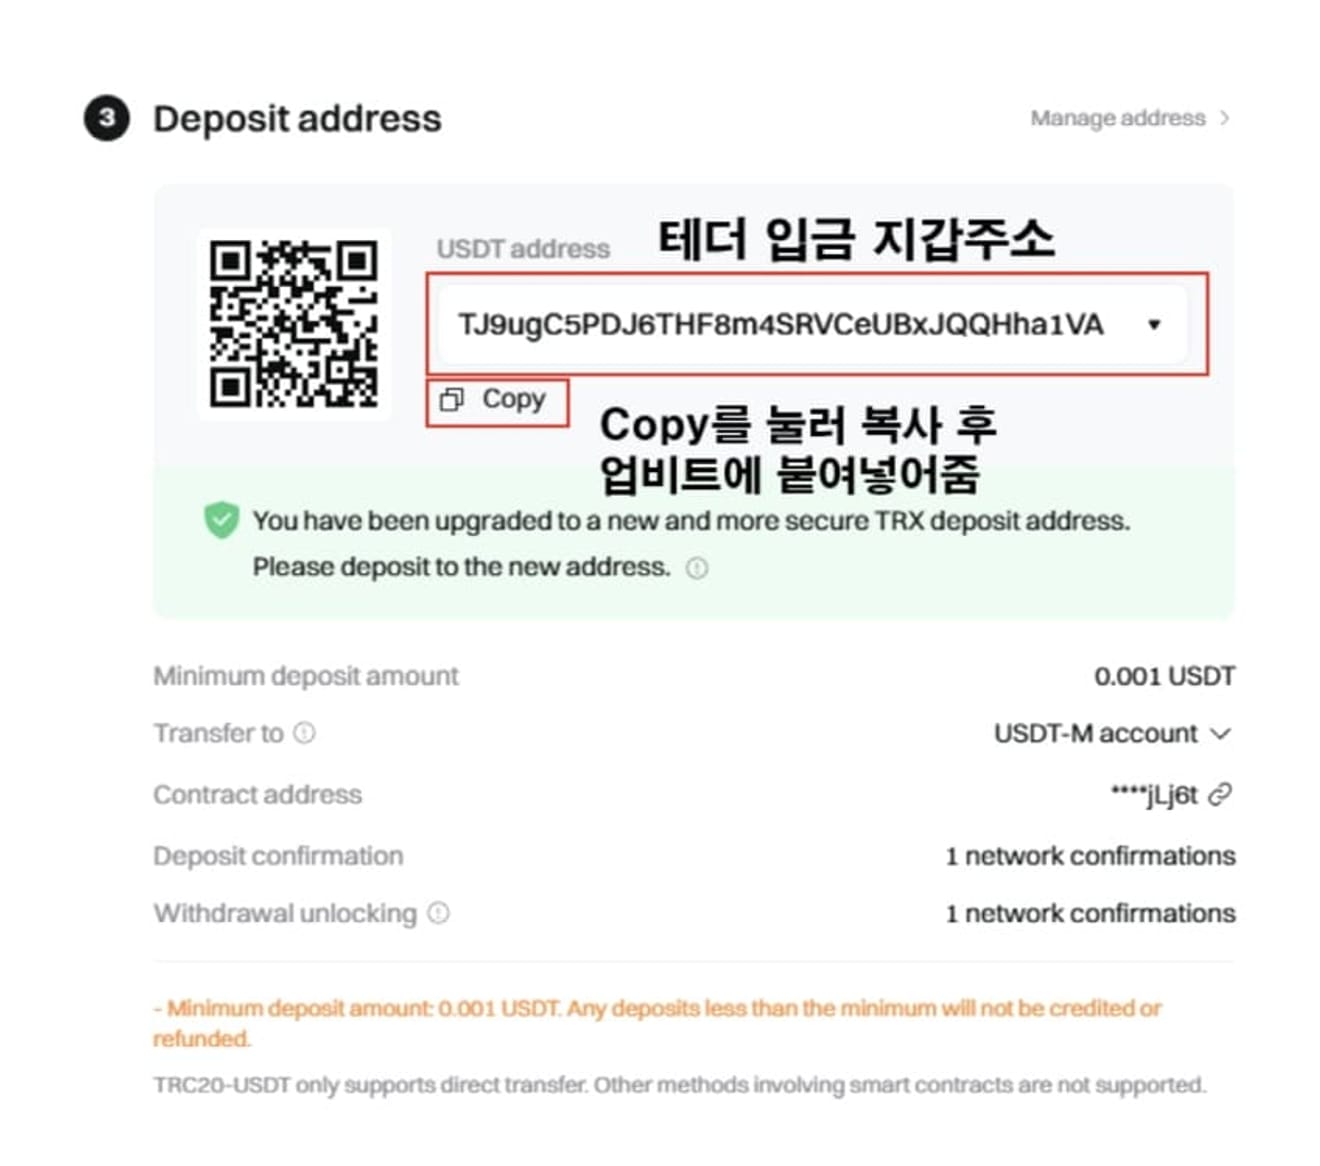
Paste the address and complete authentication, and the transfer is complete.
Transfer funds
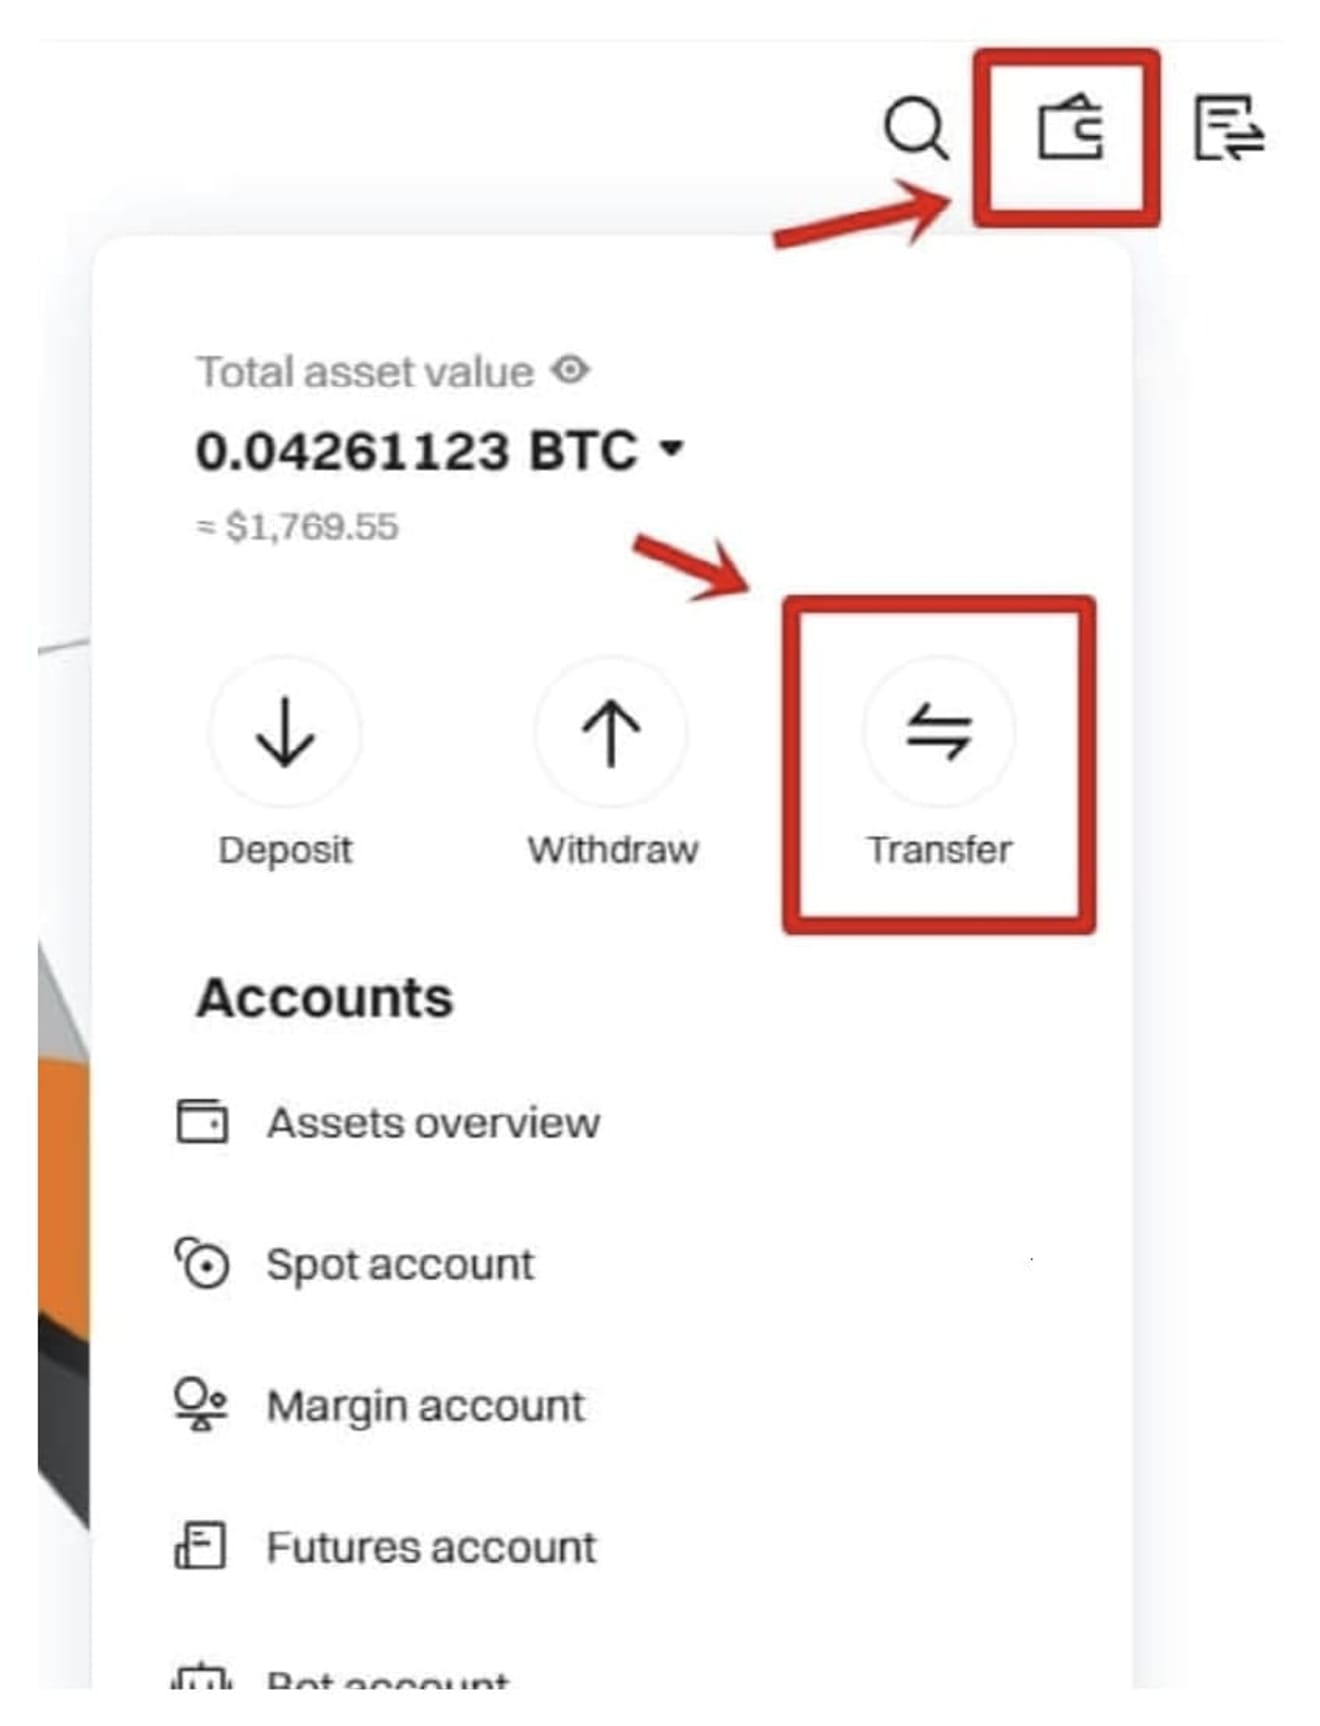
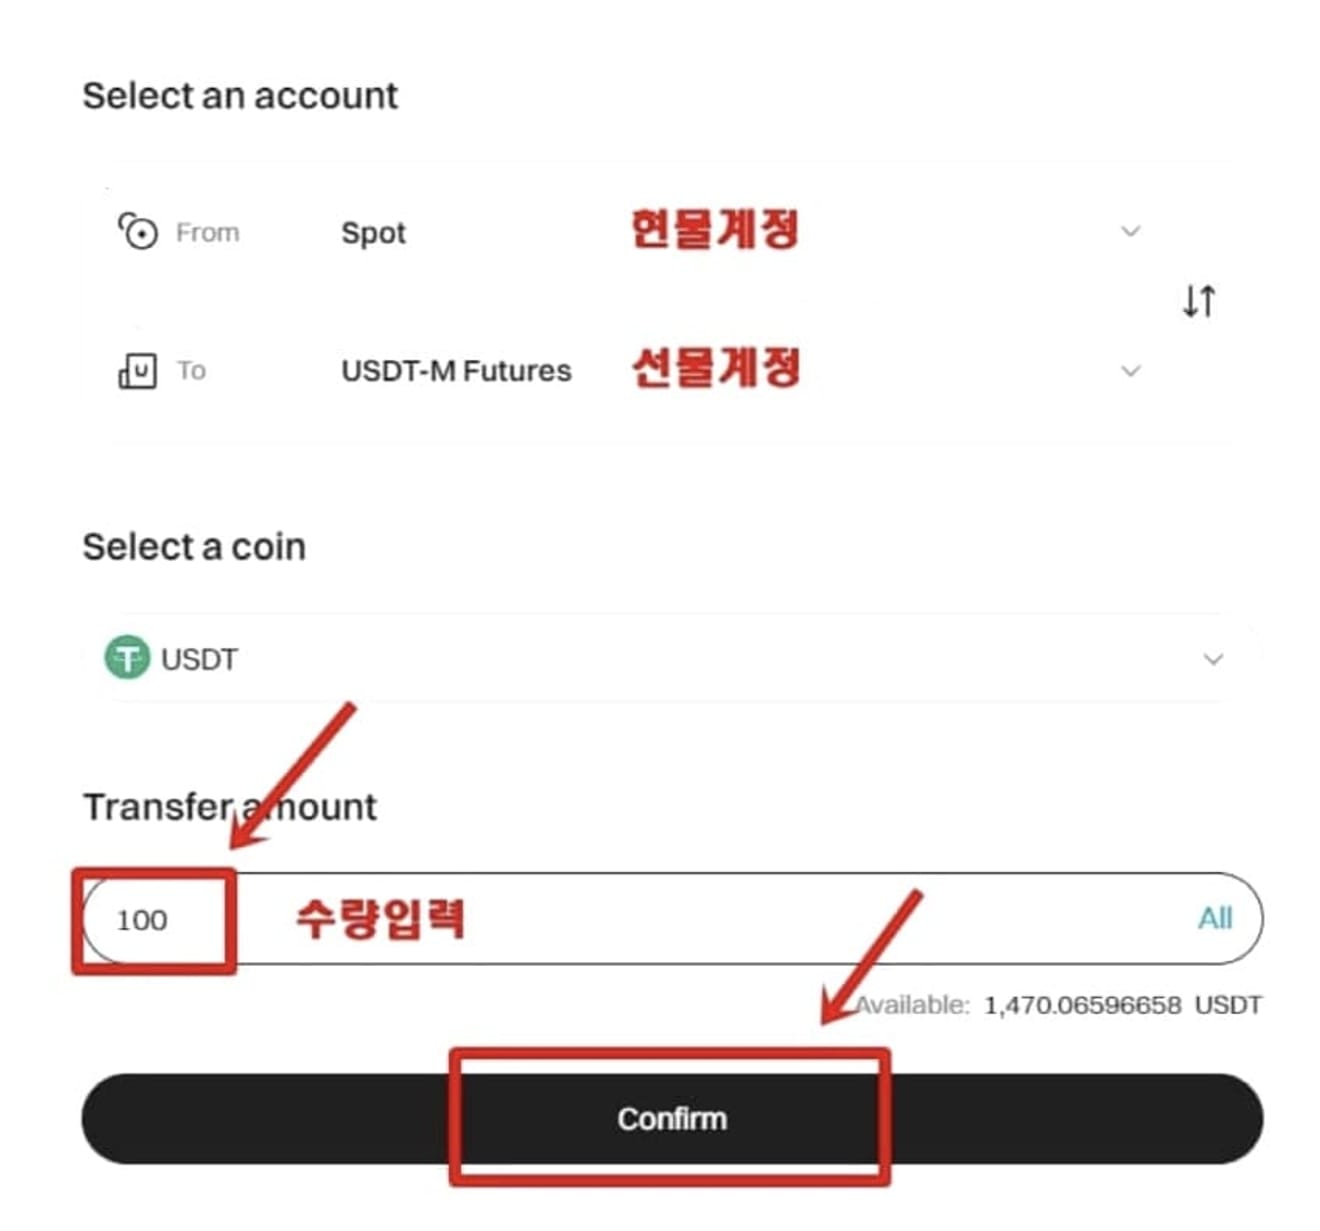
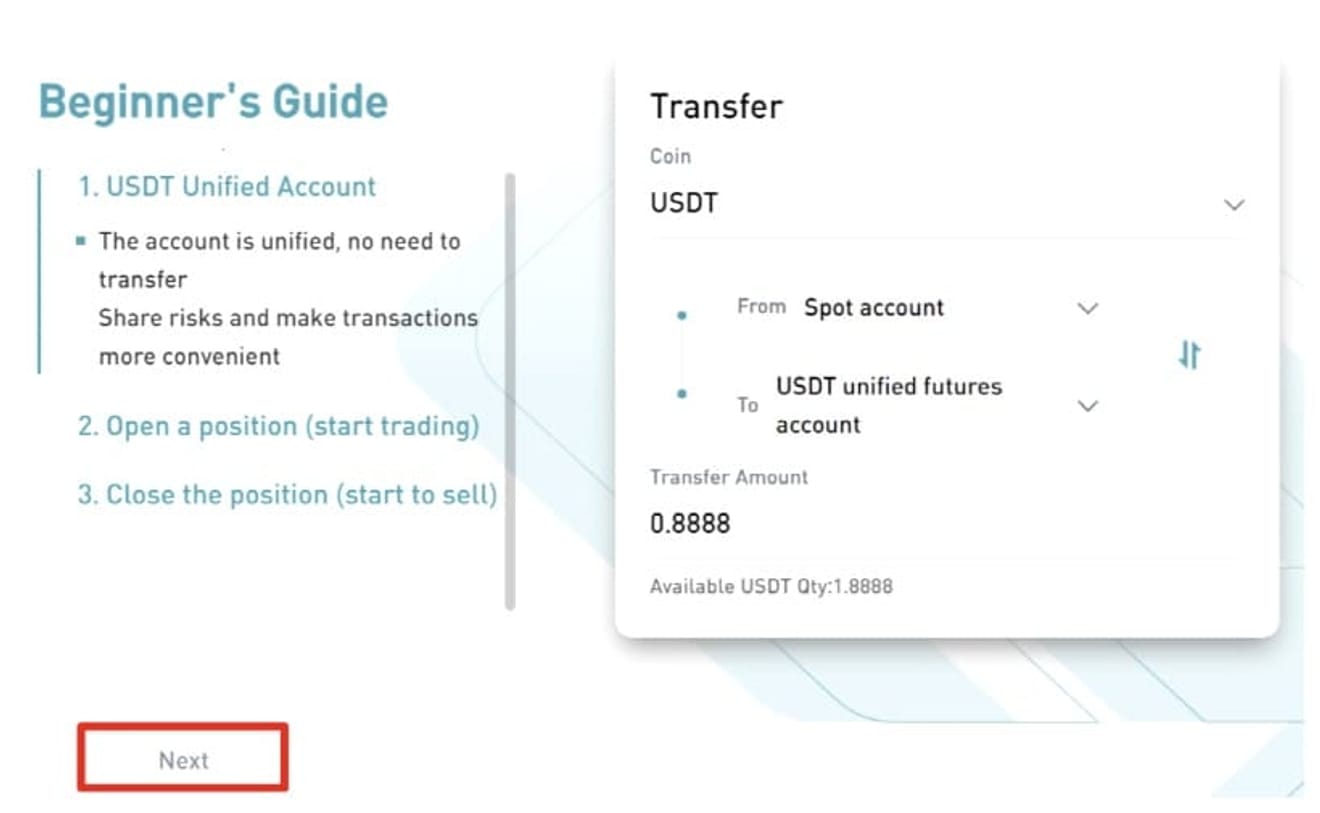
You must transfer USDT from your spot wallet to your futures wallet to trade. In the wallet menu, click Transfer, select USDT, and transfer it to the futures account.
Trade USDT futures
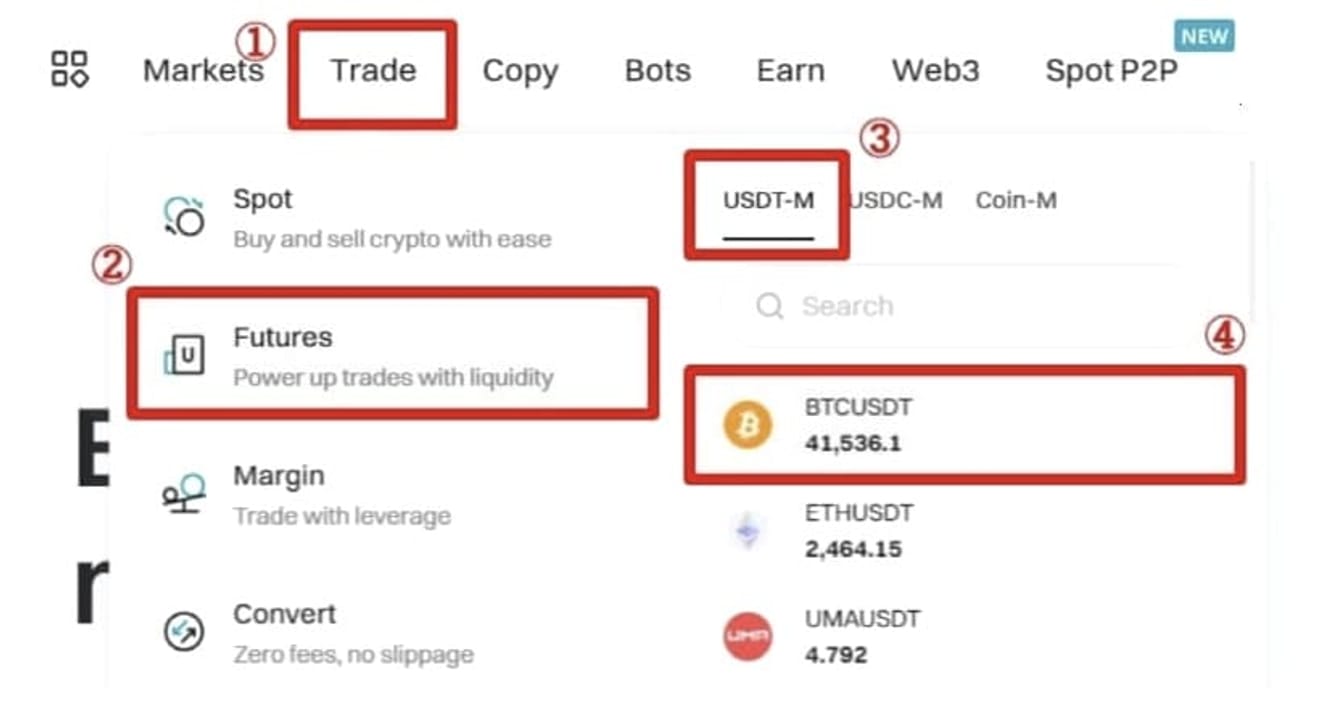
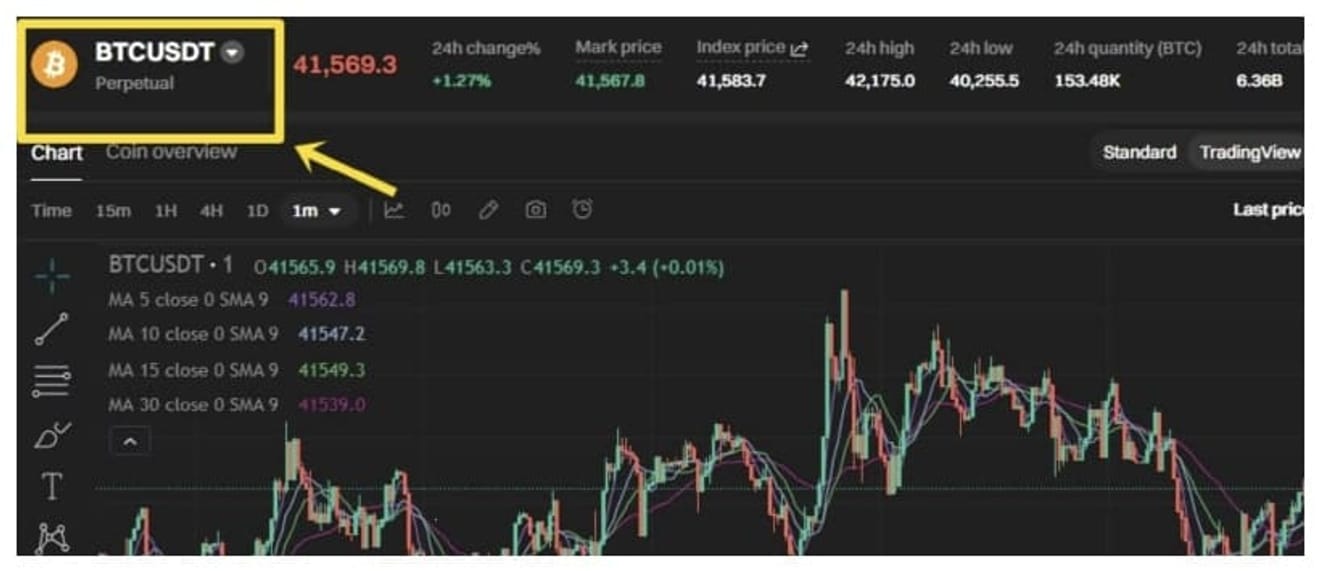
Trade Bitcoin using USDT-M futures as collateral. Select Futures → BTCUSDT from the Bitget menu.
The trading window displays the price, index, funding rate, and countdown, etc.

- Market Pair: BTCUSDT
- Check the last traded price, market price, and index price
- Funding fee: A fee to balance positions
- Countdown: Time until the next funding fee is paid
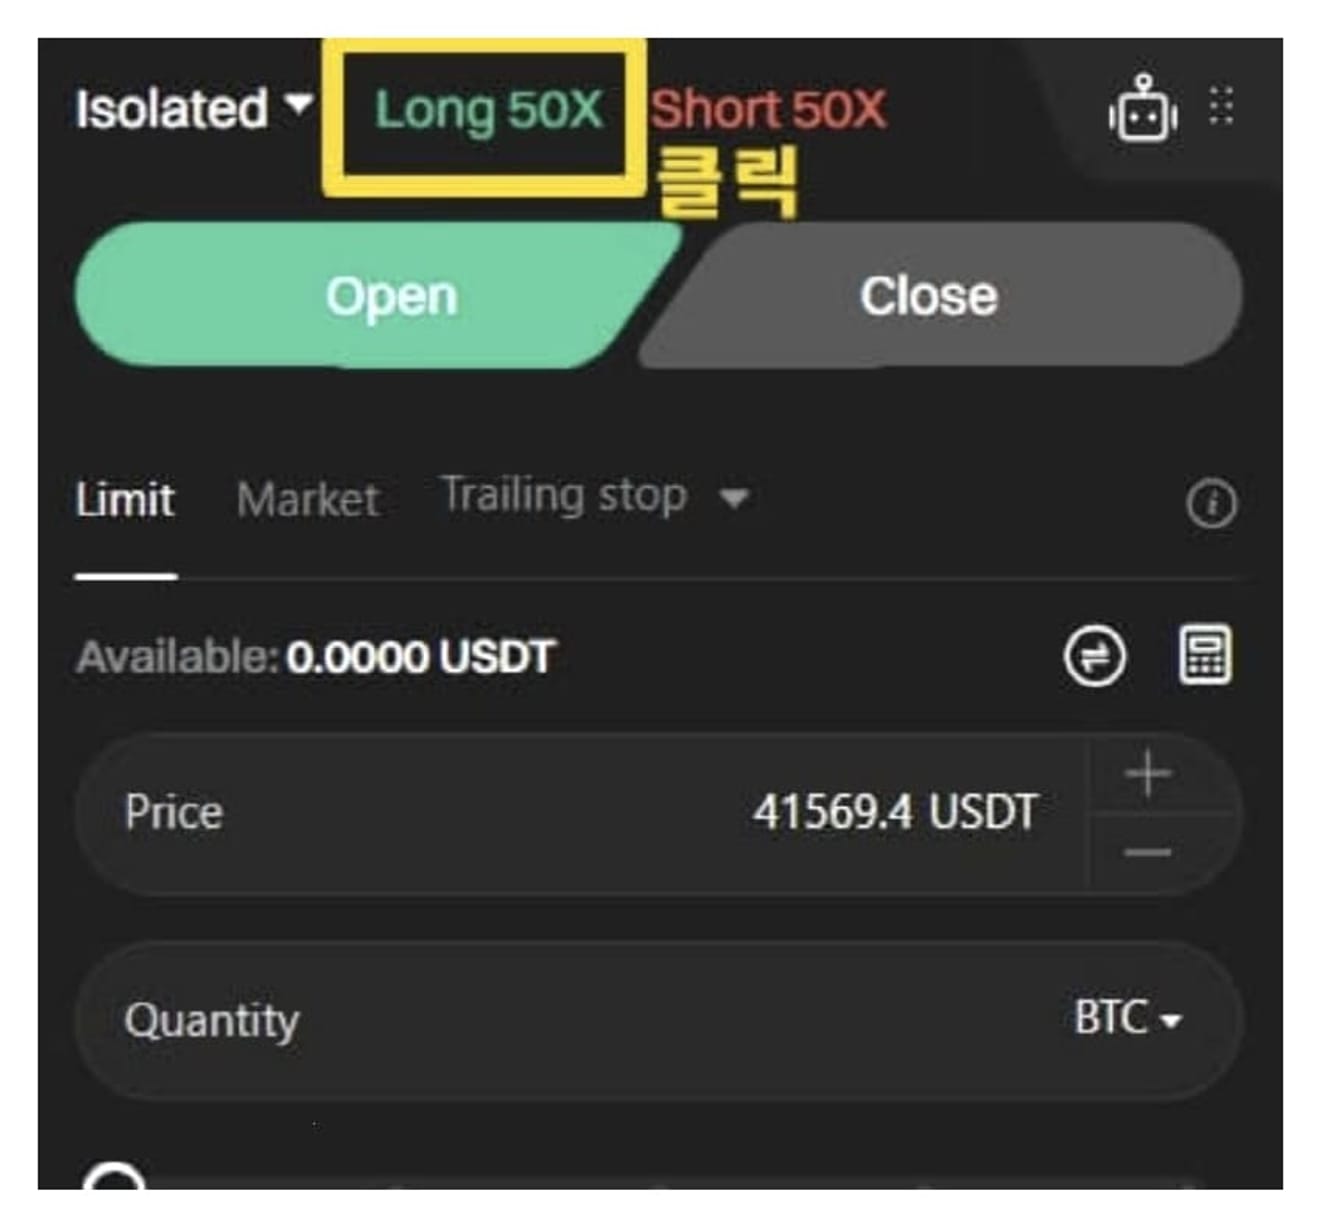
Now, let's open a short position.
Open a short position
You can open a position using the sell window in the BTCUSDT market. First, select the isolated and cross mode.

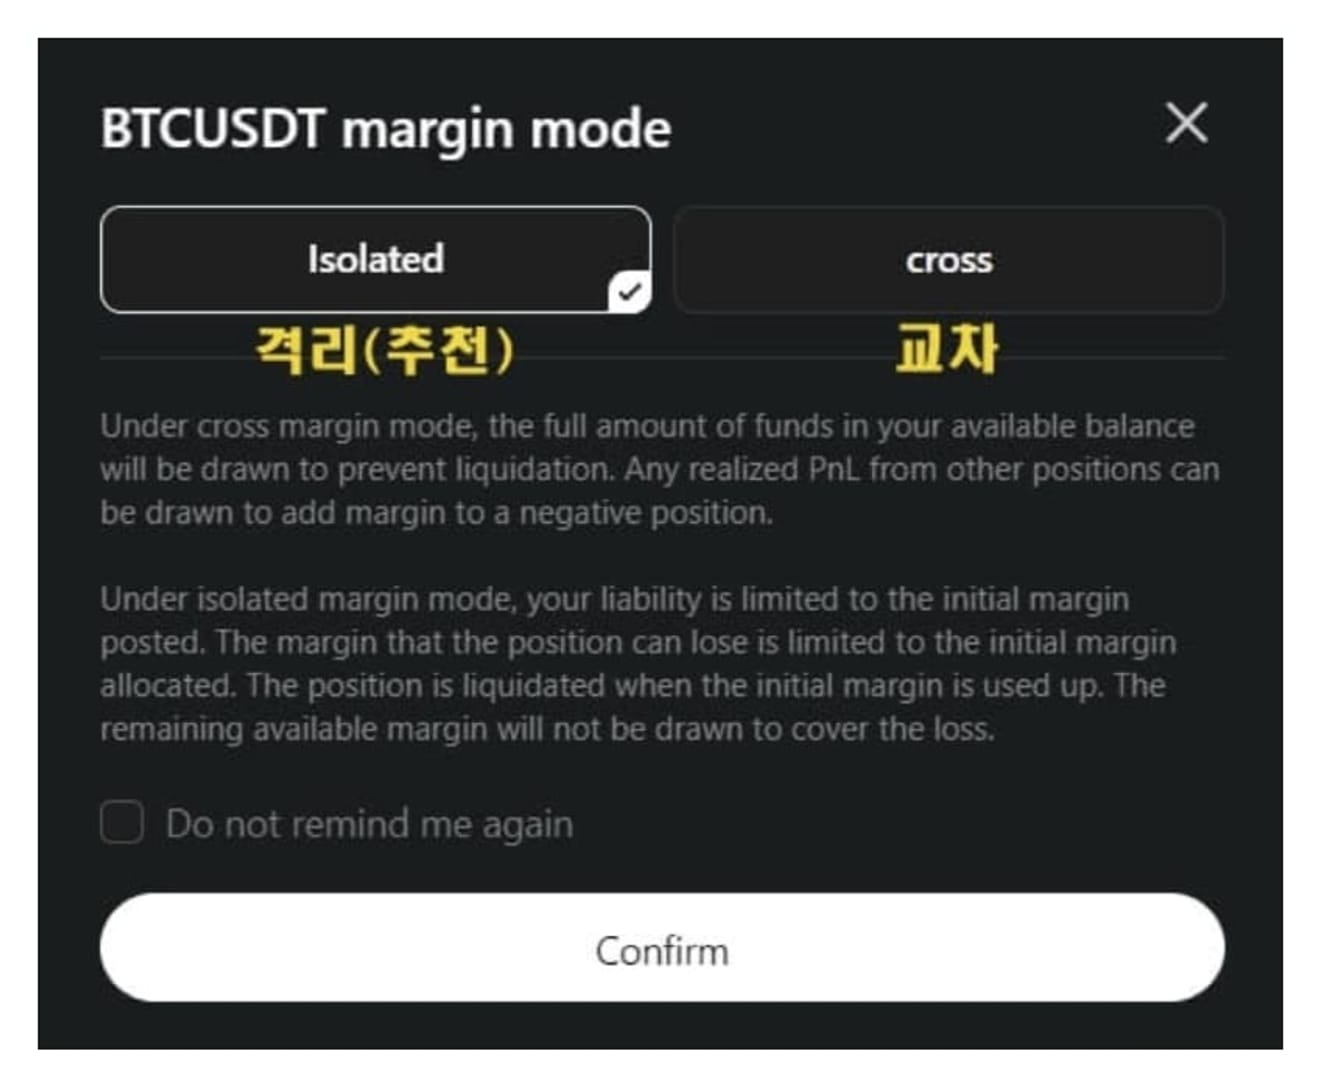
- Isolated: Use only the funds of that position as collateral. Possible to protect other assets upon liquidation.
- Cross: Use all assets in the account as collateral. High risk upon liquidation.
Leverage can be adjusted.
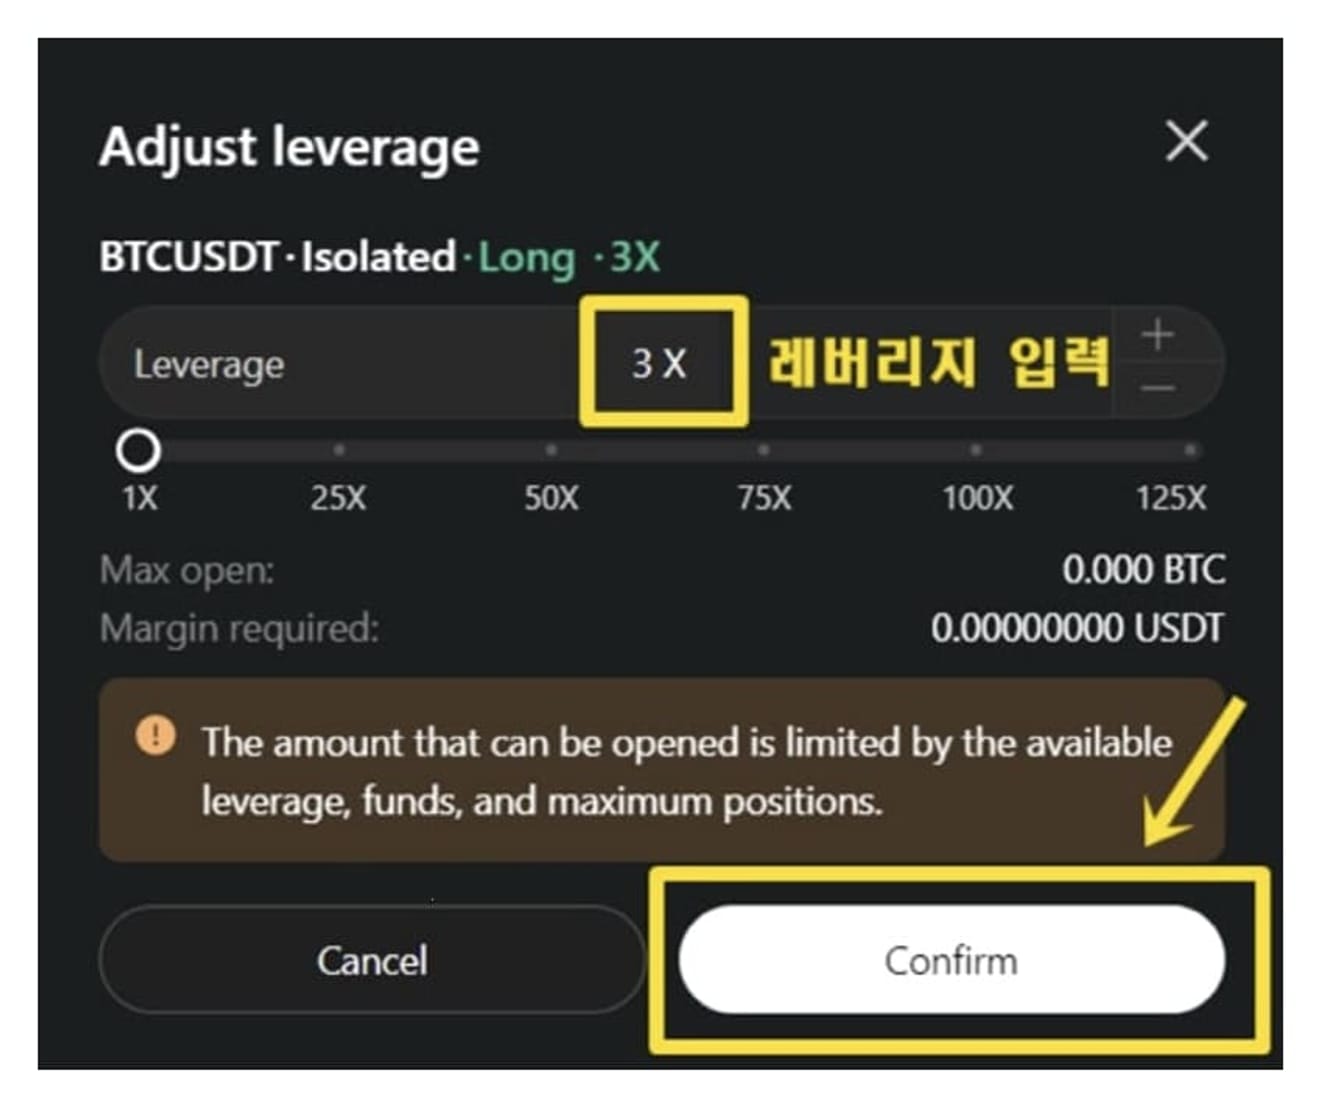
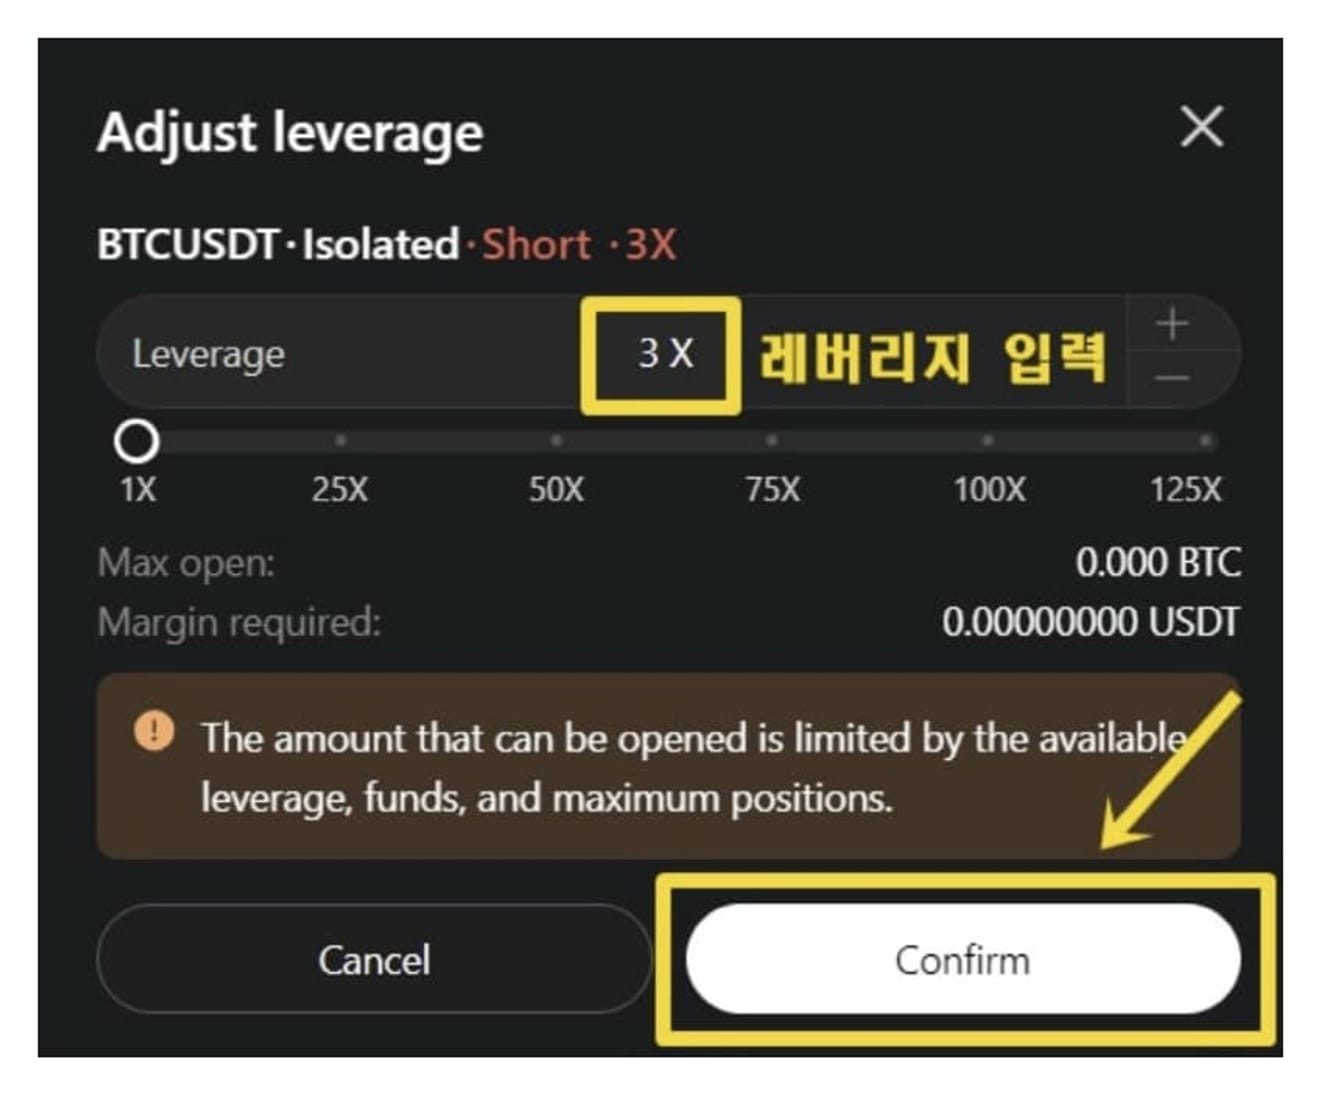
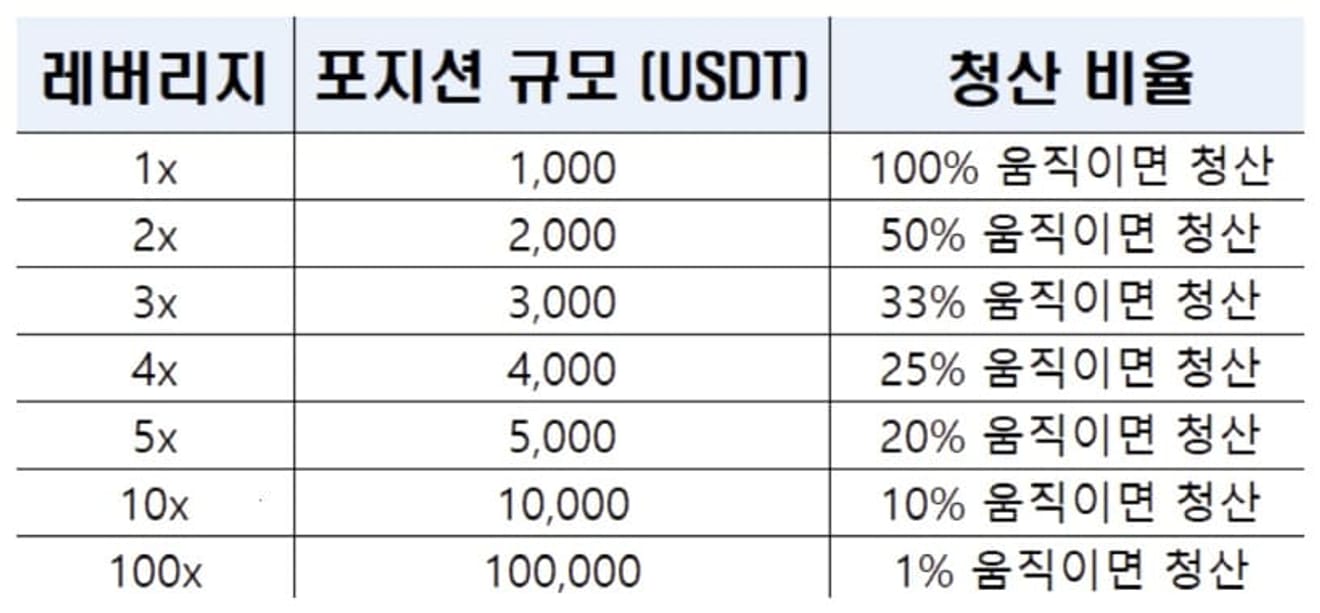
The higher the leverage, the larger the position size, but the risk of liquidation also increases.
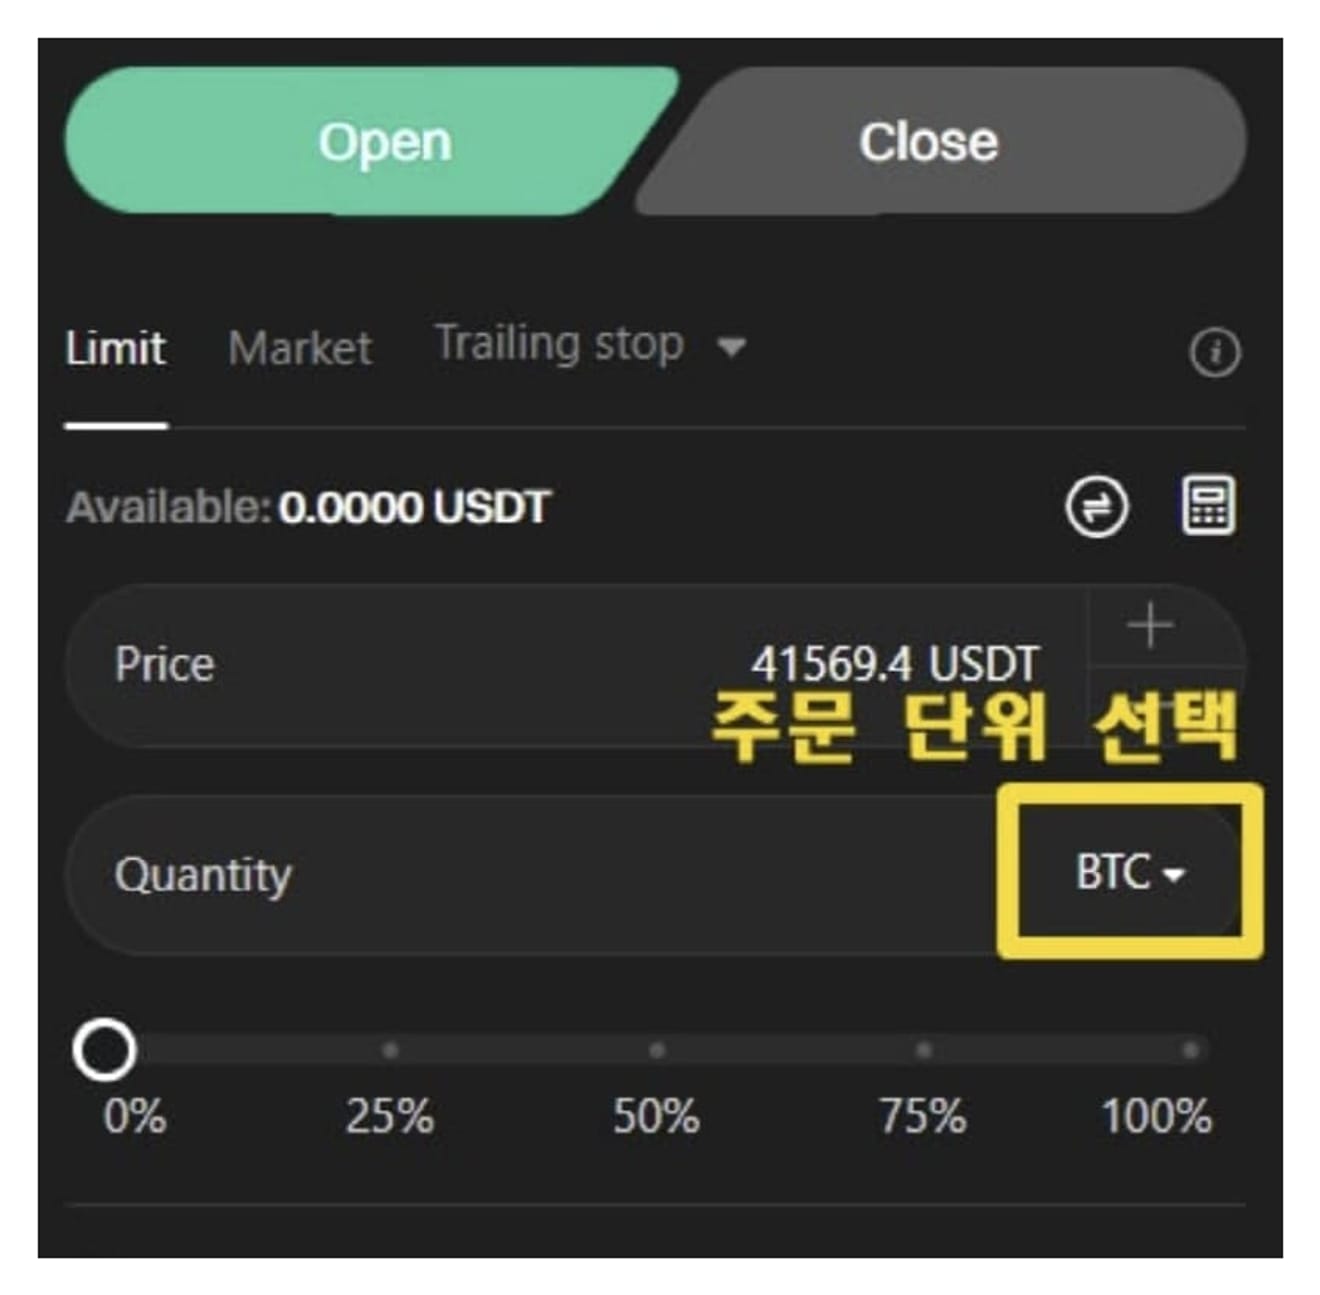
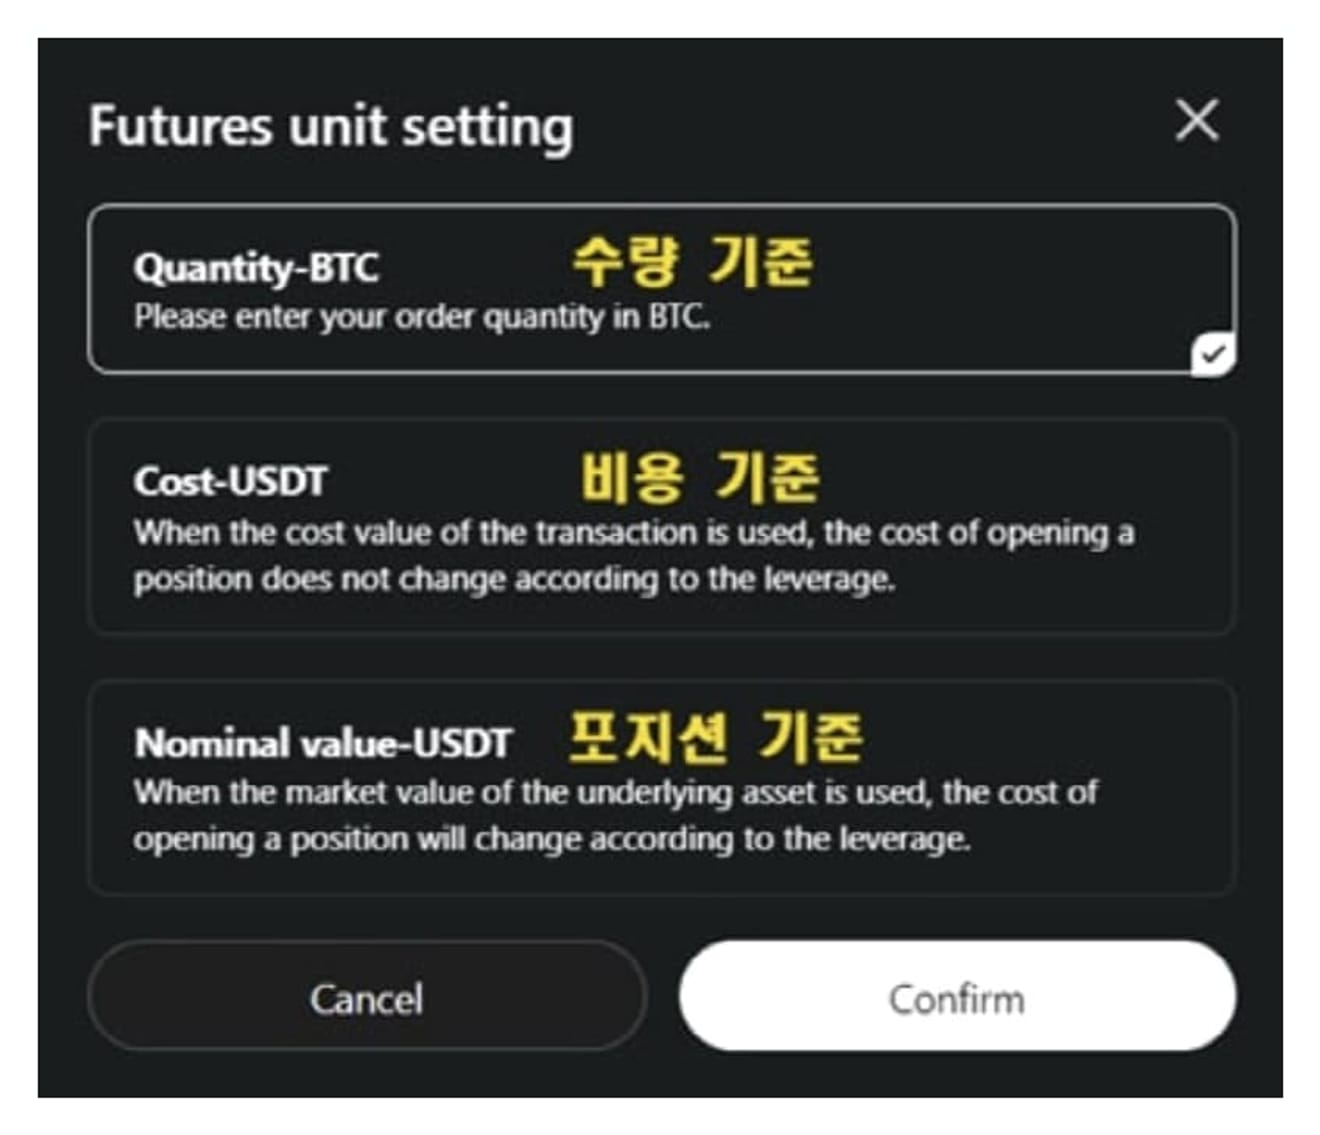
There are three methods for order unit: Quantity, Cost, and Nominal Value.
Now, open a 100 USDT position with 3x leverage in short.

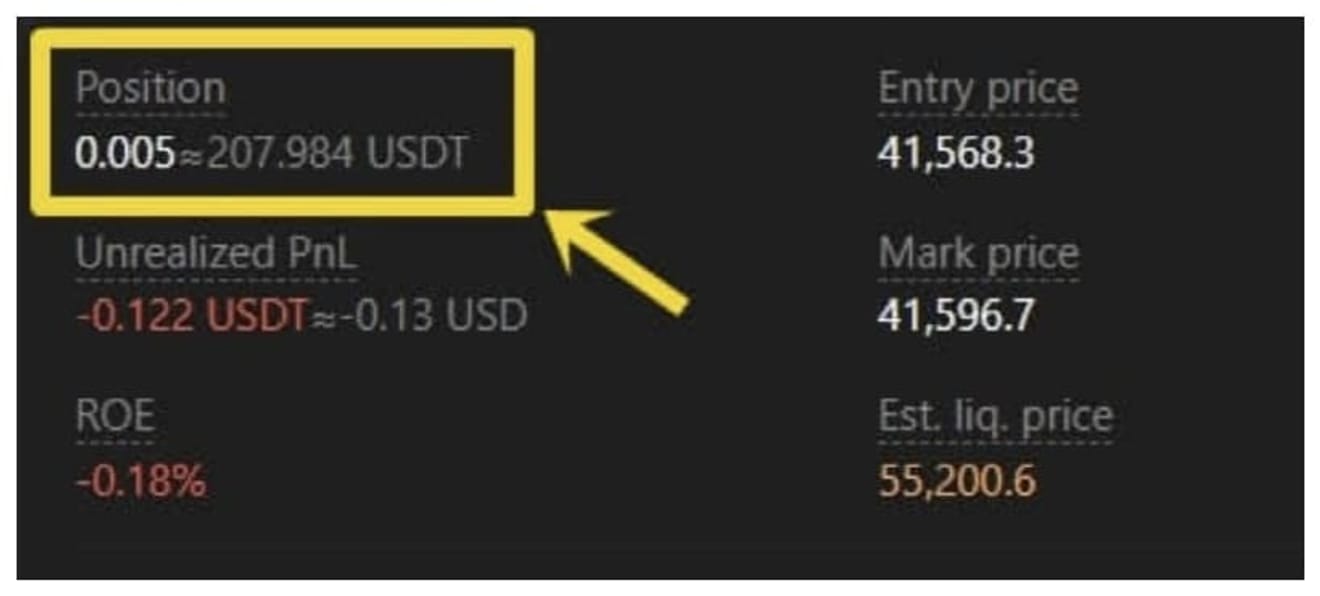
You can check the entry price, collateral, profit/loss, and liquidation price in the position window.

- Position size
- Entry price
- Collateral
- Unrealized profit and loss
- Market average and liquidation price
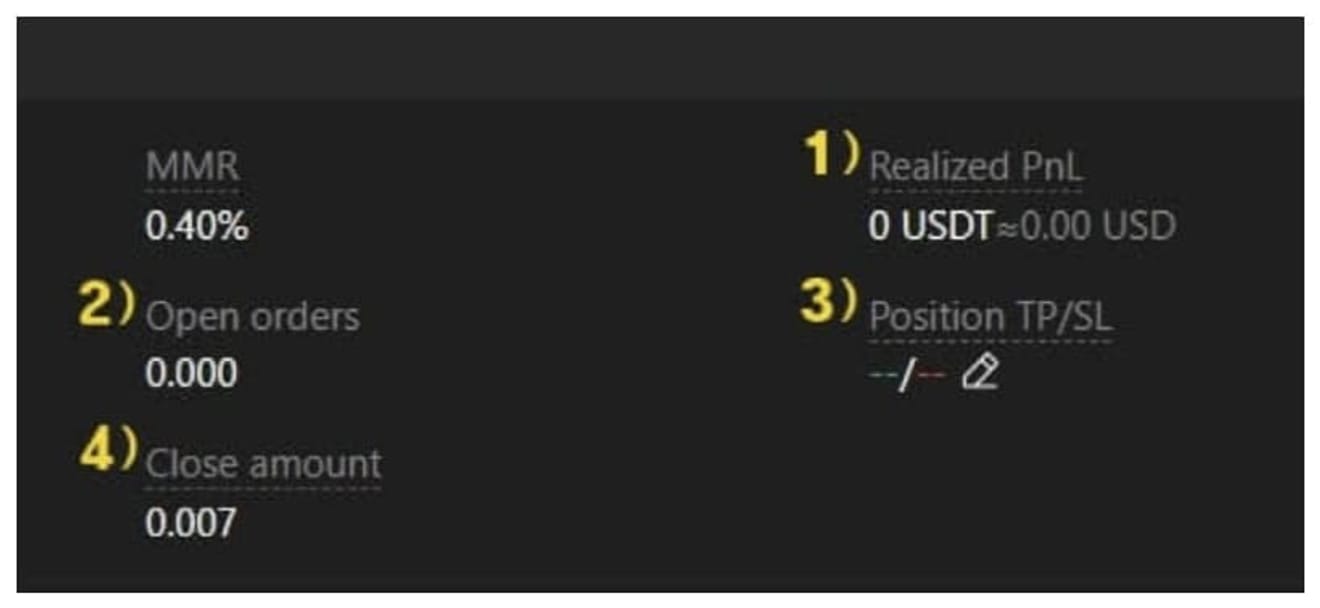
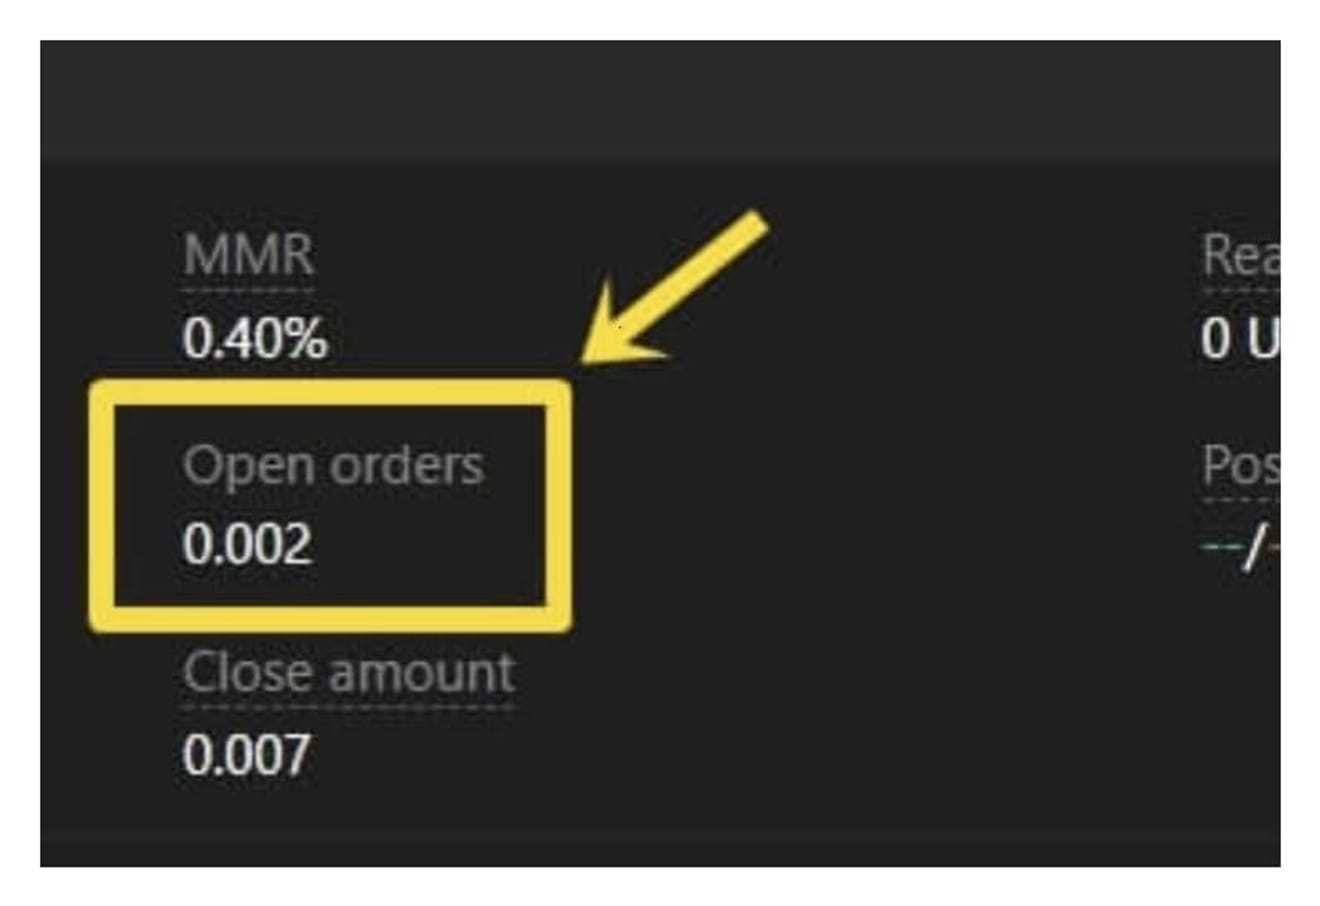
You manage realized profit and loss, pending orders, TP/SL settings, etc., in the right panel.
Close short position
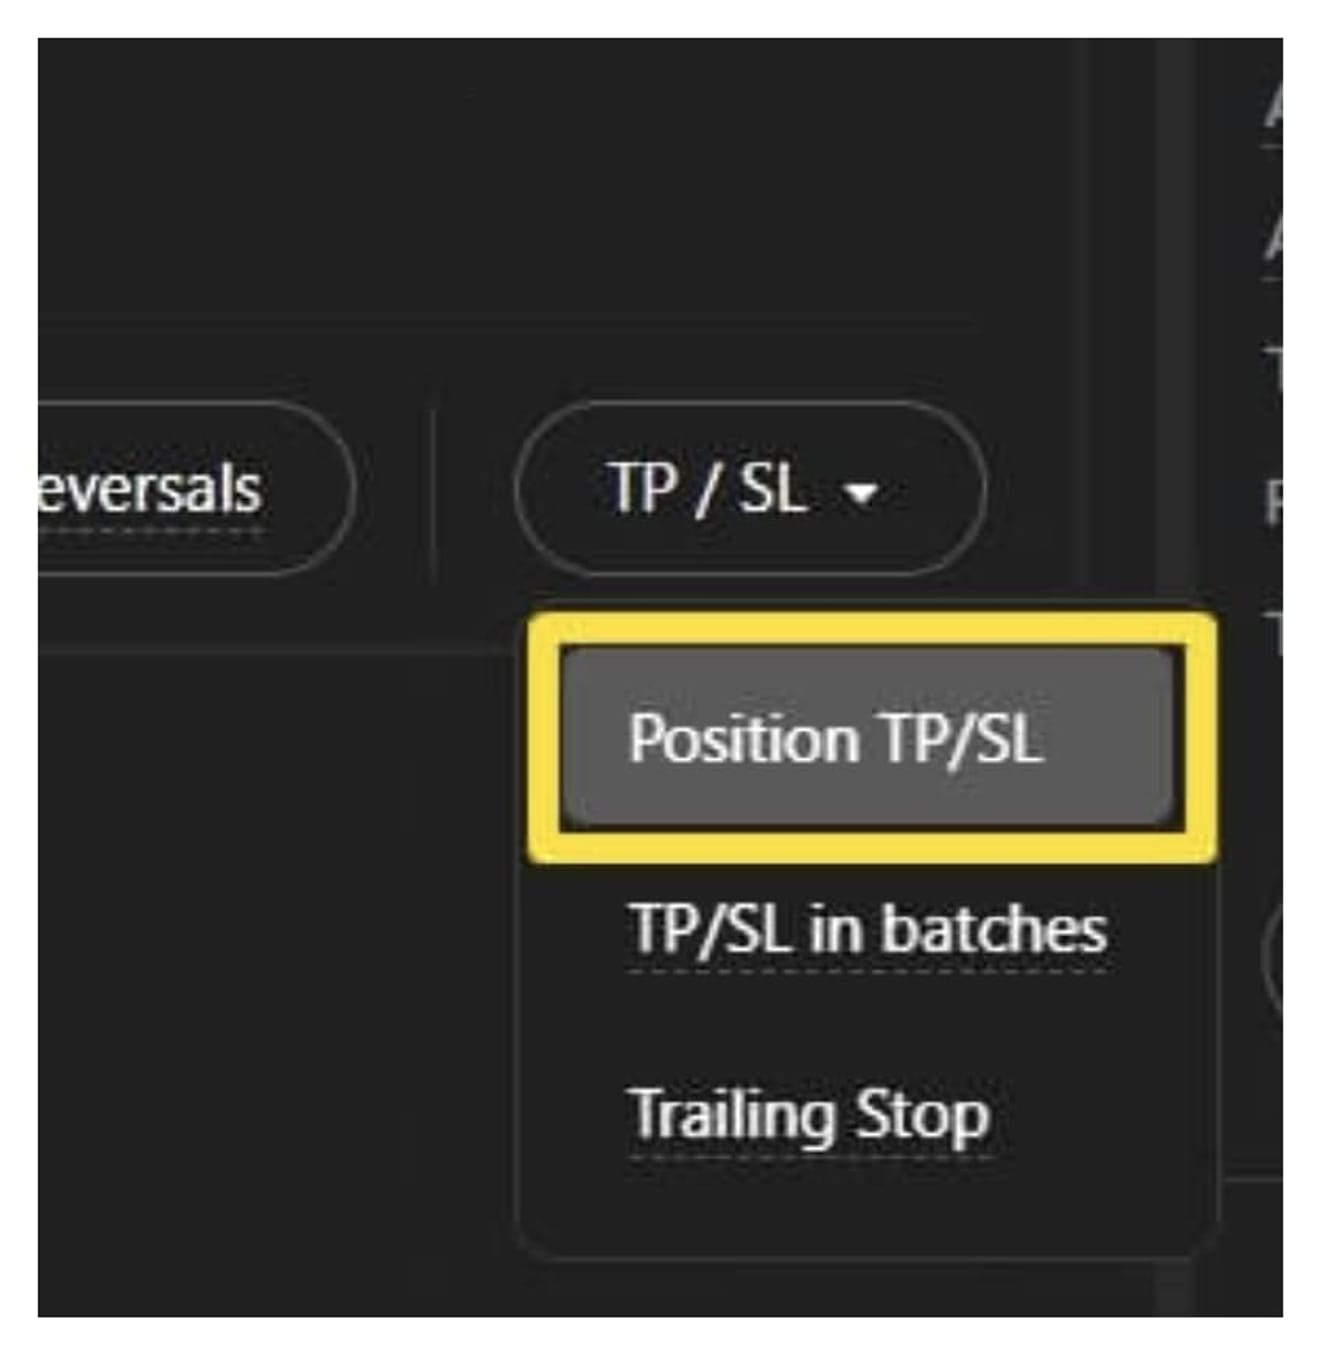
There are three methods to close: limit price, market price, and TP/SL.

Close by limit price: Input the desired price and quantity to execute

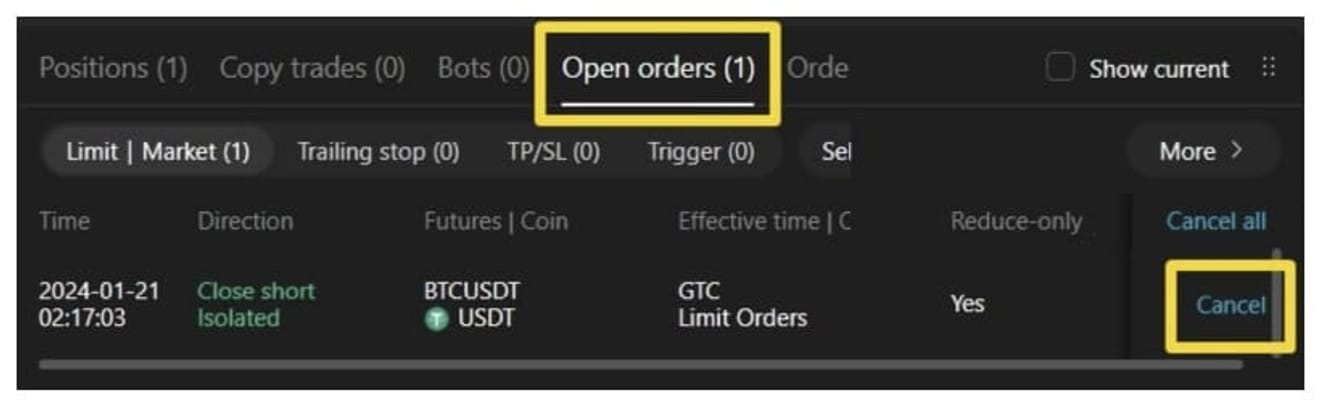
Close by market price: Immediately liquidate the input quantity

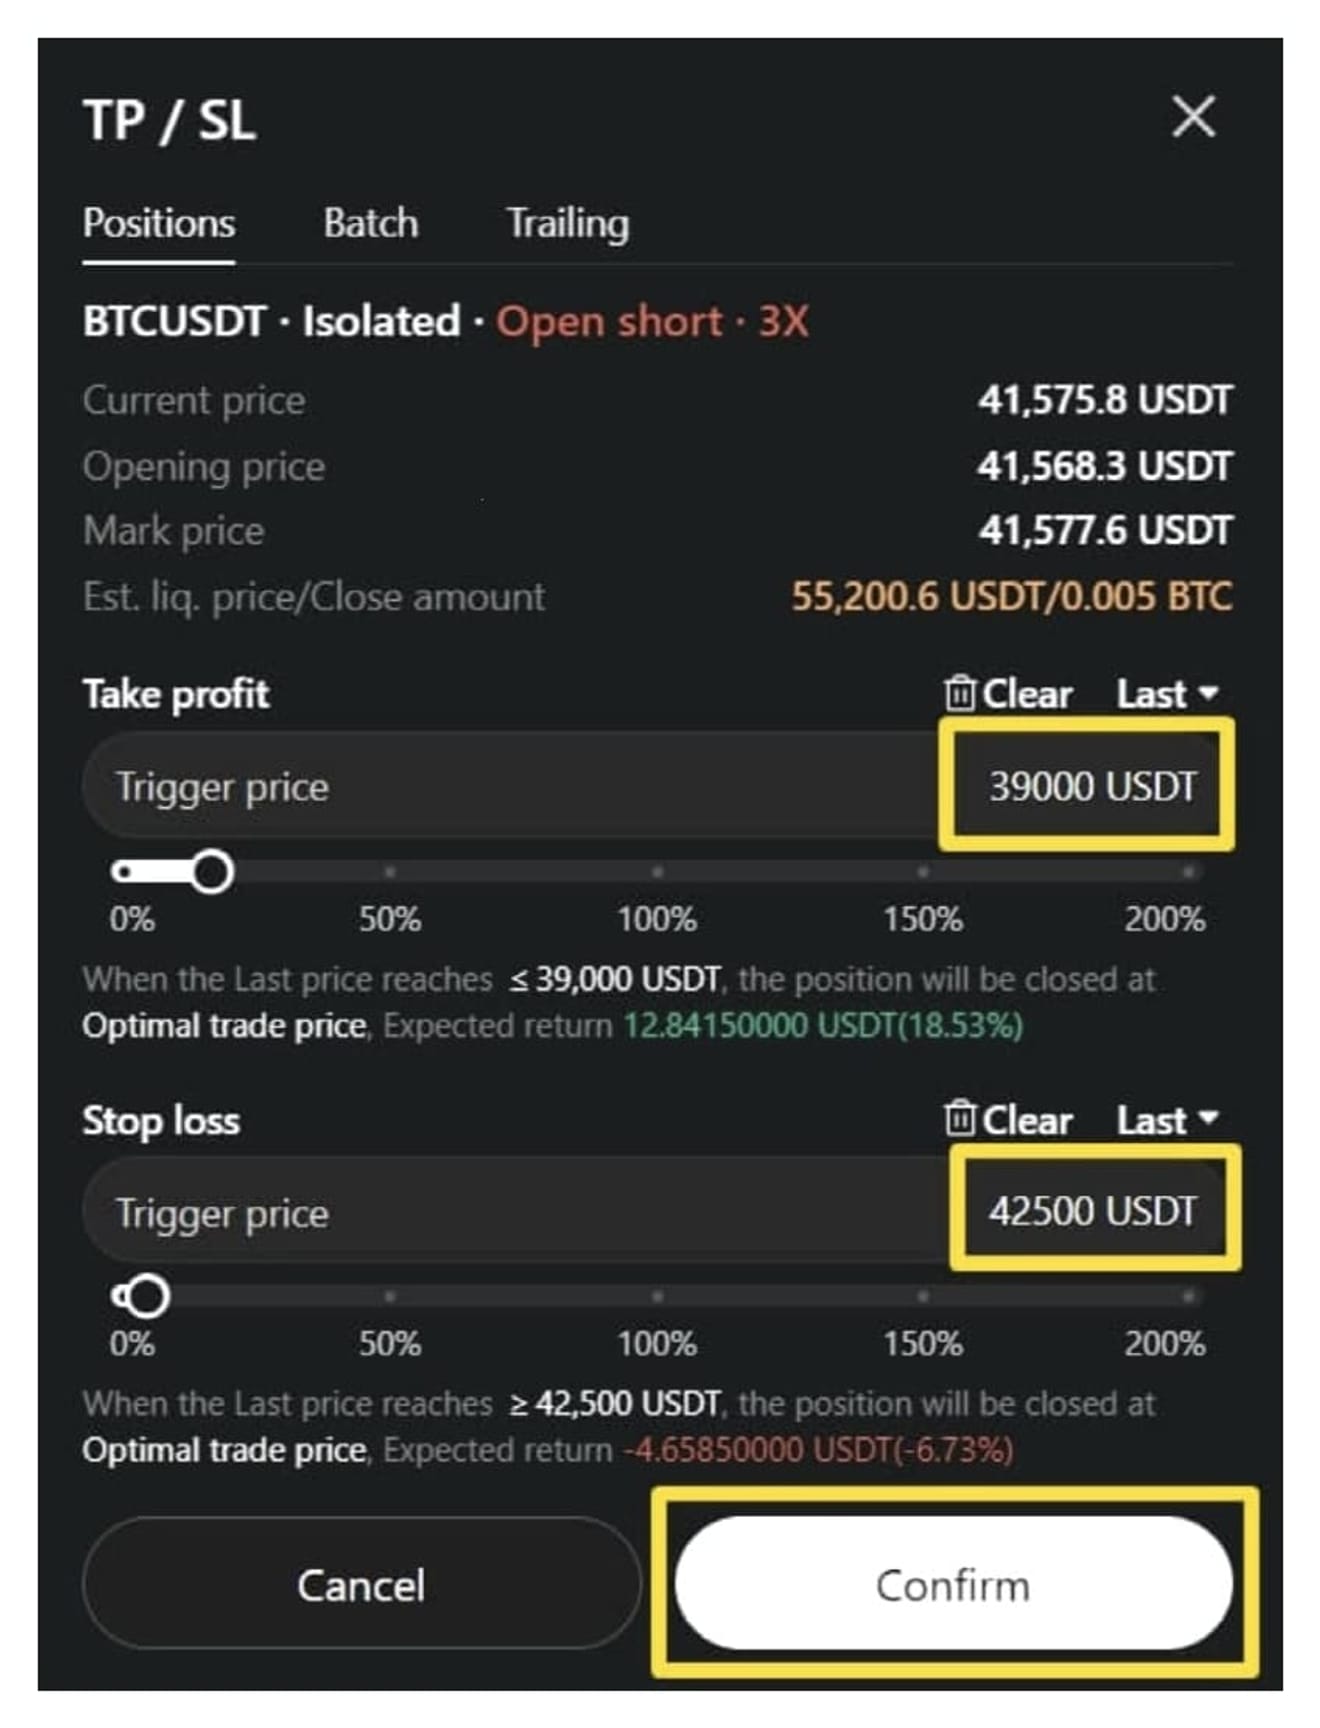
Close by TP/SL: Automatically close by setting take-profit/stop-loss prices in advance