How to sign up for Bitget | KYC Identity Verification | OTP Settings
In this blog, we will explore how to sign up for Bitget, the KYC identity verification process, and how to set up OTP. The first step to using Bitget is to set up a secure and complete account. You shouldn't think that signing up is complete just by entering your email and password. For smooth transactions, KYC identity verification and security settings must be completed. In particular, if you don't do KYC verification, your withdrawal limit will be greatly restricted, and if you don't have OTP settings, you can be exposed to hacking risks. Many people tend to postpone or roughly set up these processes because they feel complicated, but in this article, we will explain in detail, step by step, from Bitget sign-up to KYC identity verification and OTP security settings, along with screenshots. We will also cover how to prepare verification documents, how to deal with delays in approval, and the importance of various security settings and how to set them up correctly.

How to Sign Up for Bitget
The process of signing up for Bitget starts with a referral link that offers a fee discount.
By signing up through the link above, you can receive a fee discount on Bitget. Enter your phone number (or email) and password, agree to the terms and conditions, and click the 'Create Account' button below.
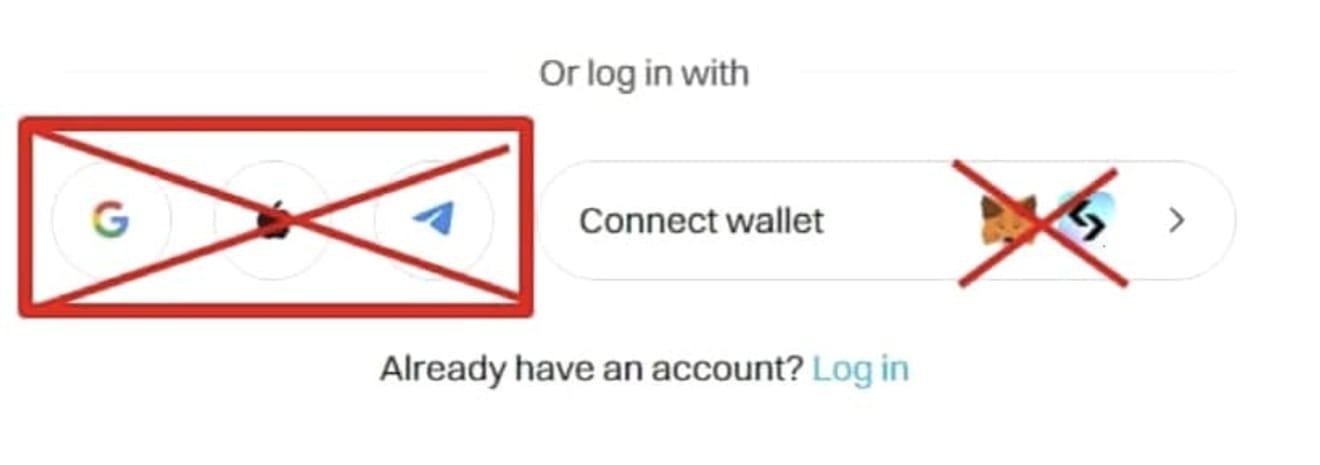
When signing up, do not use the Google, Apple, or Telegram sign-up buttons at the bottom. Fee discounts may not apply.
Clicking the 'Create Account' button will take you to the verification screen. Here, click 'Click to verify' and tap the images in order.

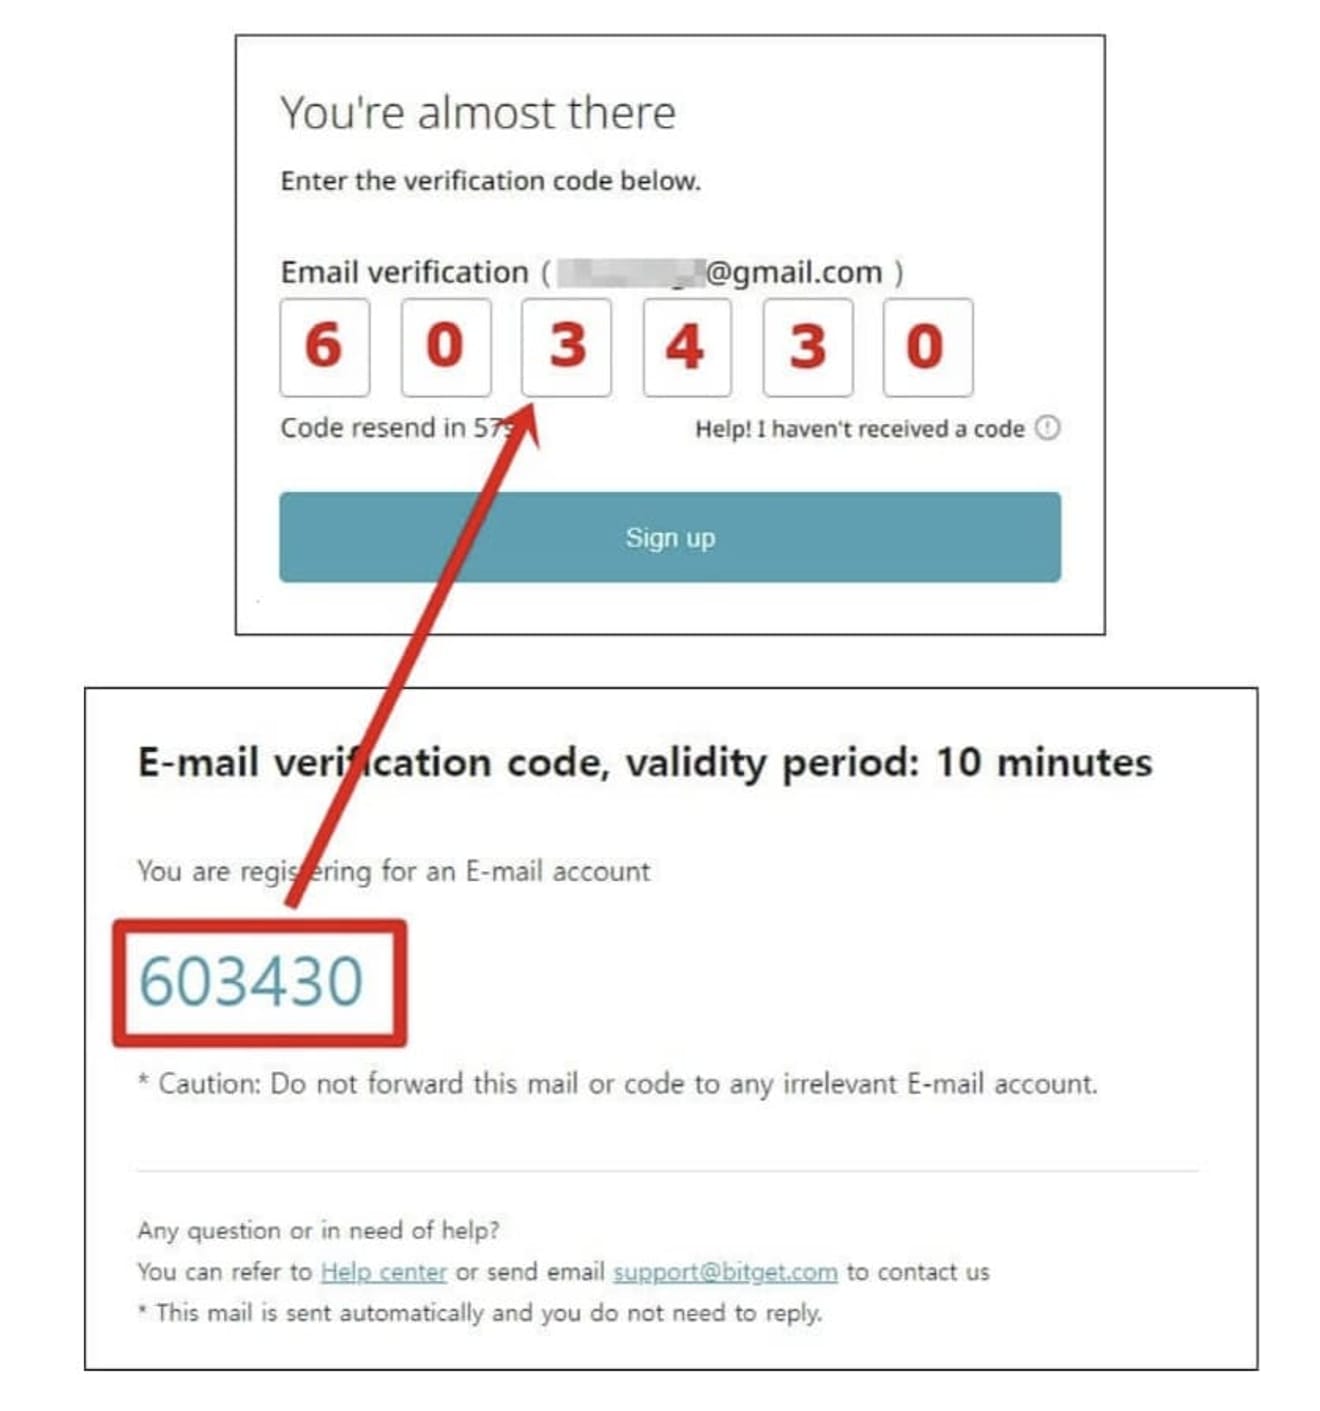
After that, enter the 6-digit verification code sent to your email or SNS to complete account creation.
Now, let's proceed with KYC verification.
Bitget KYC Identity Verification Method
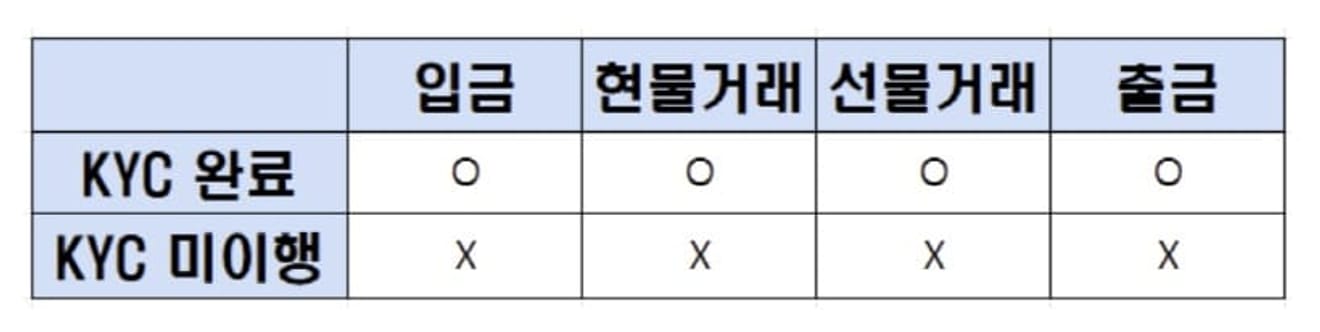
The reason for KYC verification is that it is impossible to even deposit without it. Also, if you proceed with KYC verification on a computer on the website, it takes a lot of time due to the input of unnecessary photos and information, so if possible, we recommend verifying easily through the Bitget app.
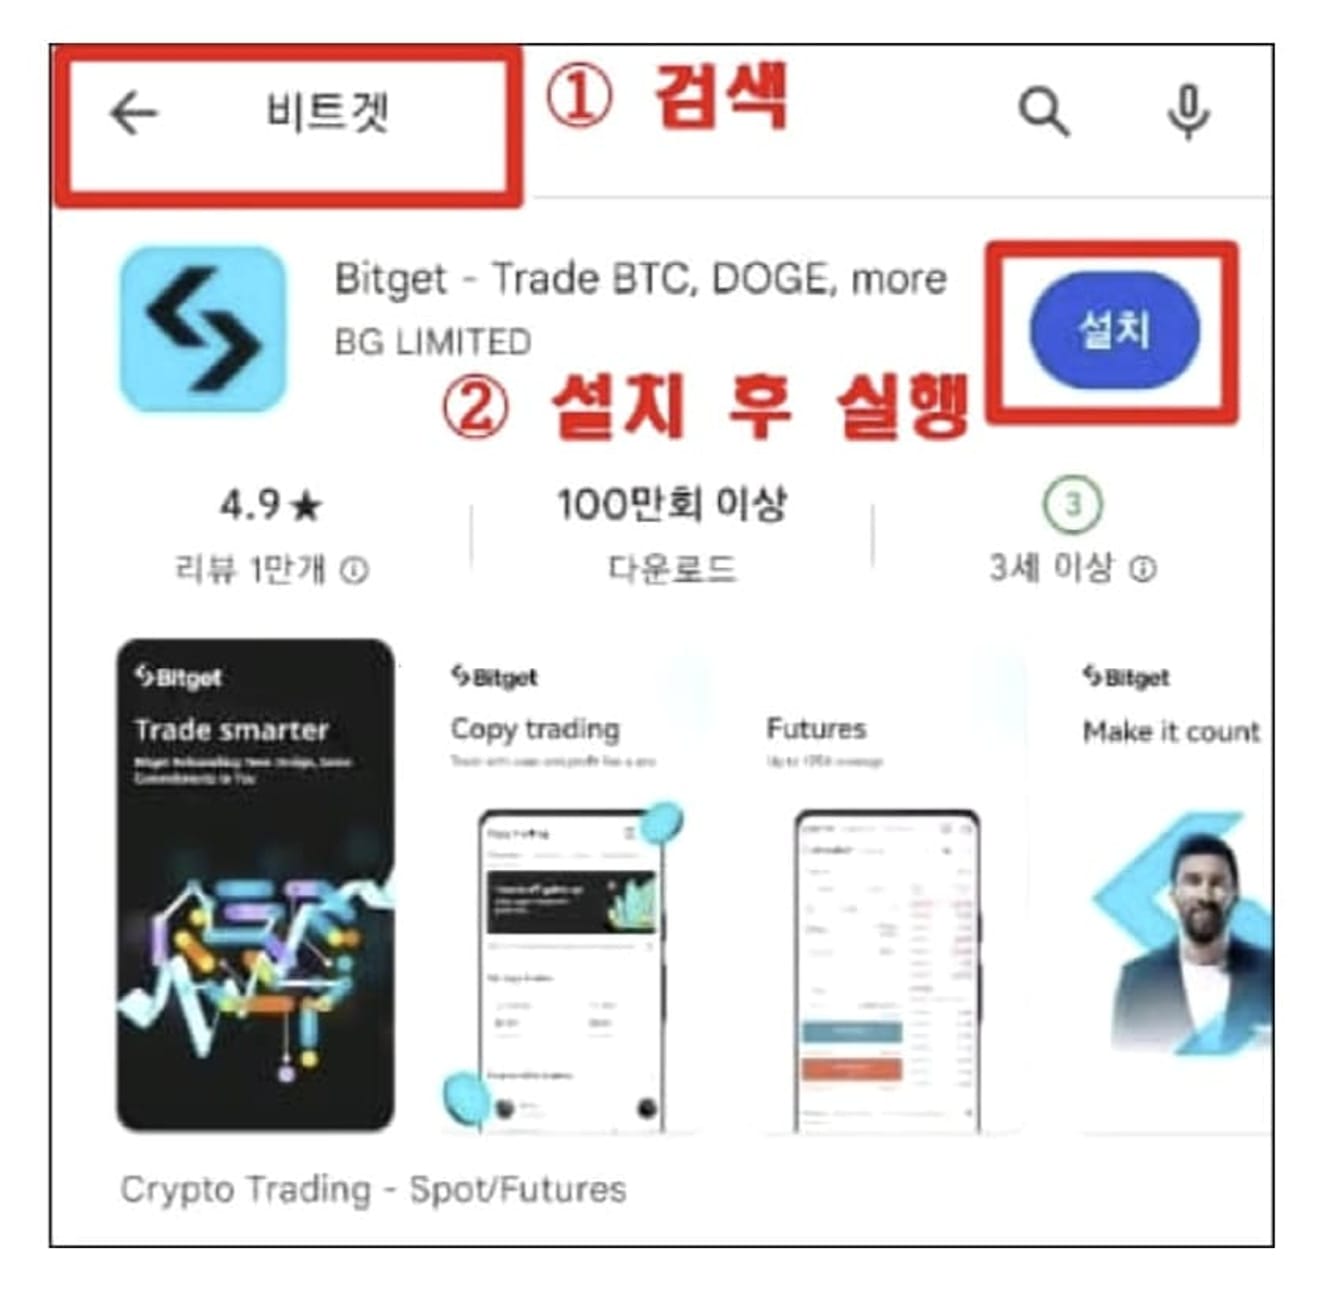
Open the Google Play Store (or the App Store for iPhone) and search for 'Bitget', install it, and run it.
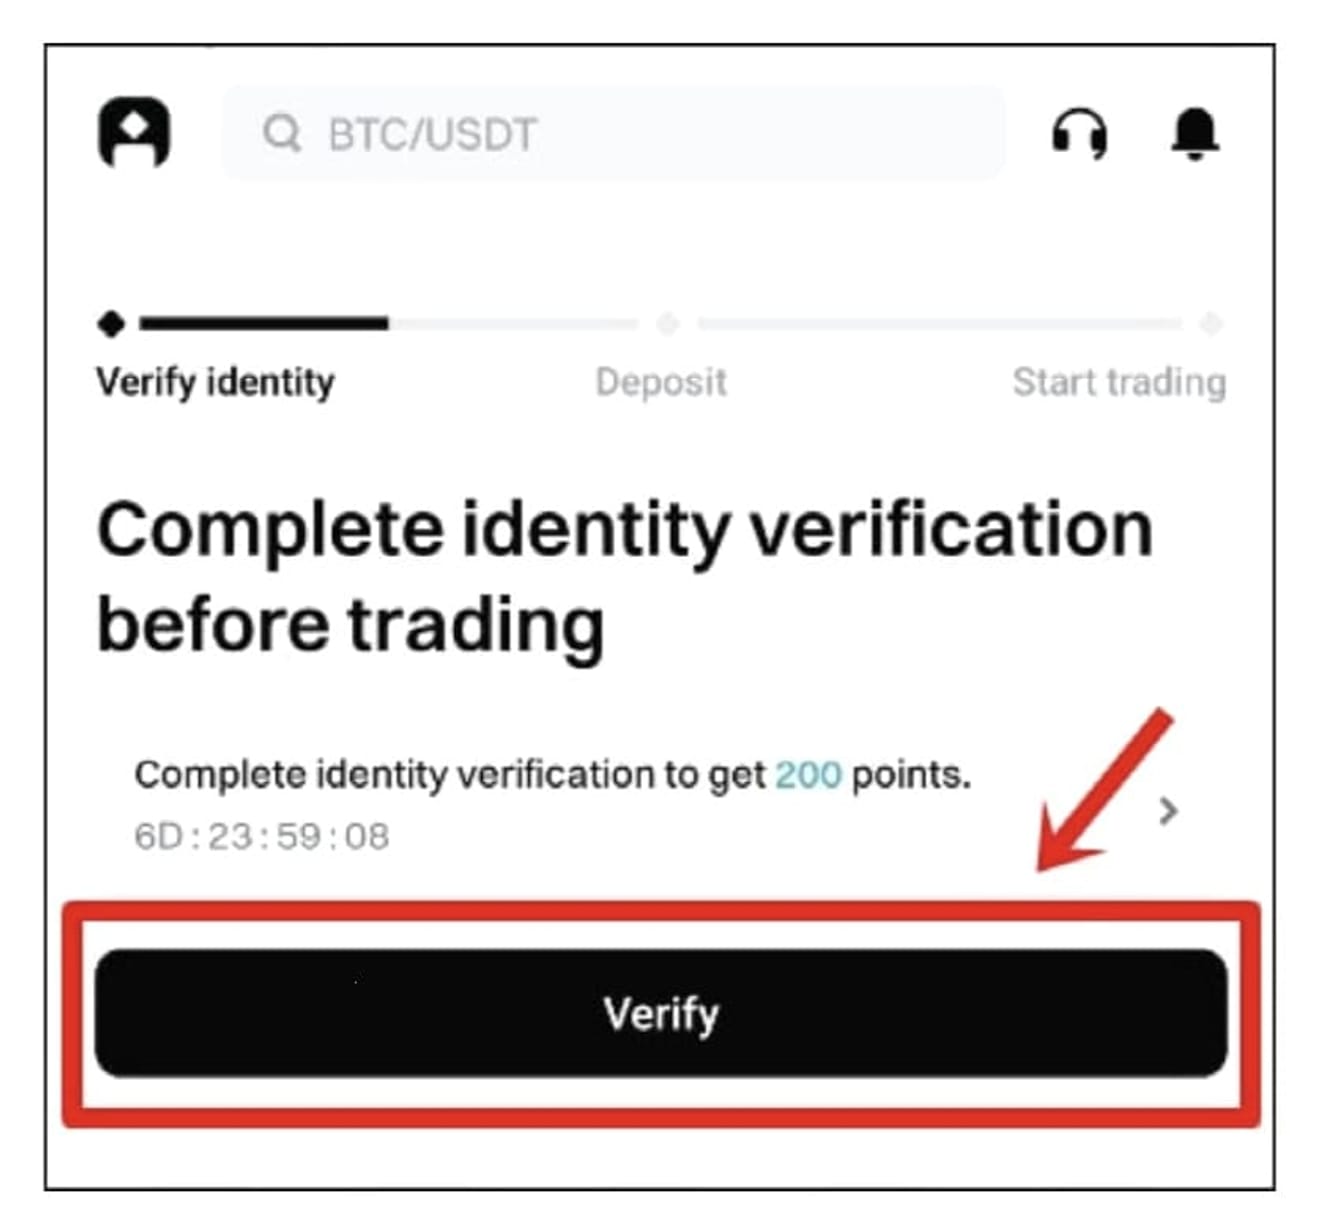
Run the Bitget app and tap the 'Verify' button to enter.
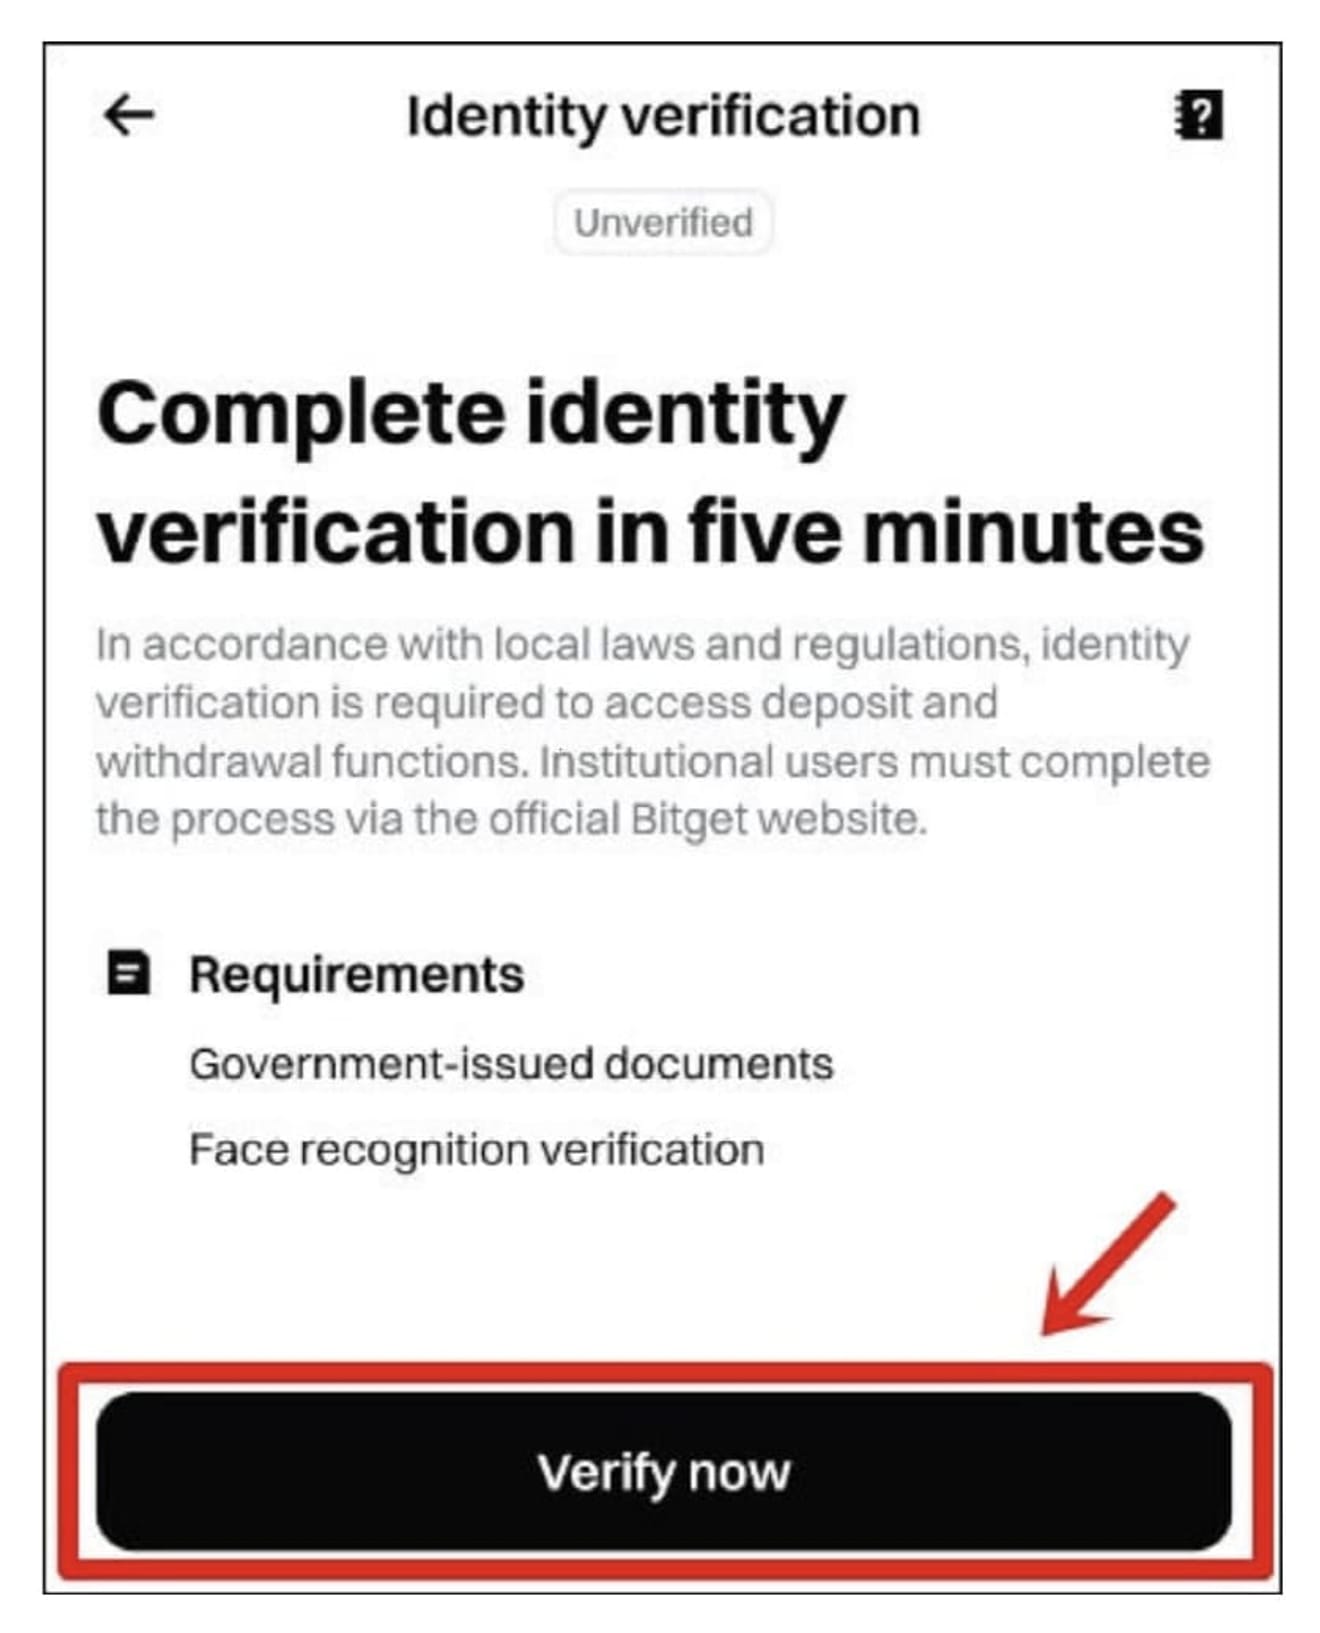
Now, start KYC verification. Click the 'Verify now' button again to proceed.
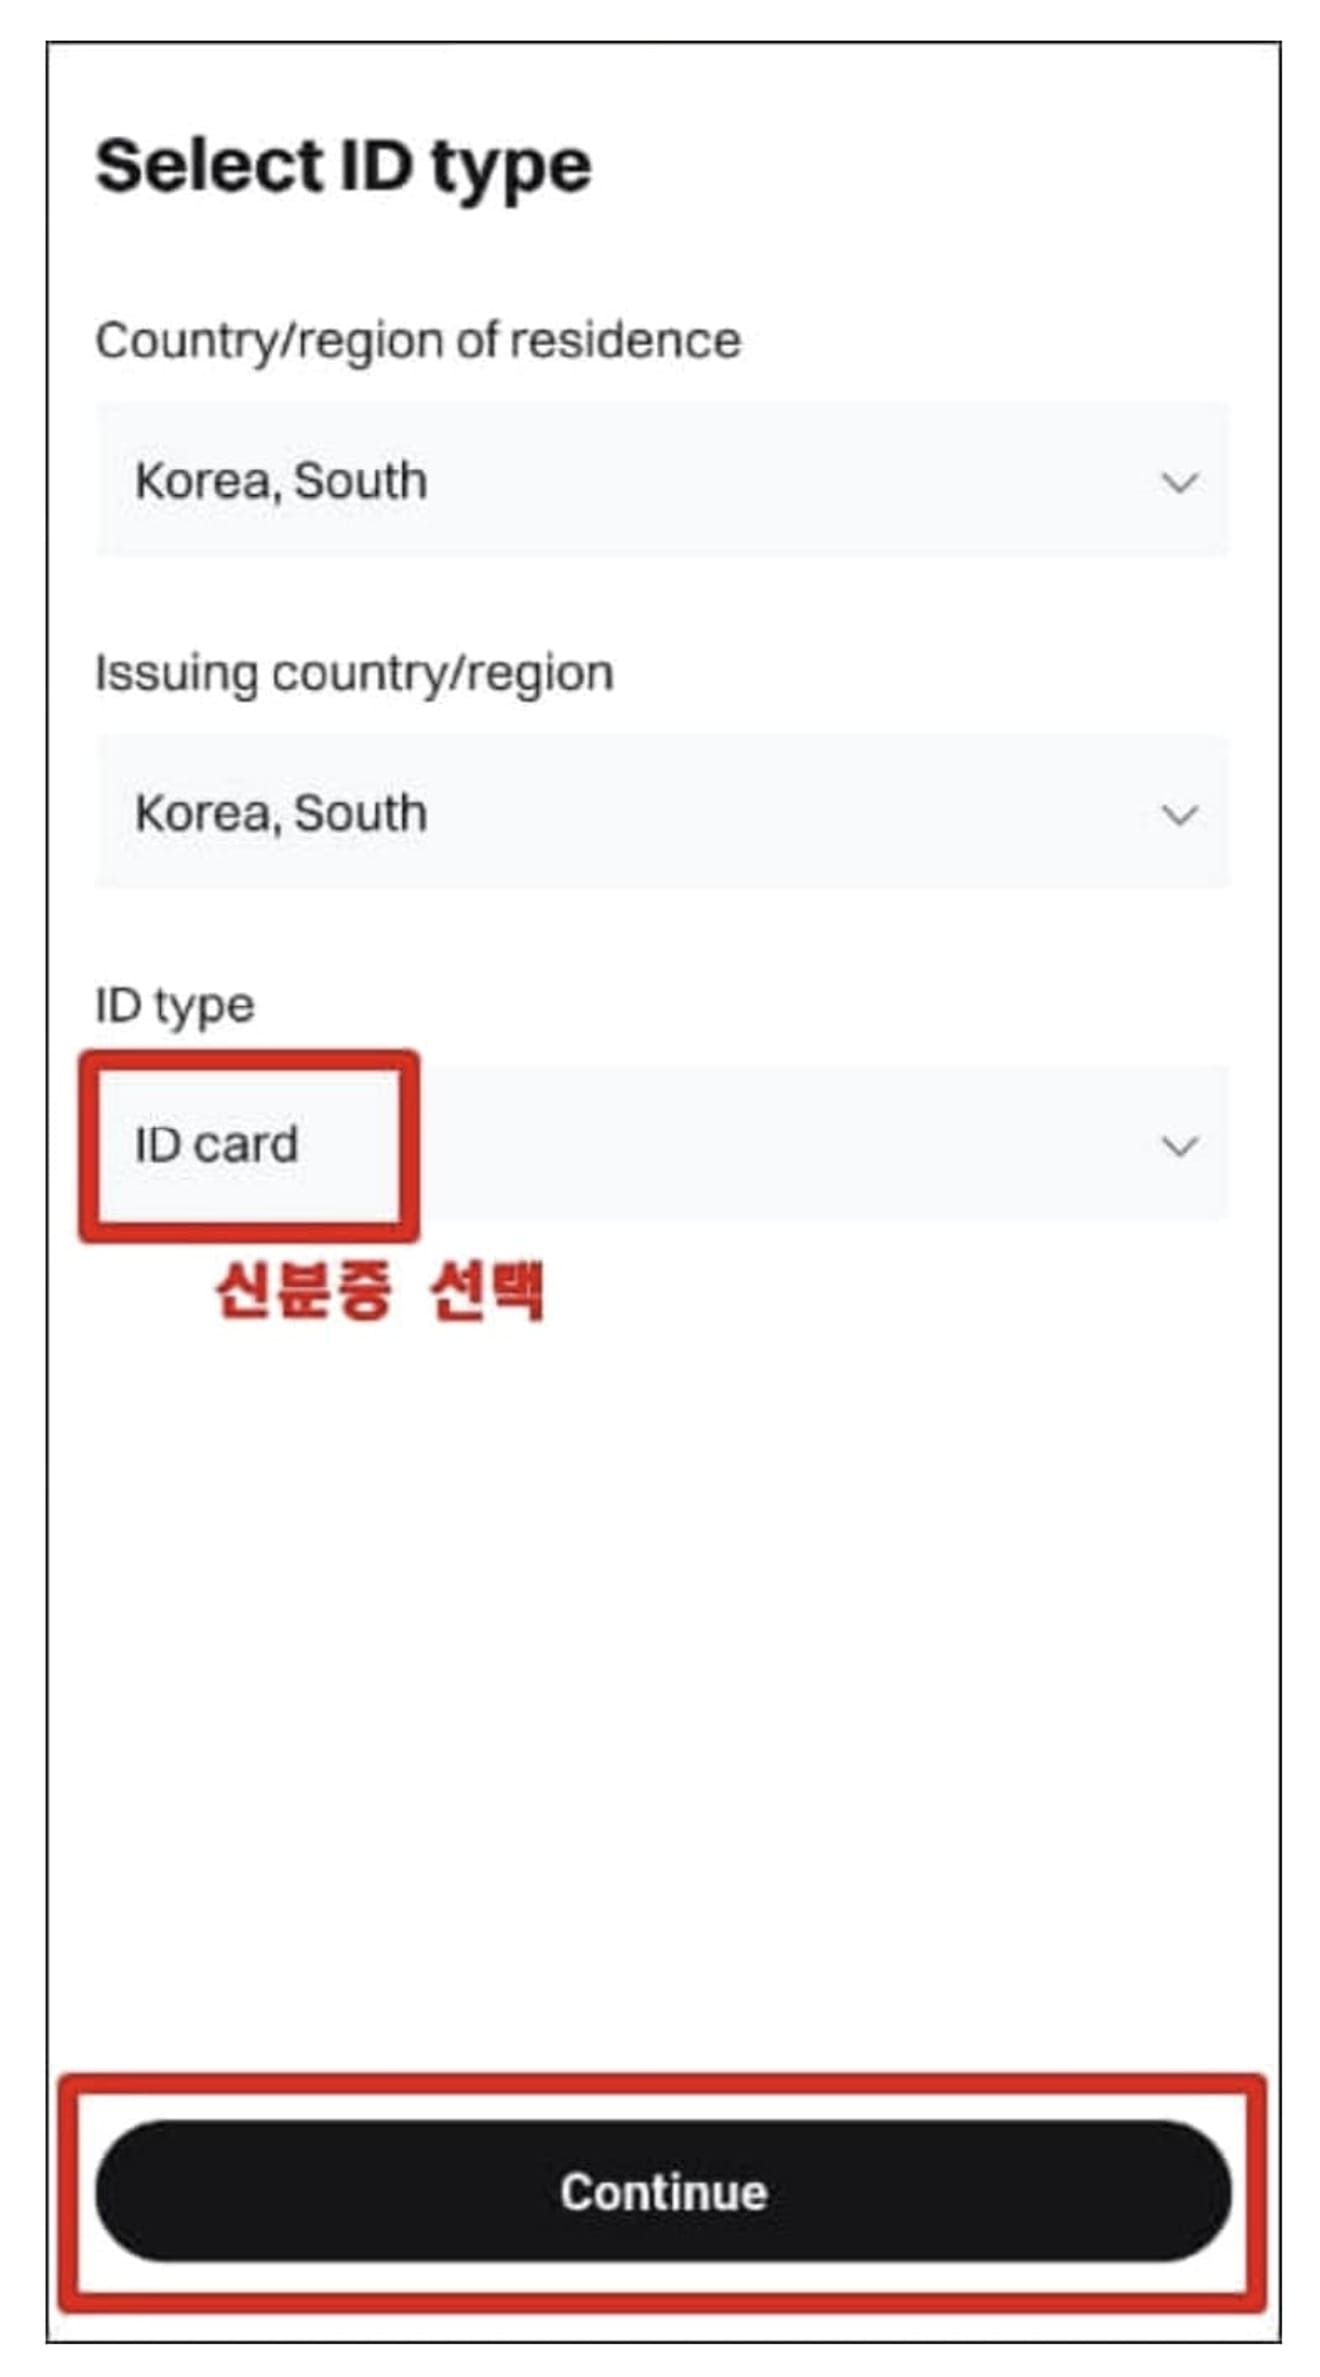
Make sure that both the country name and issuing region are set to 'Korea, South', and select the ID card to use for verification. You can choose any ID card, as verification is completed within 5 minutes. I will use my resident registration card (ID Card).
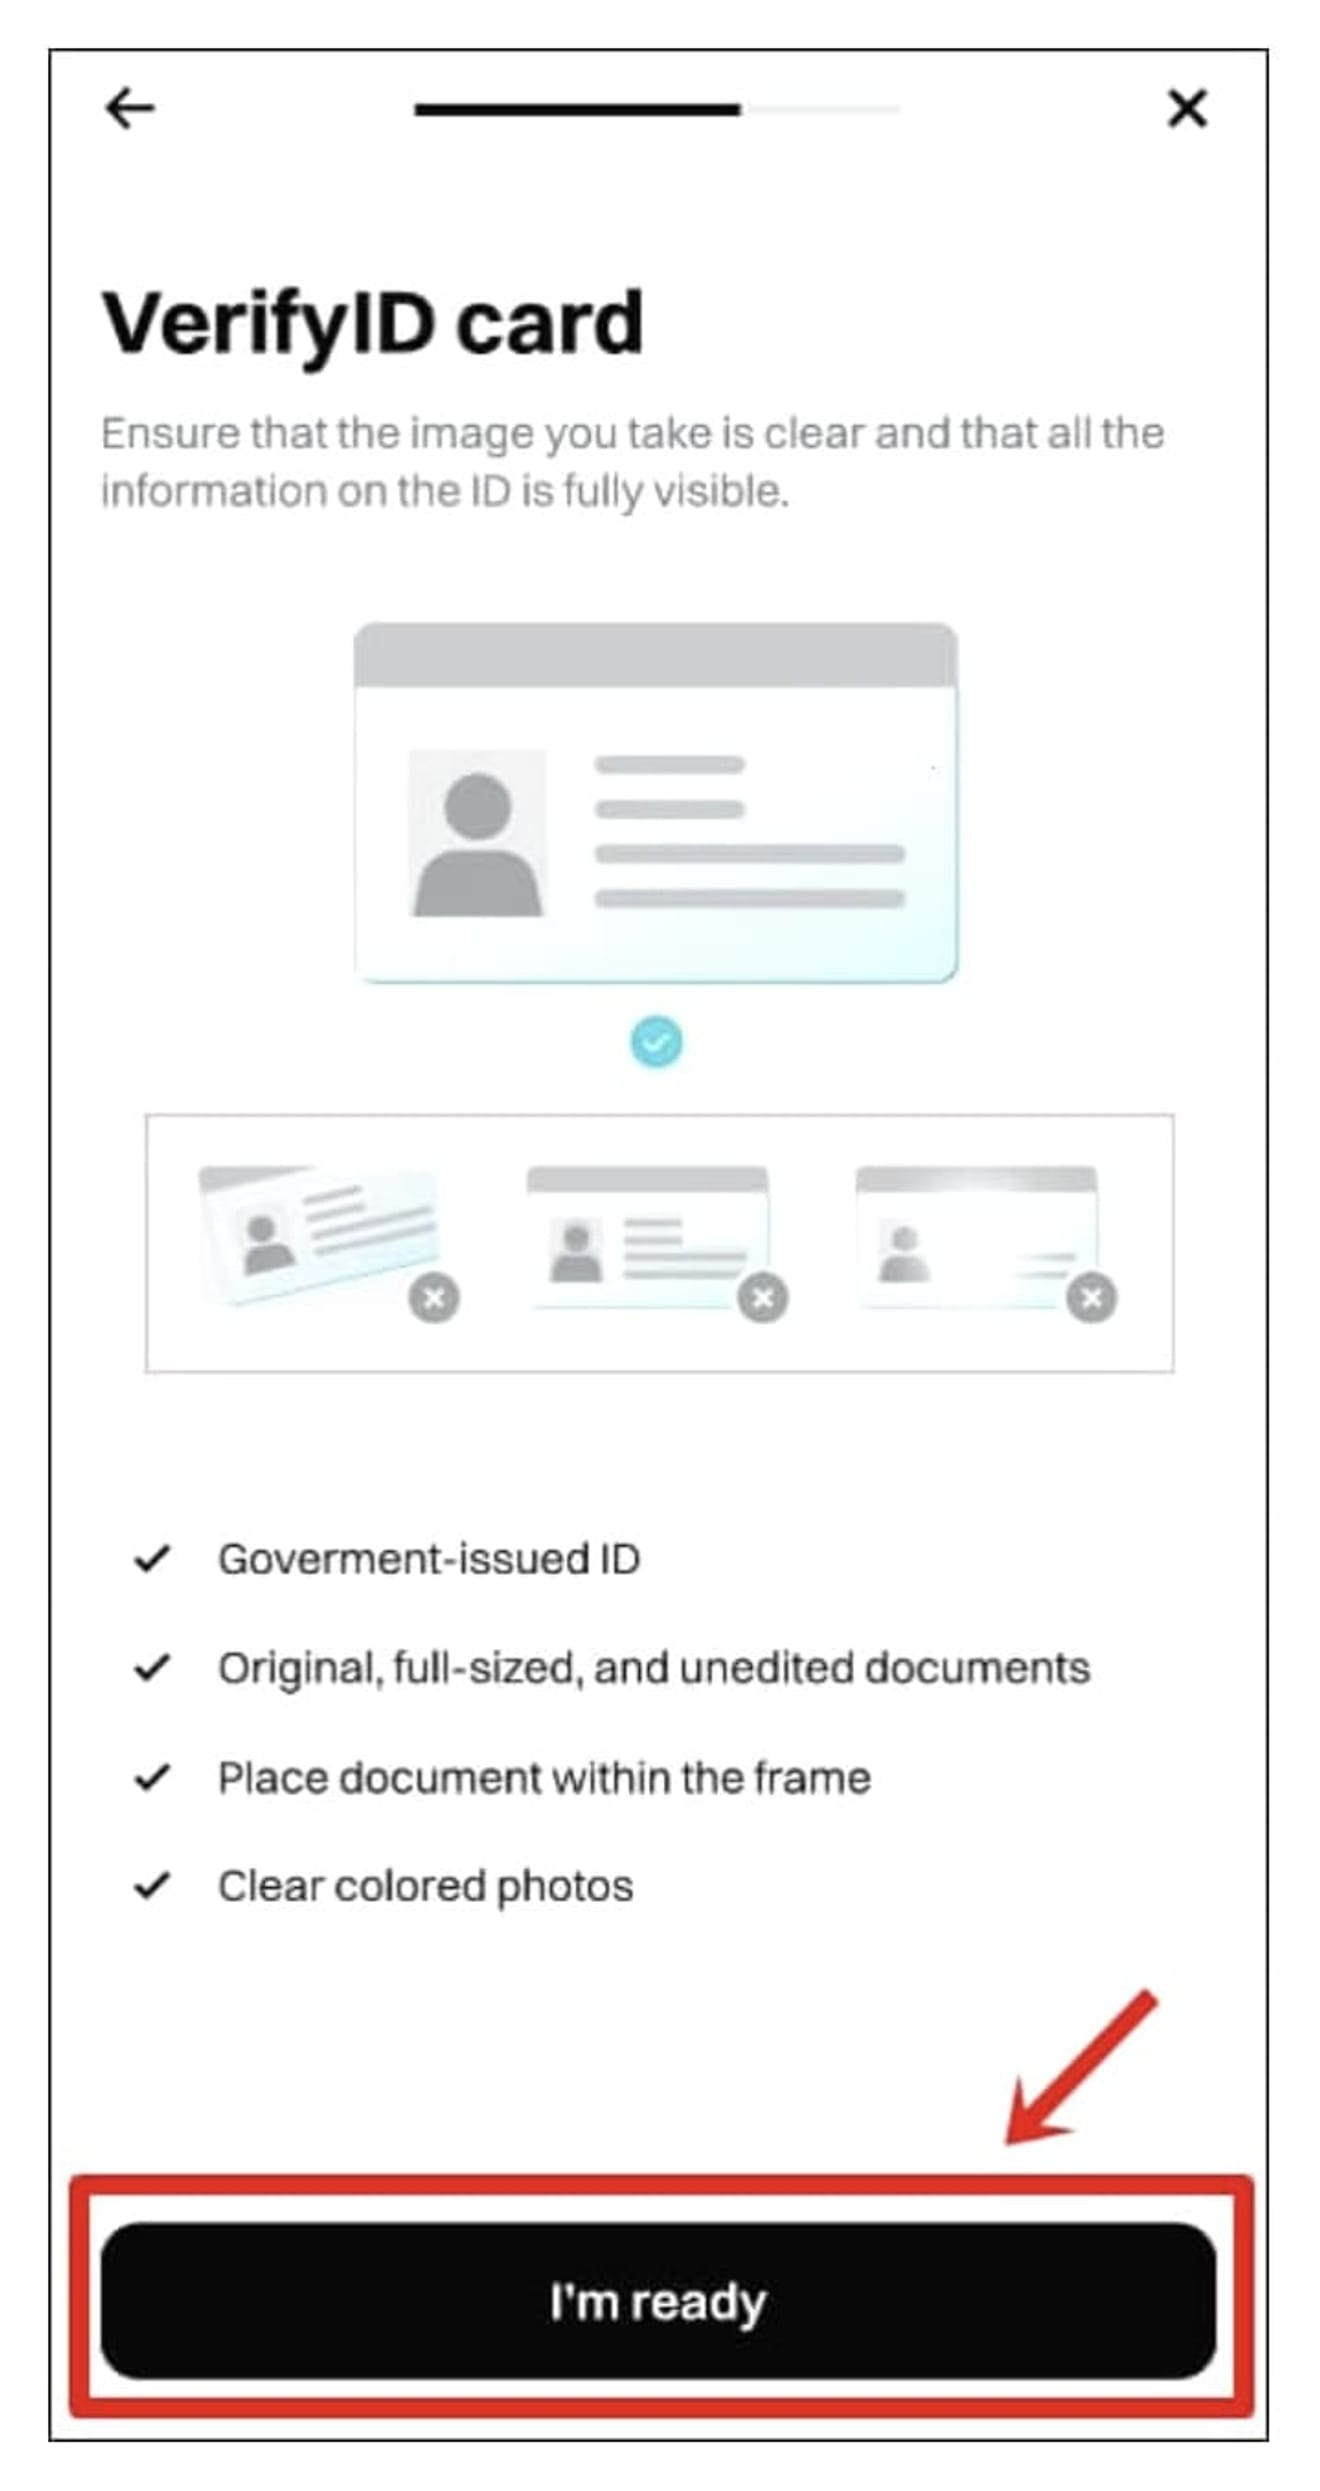
If you have prepared your ID, click the 'I'm ready' button.
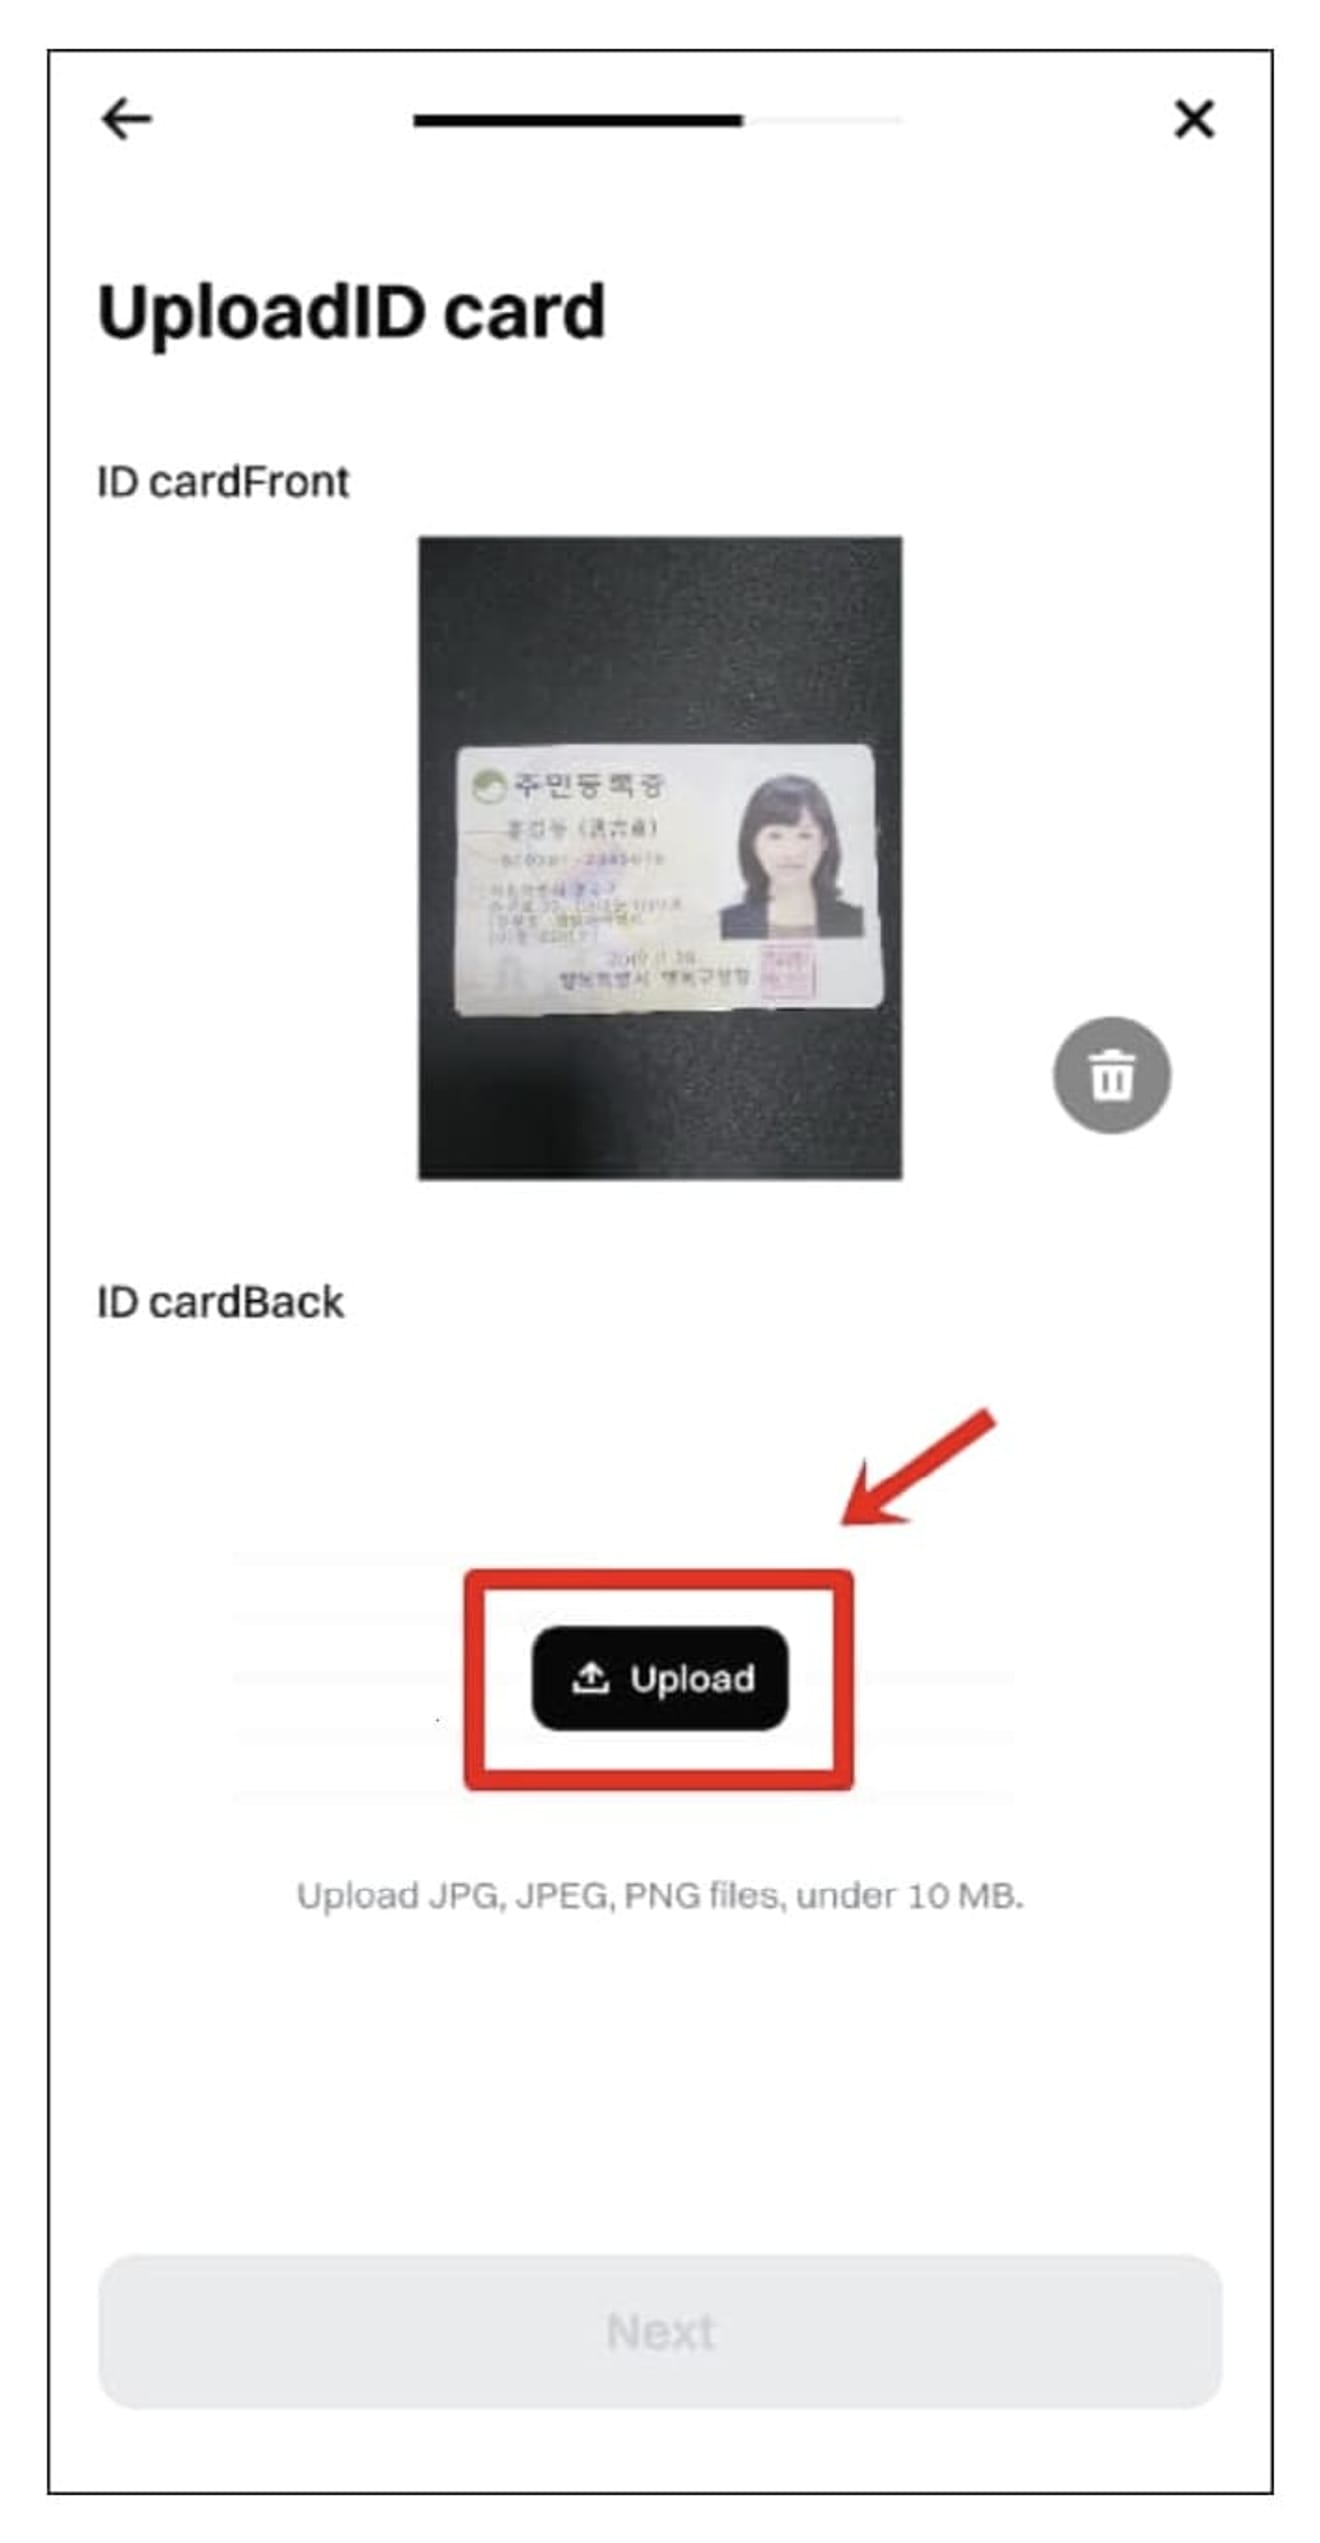
Now, proceed with ID card photography. Click the 'Upload' button and upload the front and back of your ID card. For passports, back-side photography is not required.
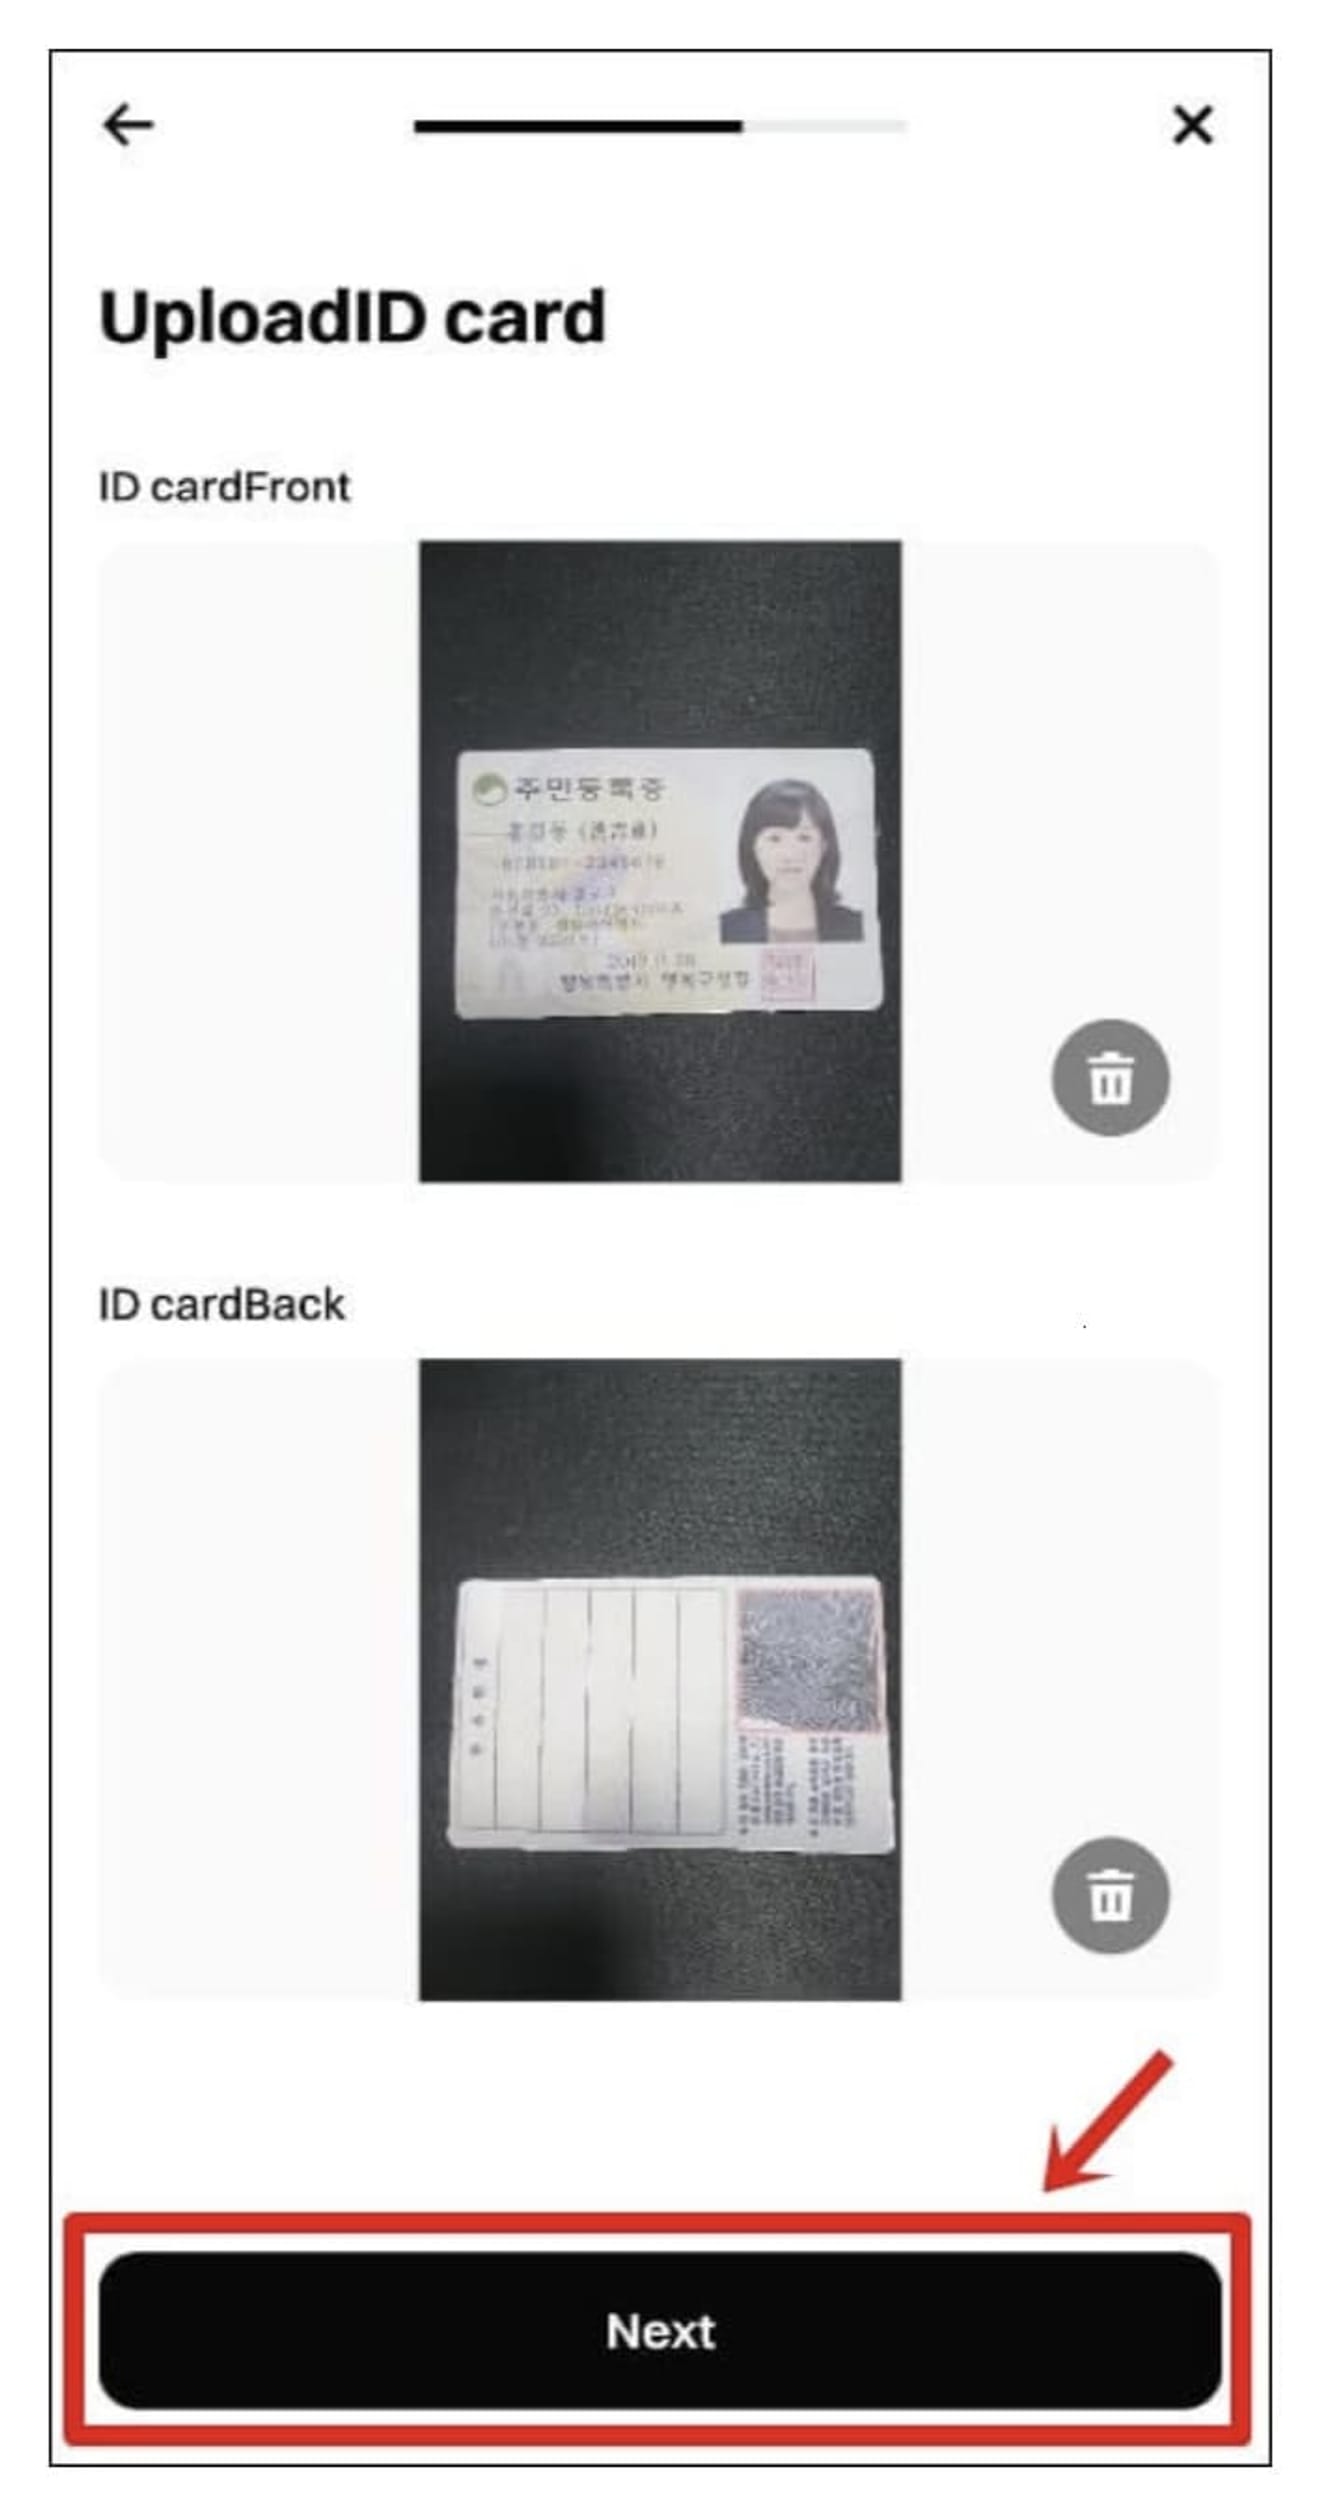
After uploading both the front and back, click the 'Next' button.
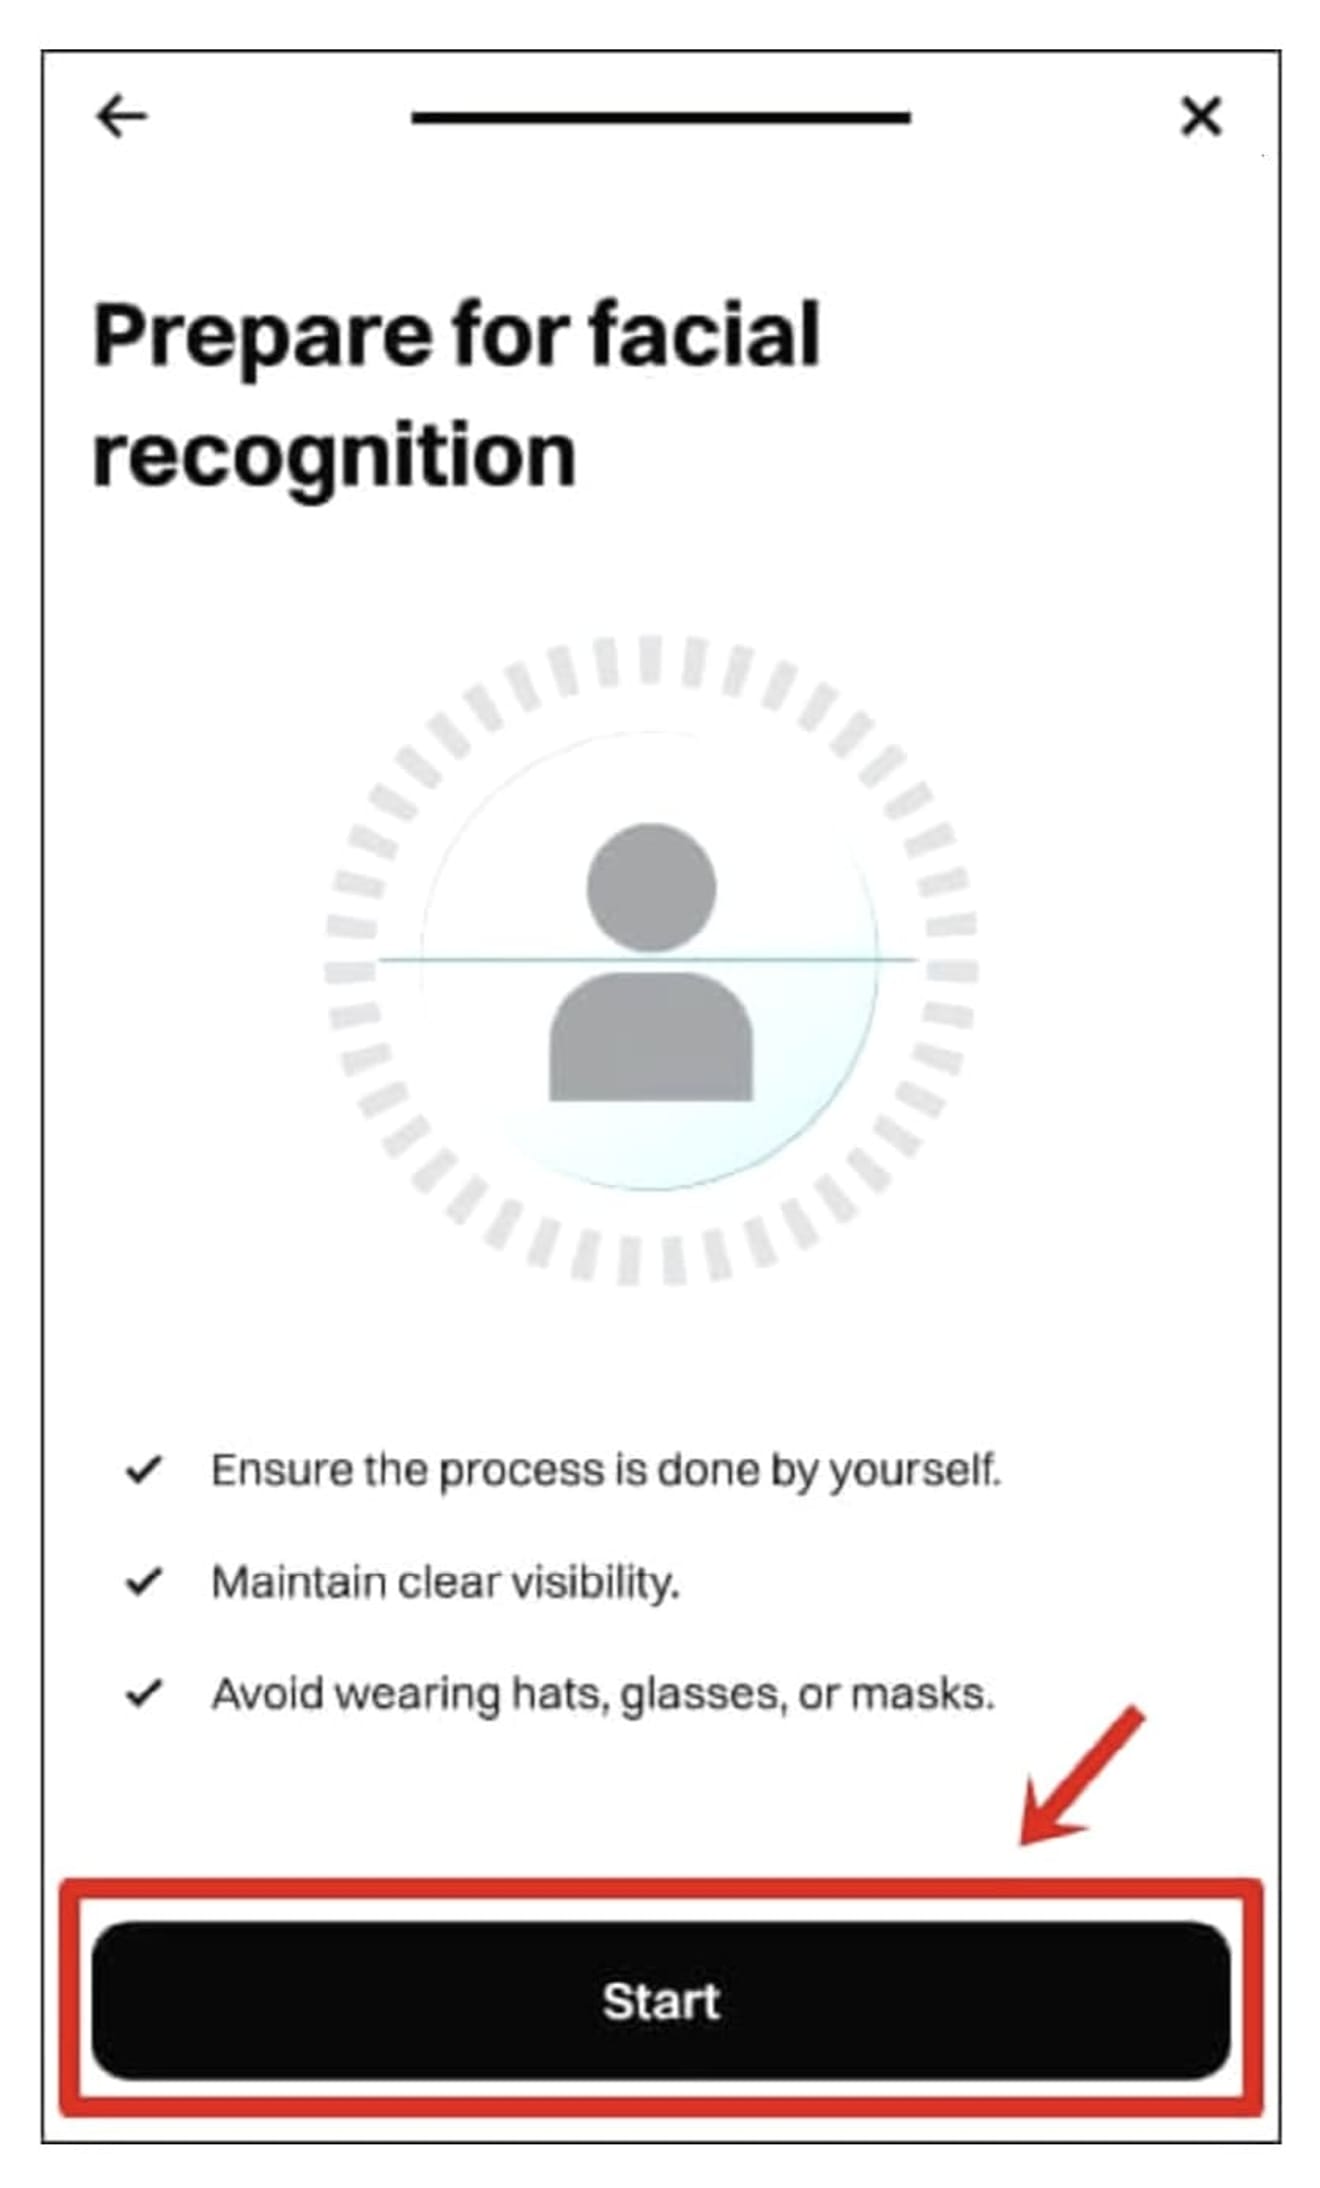
Next, proceed with facial photography. Press the 'Start' button.
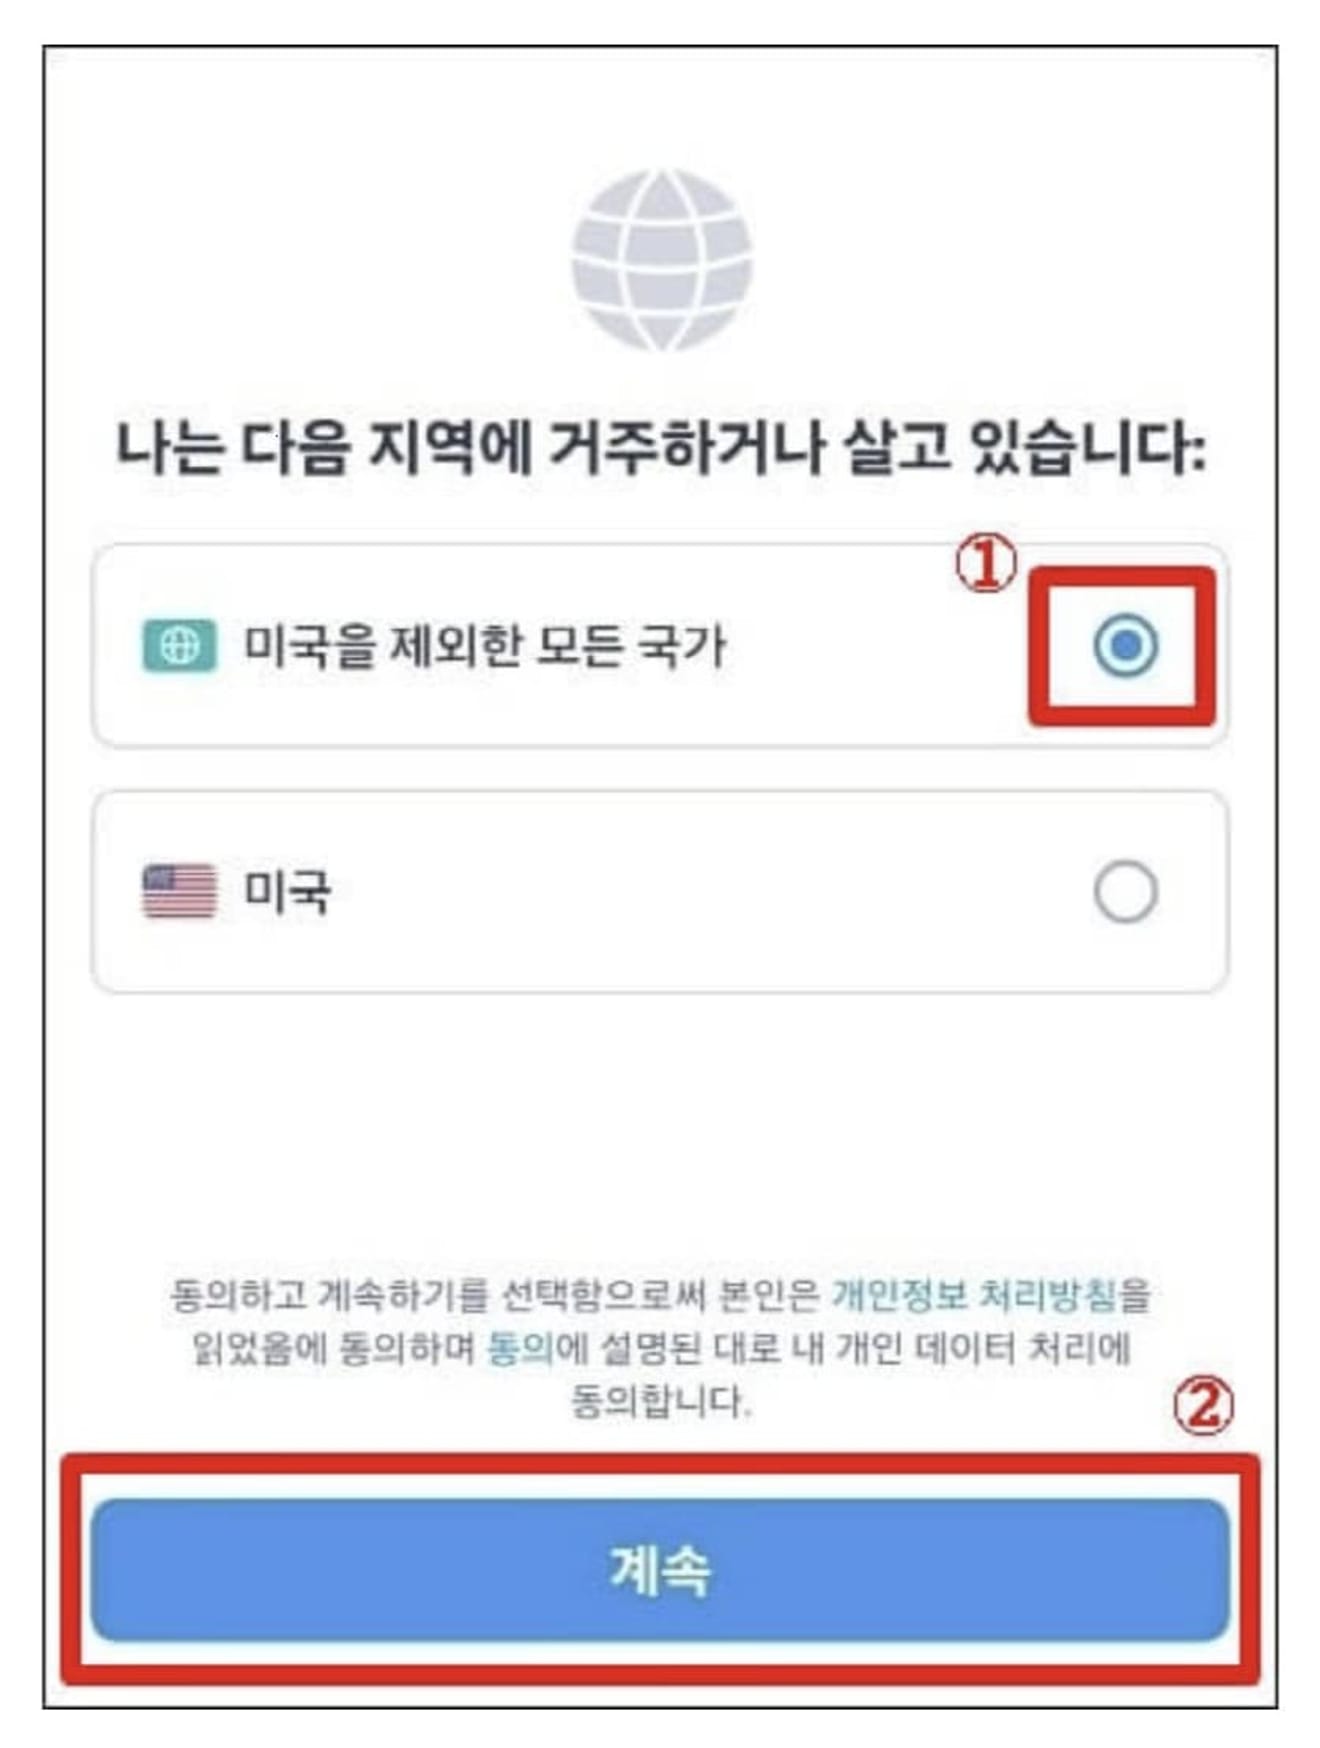
Select 'All countries except the US' and click the 'Continue' button.
Align your face with the circular frame, look directly at the camera, and wait for about 10 seconds.

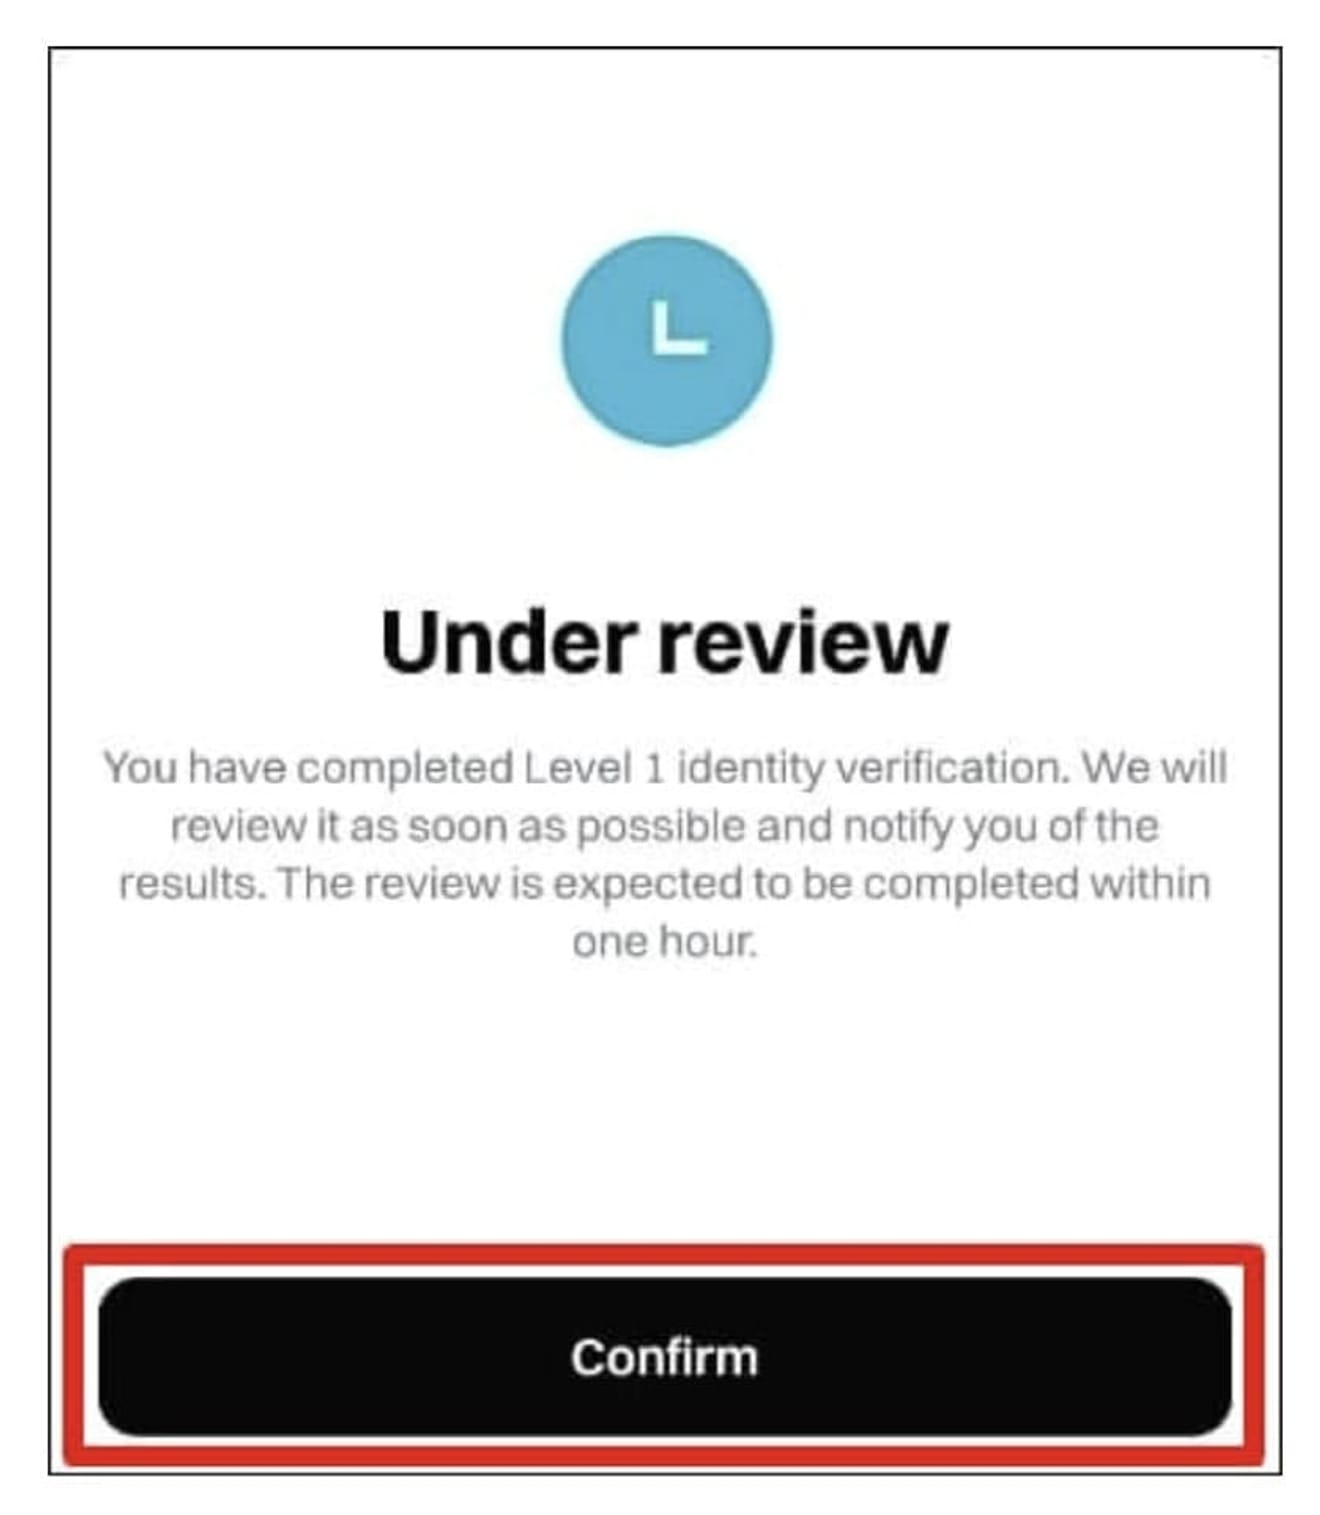
Once the facial photography is complete, close the window by pressing the 'Confirm' button. After that, wait for about 5 to 10 minutes.
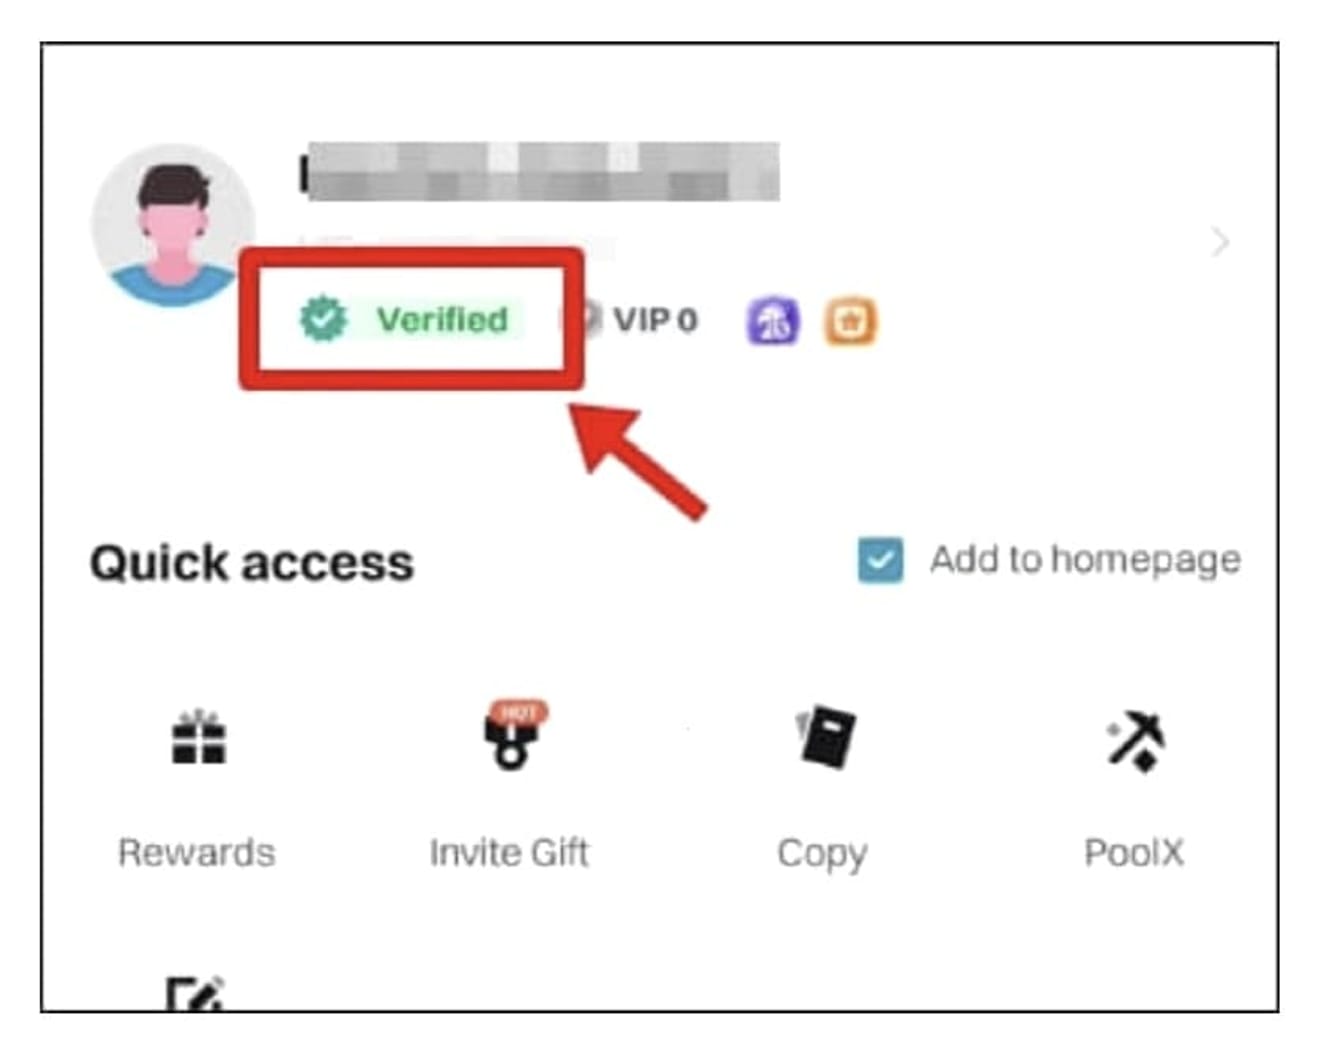
If you tap the 'person-shaped icon' in the upper-left corner of the main screen of the Bitget app, the phrase 'Verified' will appear as shown in the photo below. This completes your Bitget sign-up, and you are now ready to use the exchange.
Bitget OTP Settings Method
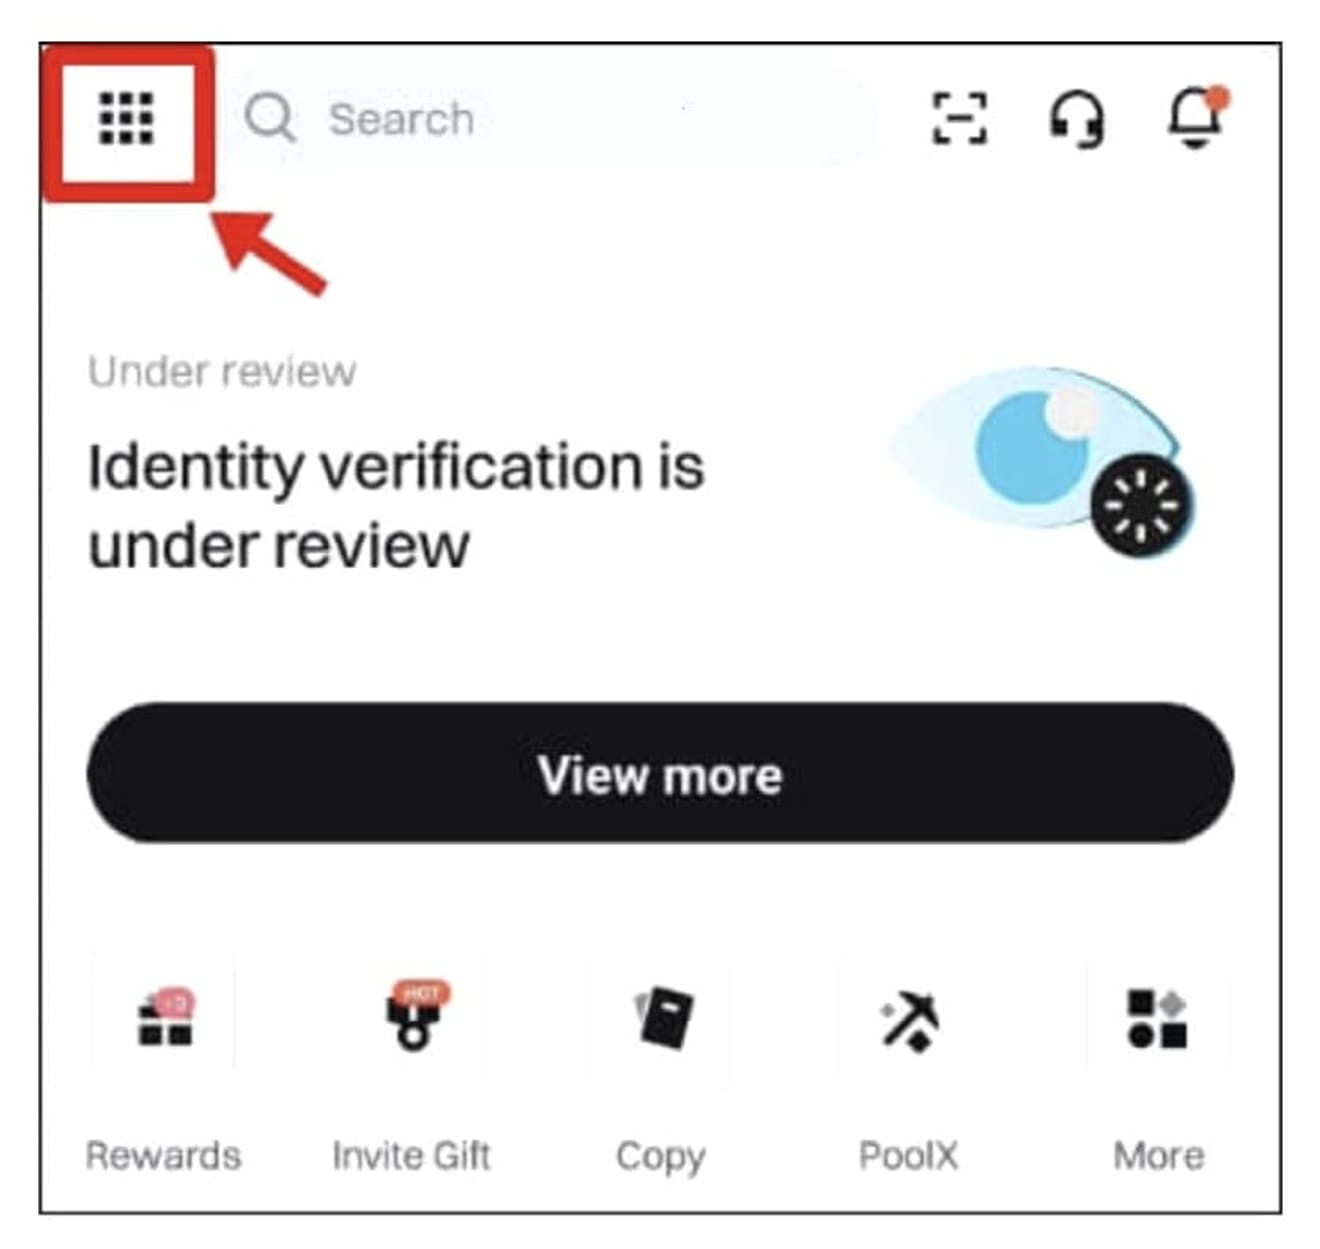
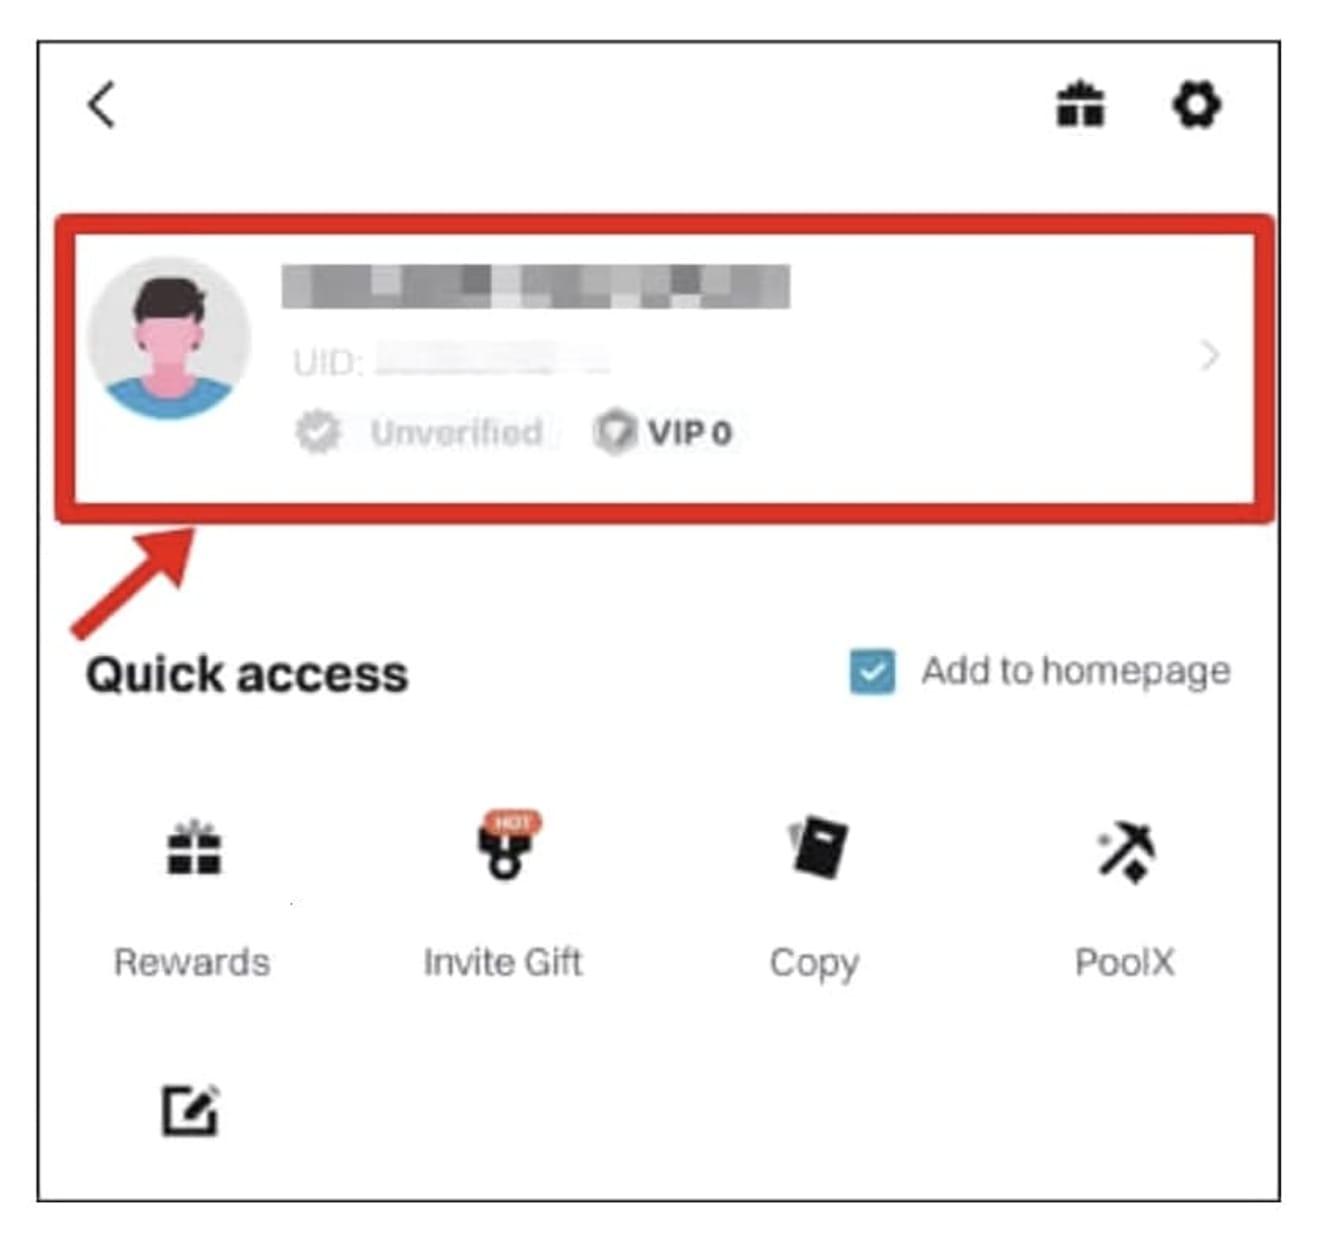
The purpose of OTP settings is to protect assets from hacking and is necessary when requesting withdrawals in the future. Now let's proceed with the settings. Click the 'dice-shaped icon' in the upper-left corner of the app's main screen, and then select the 'profile icon'.
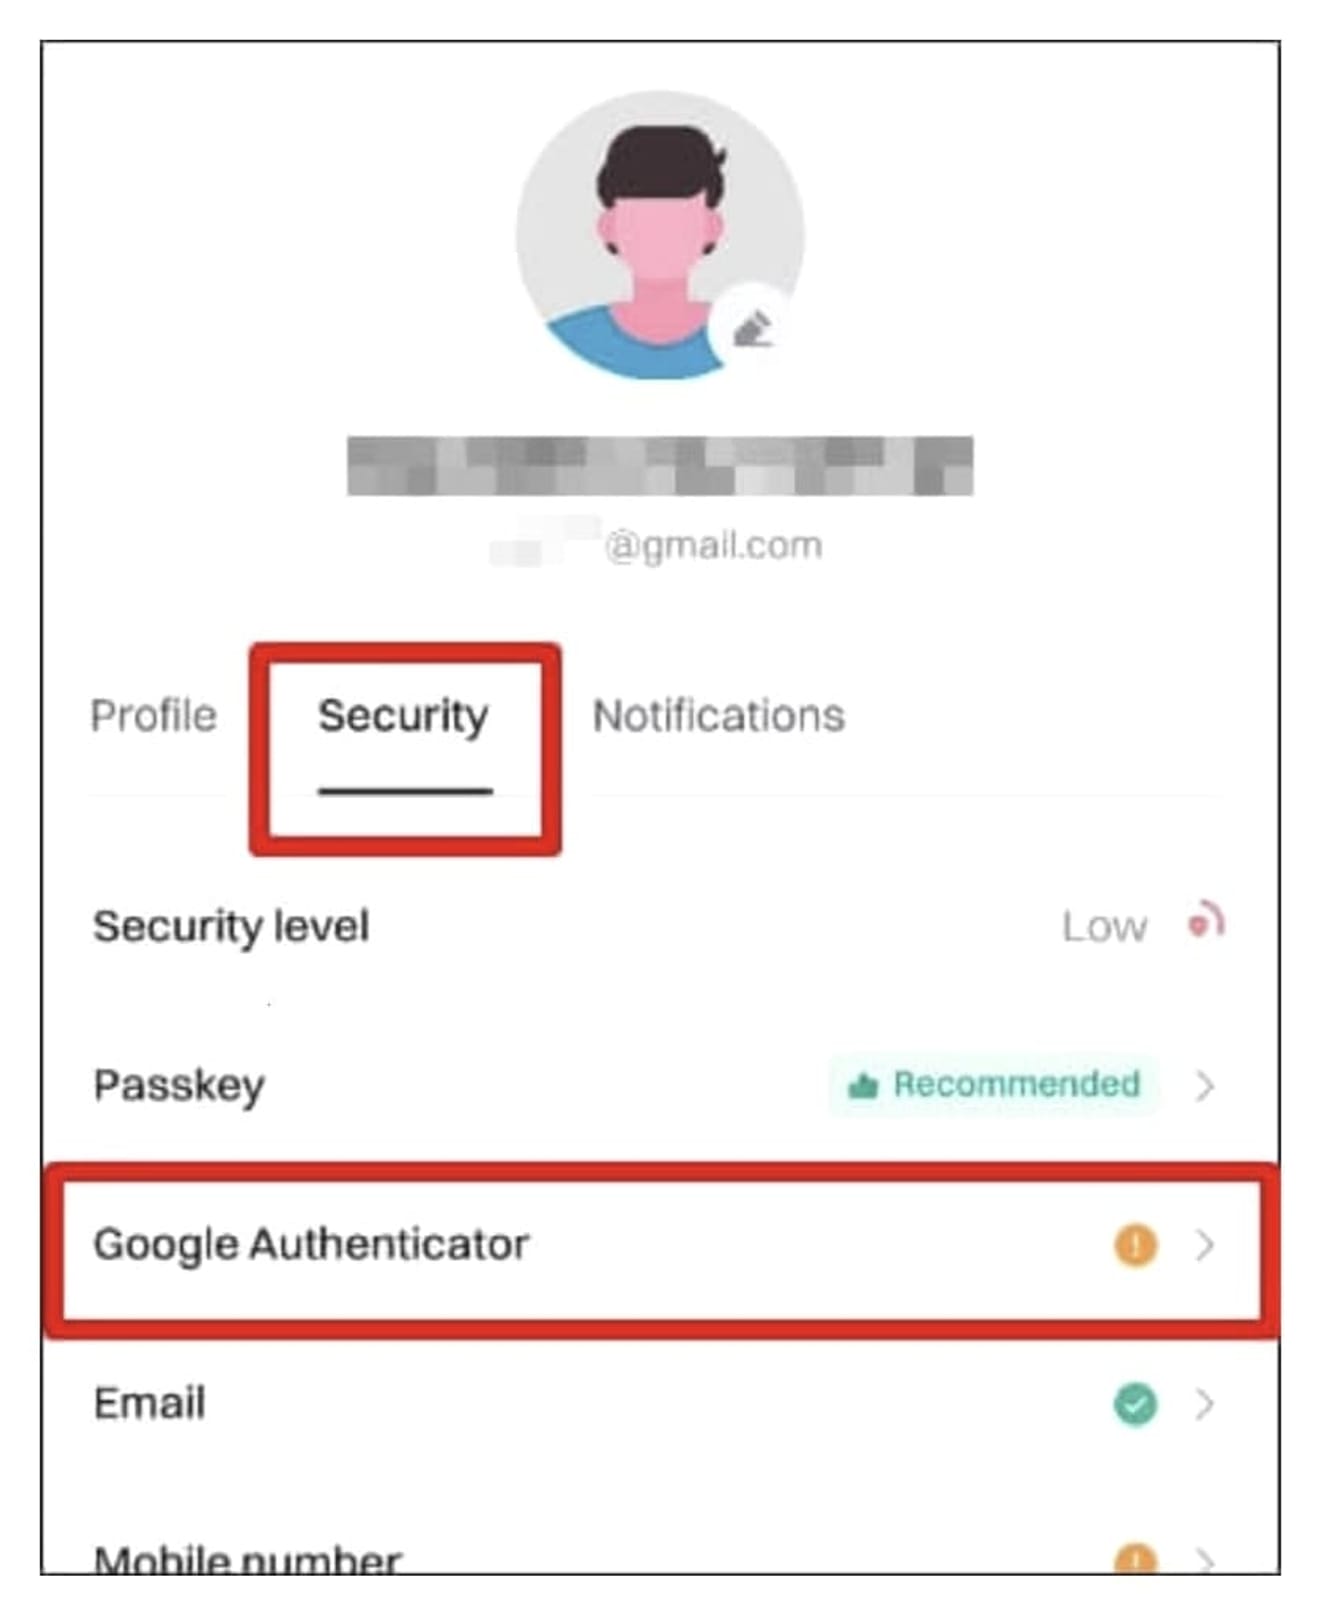
Select 'Security' and then click 'Google Authenticator' to enter.
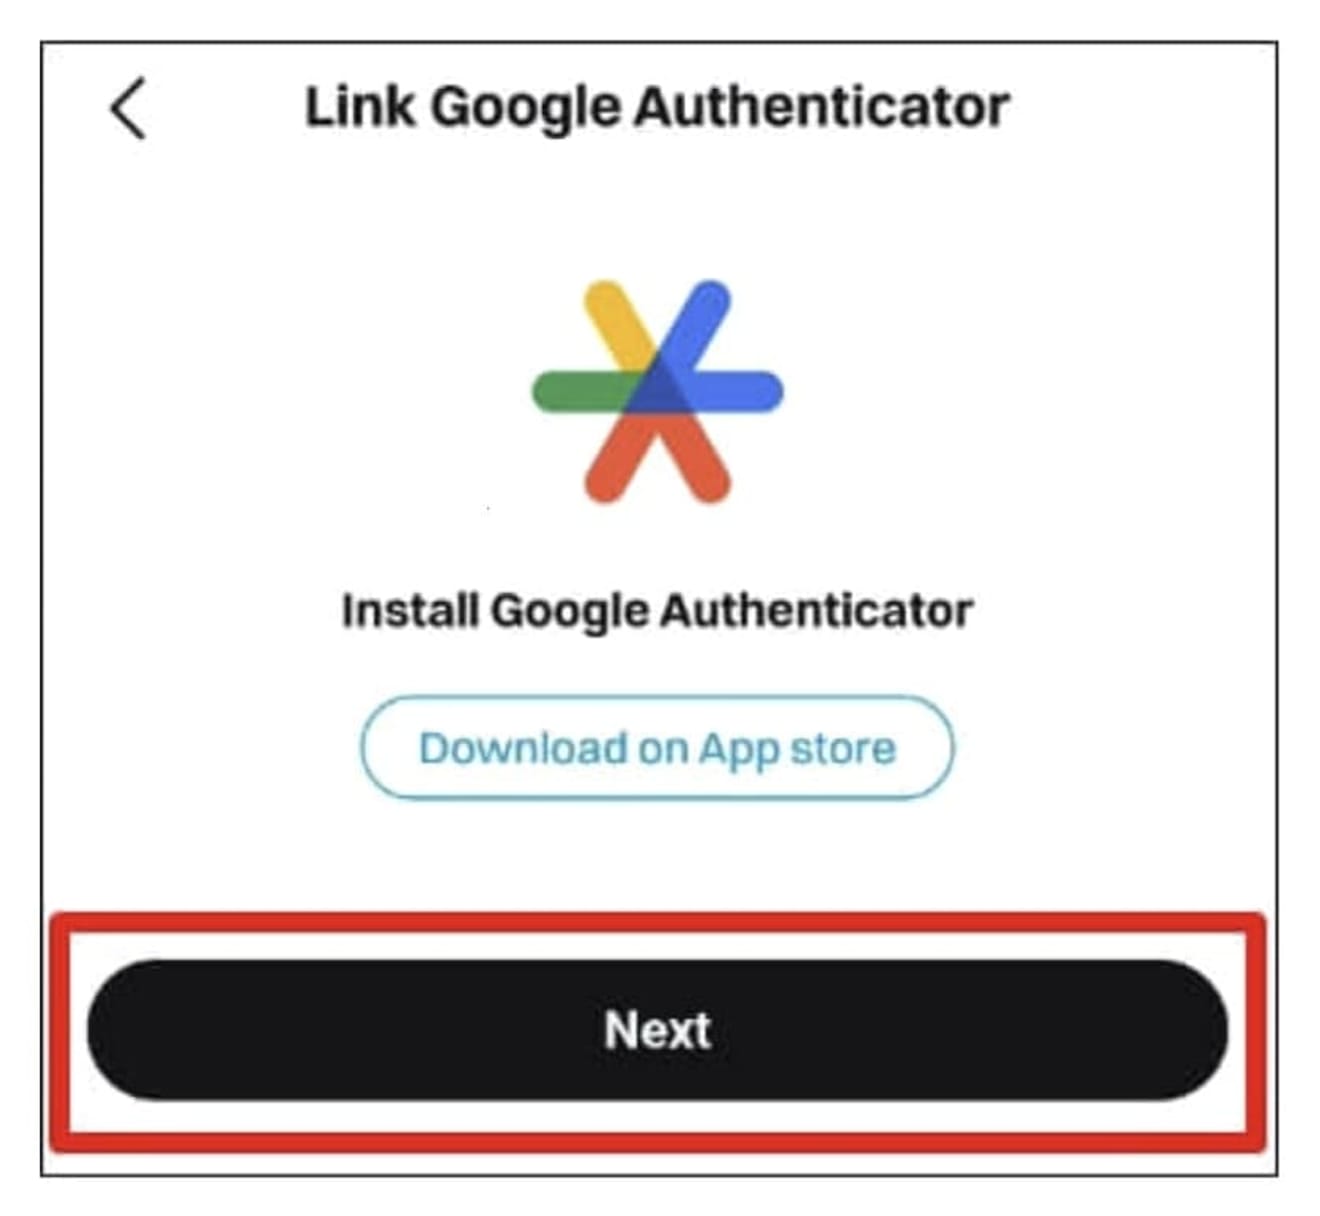
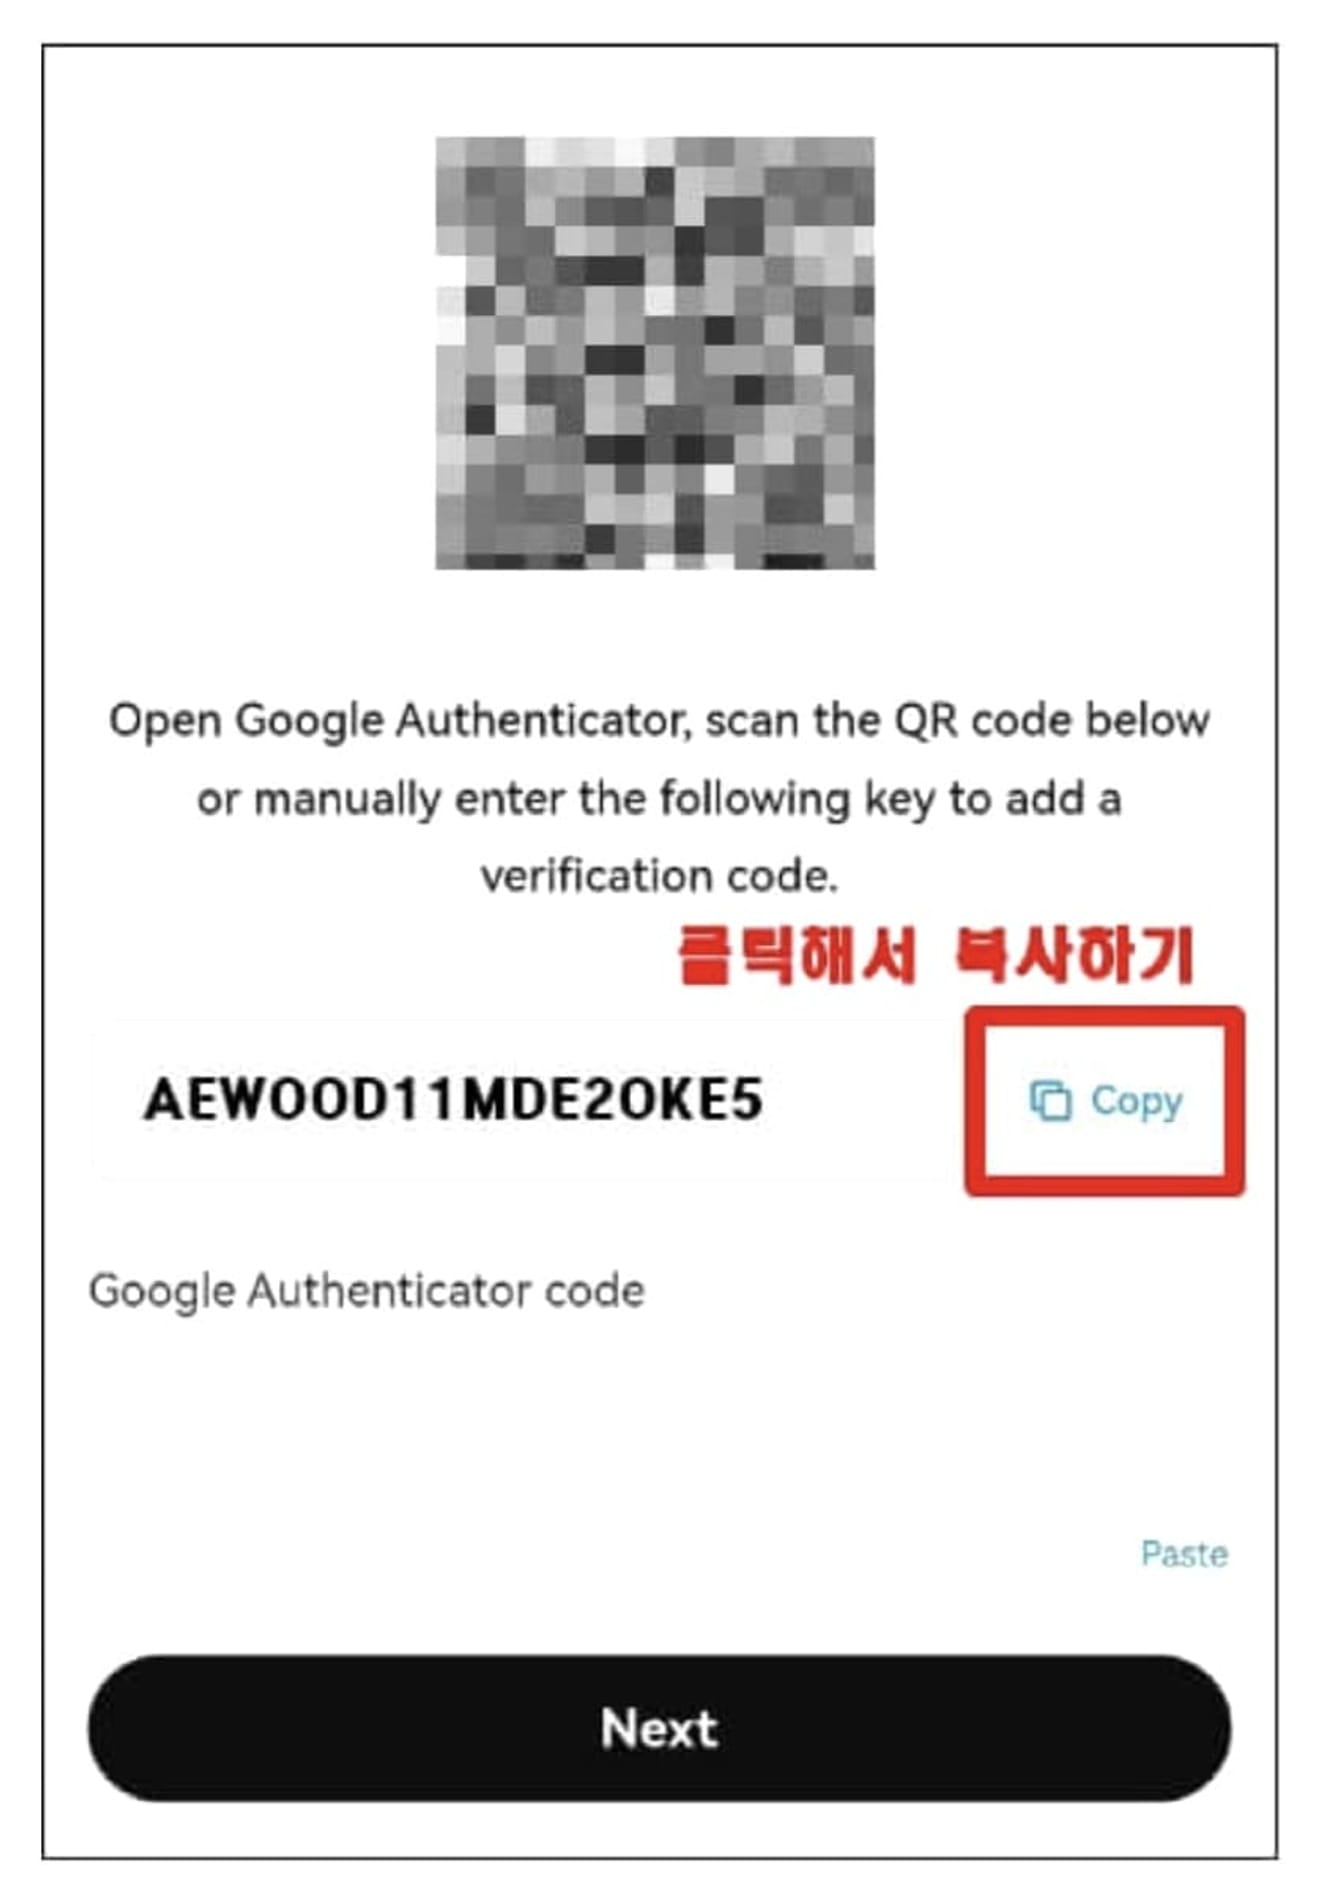
Then, click the 'Next' button and copy the 16-digit verification code.
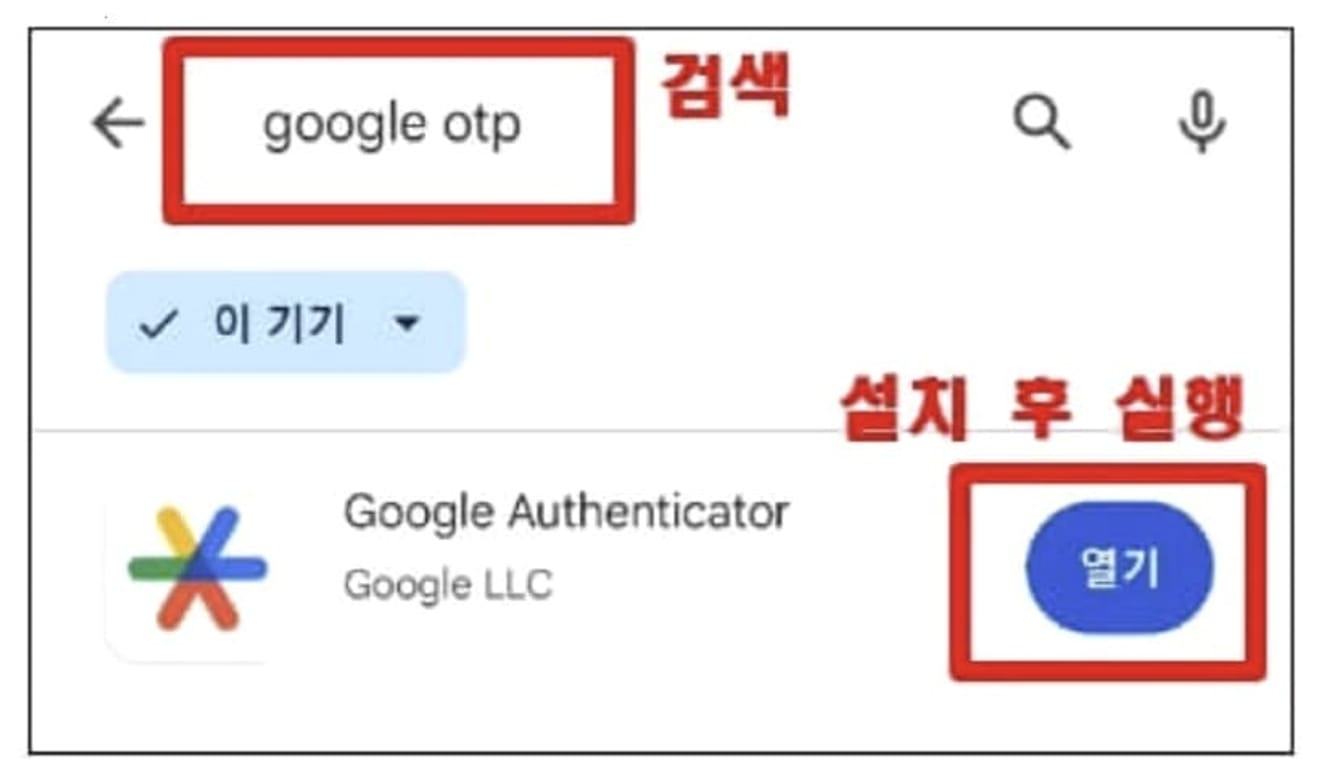
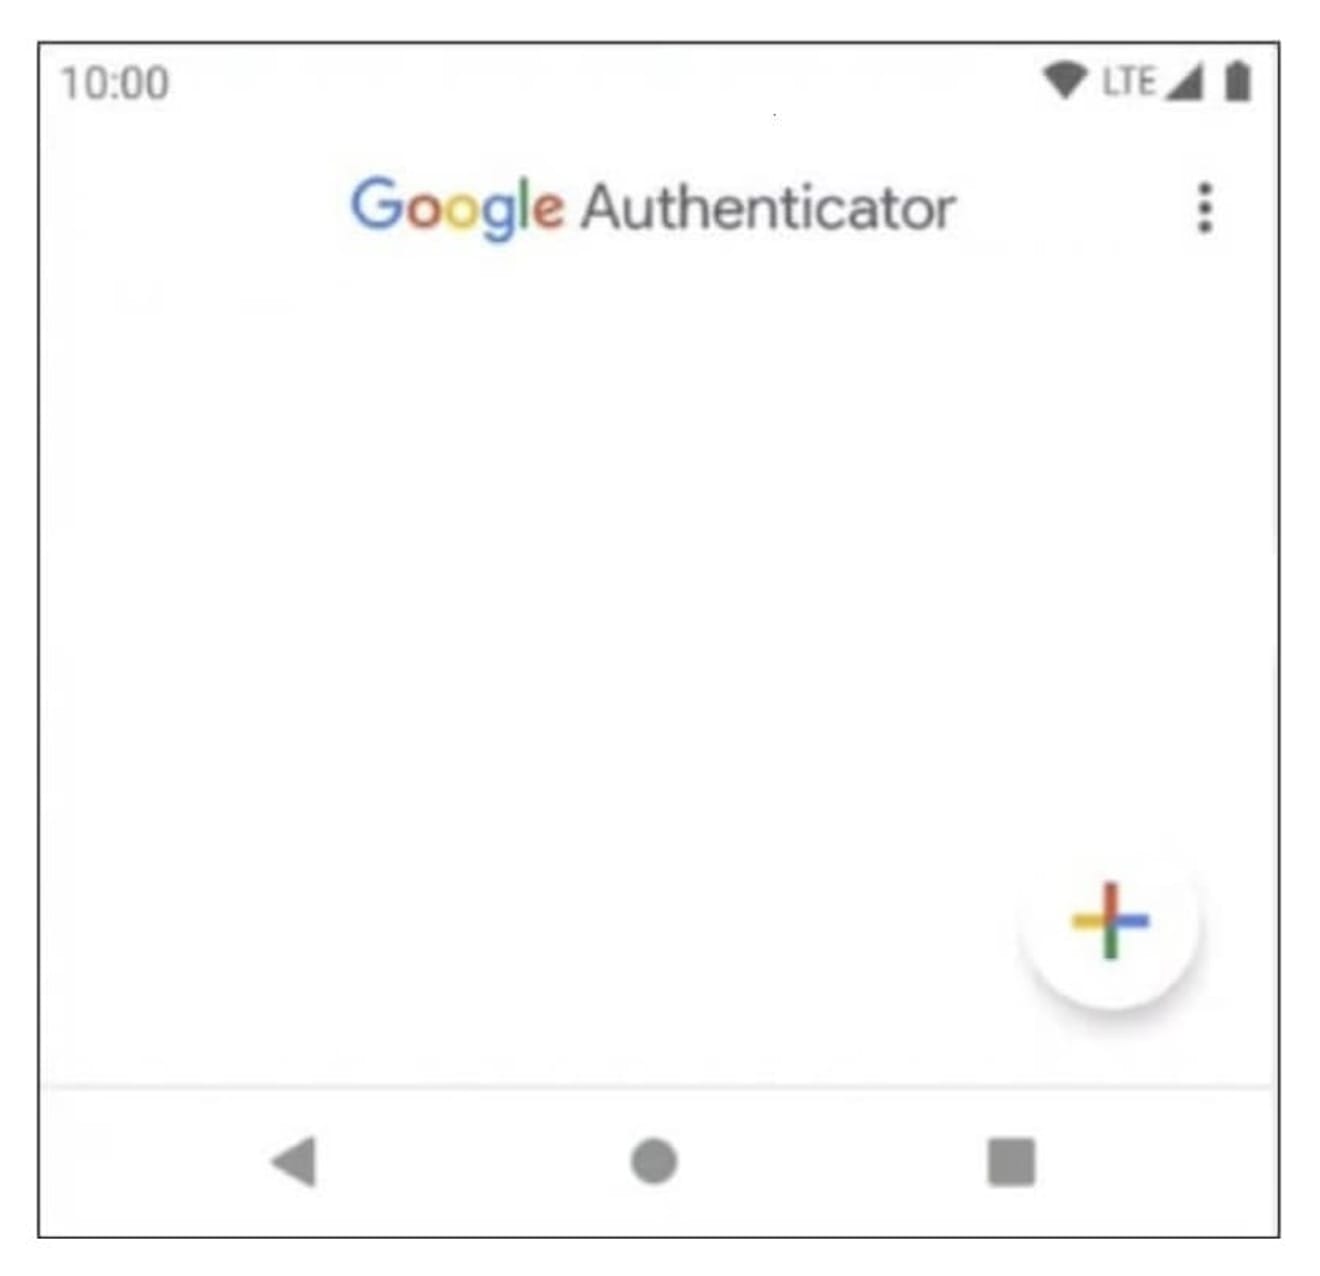
Now, connect to the Google Play Store (or App Store for iPhone). Enter 'Google OTP' in the search bar, install the 'Google Authenticator' app, and run it. Next, skip the tutorials and introduction until the basic OTP screen appears as shown in the photo below.
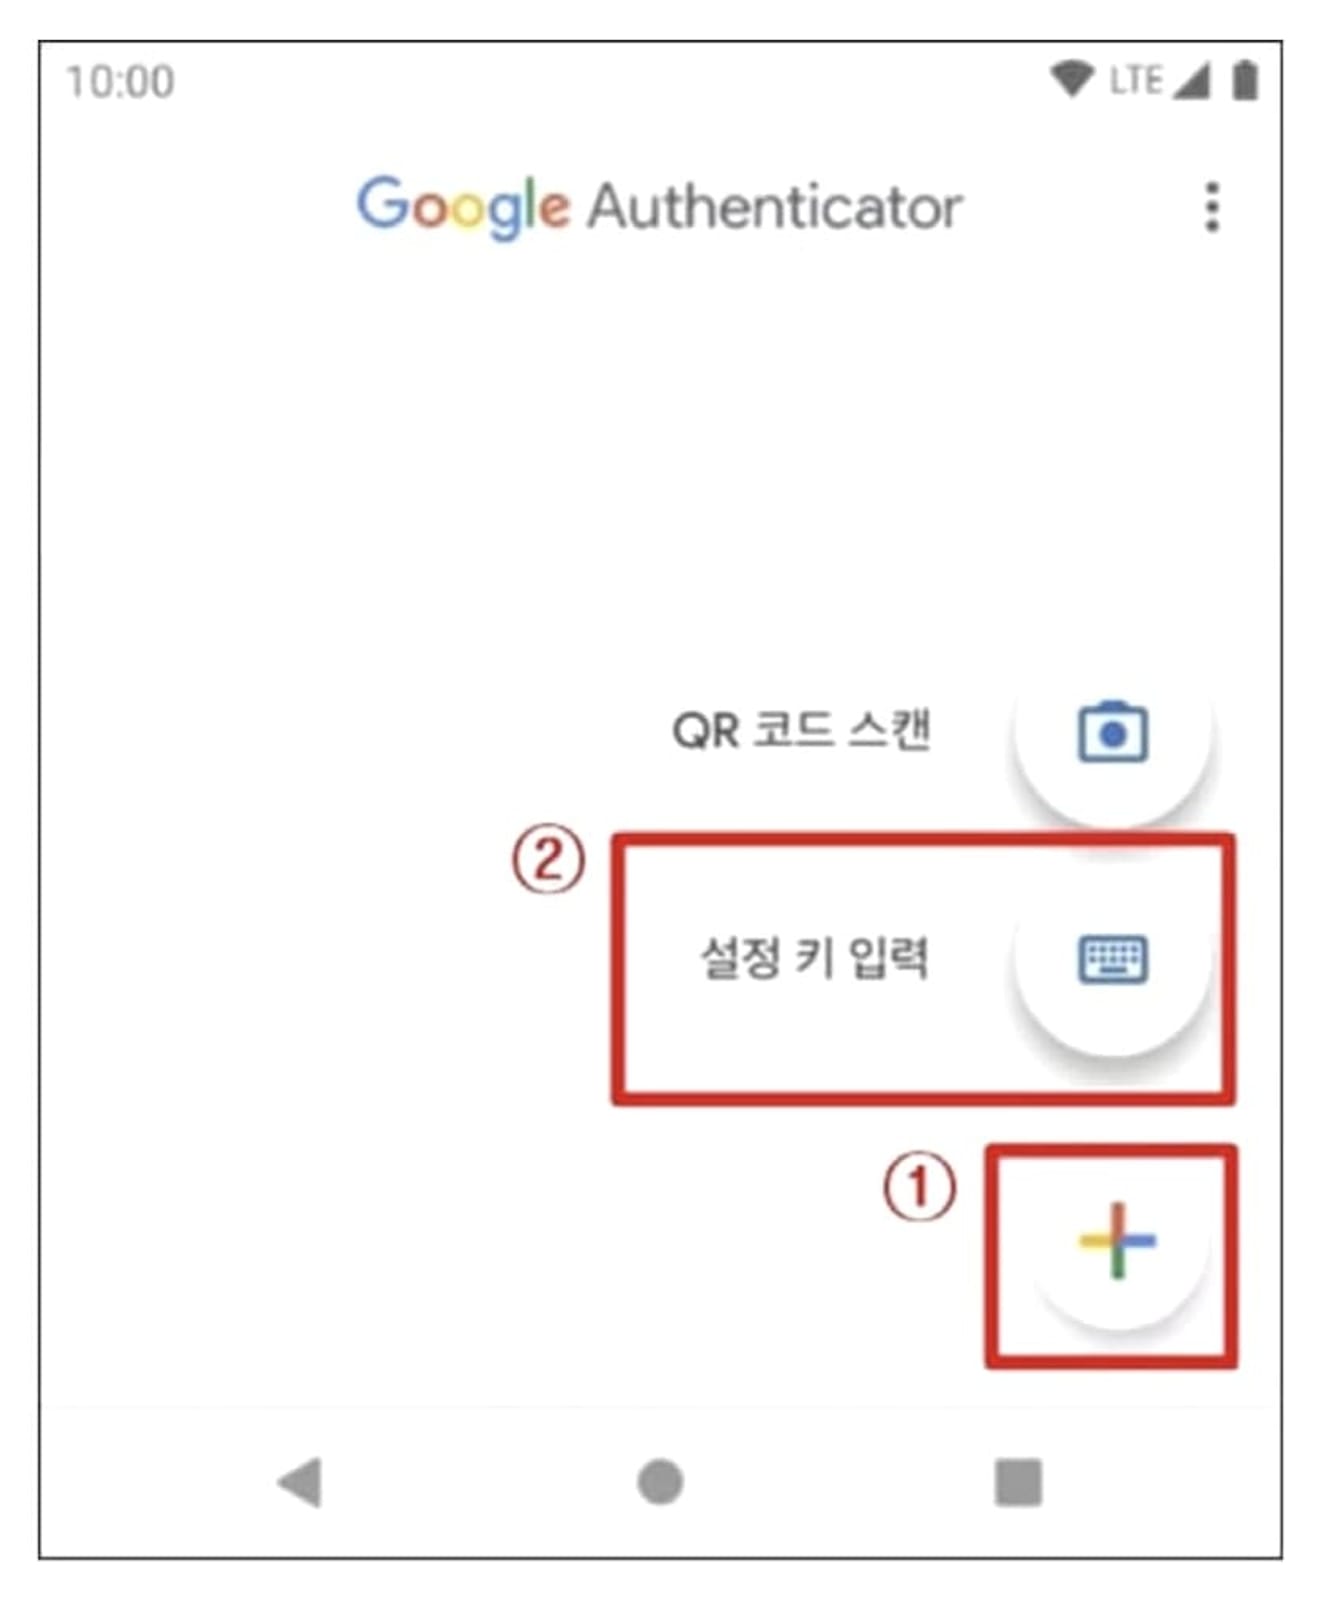
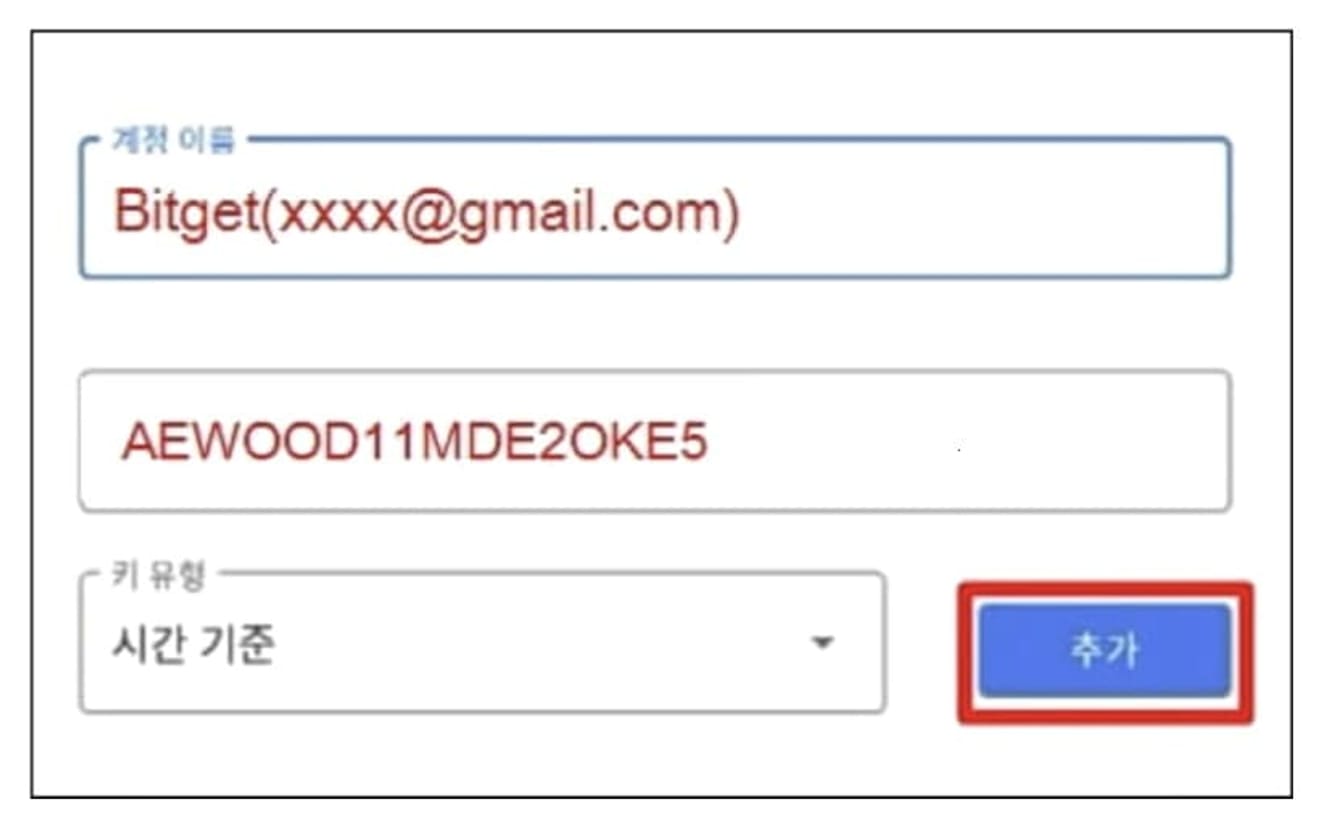
Then, click the plus (+) button in the lower right corner and select 'Enter setup key'. Then, enter the account name as desired, referring to the picture below, and paste the 16-digit setup key you copied earlier into the 'Your key' section. Finally, add the Bitget OTP by pressing the 'Add' button.
Then, an OTP that changes every minute will be generated, as shown in the photo below. Now, open the Bitget app, enter the 6-digit number in the Google Authenticator code field, and click the 'Next' button.

Then, click the 'send' button, enter the 6-digit verification code you received from your email or SNS, and click the 'Confirm' button.

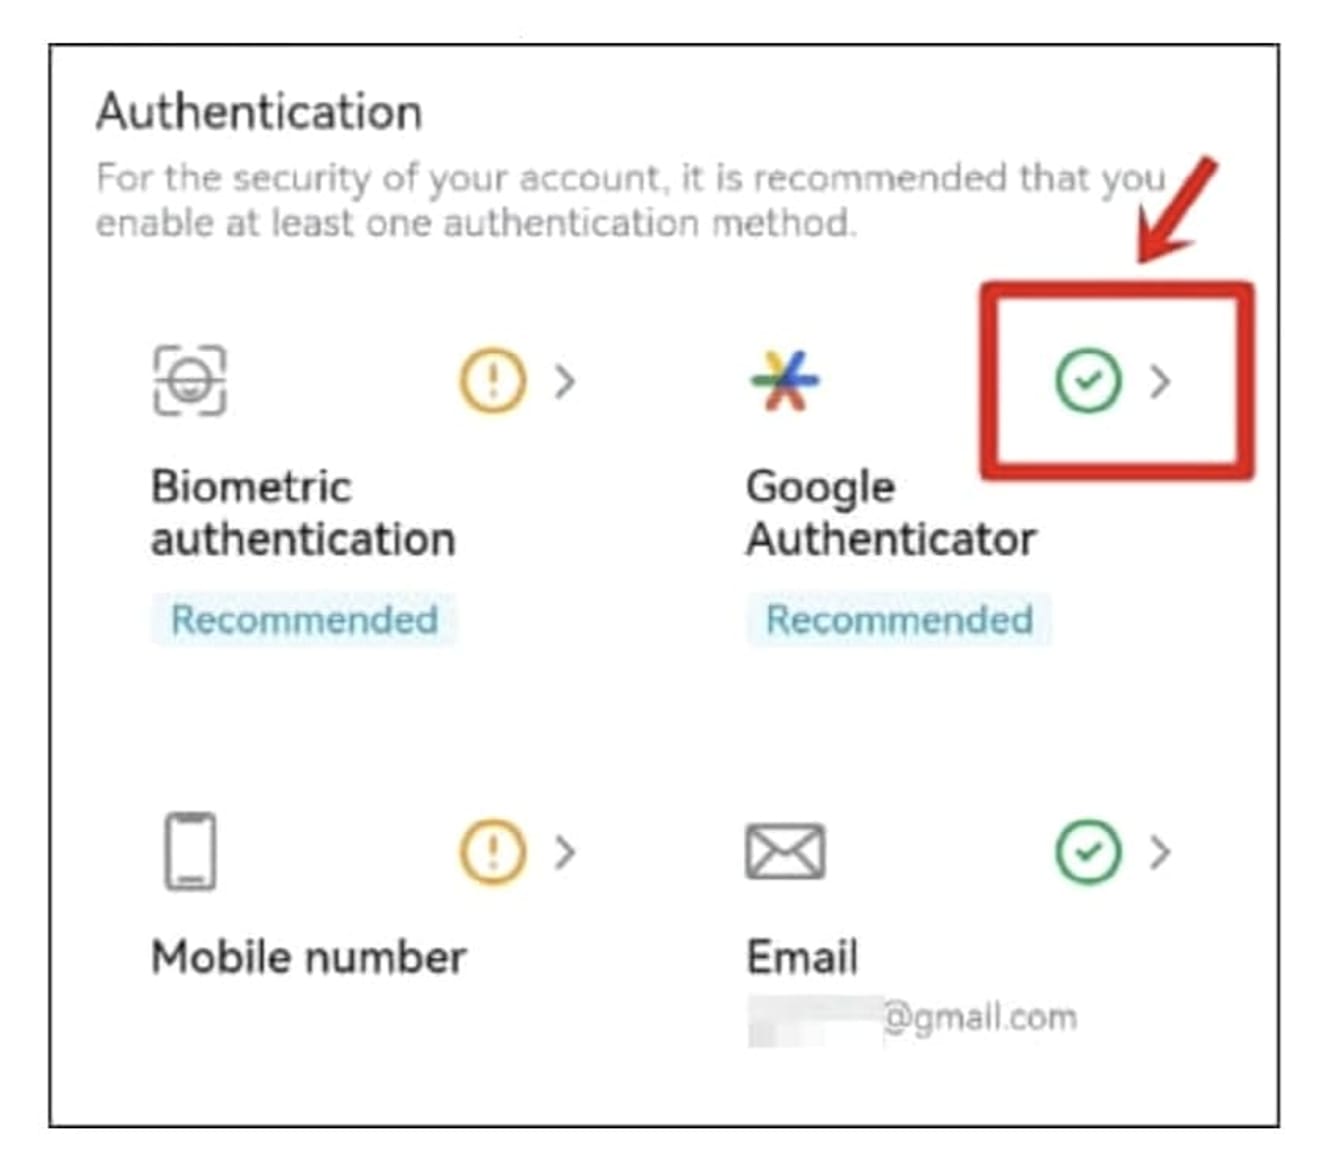
After that, go back to the Security menu, and you can see that the green check icon next to 'Google Authenticator' is activated, as in the image below.
Now the OTP registration process is complete.