How to use Bitget | Sign up | KYC Identity Verification | Deposit | How to Trade Futures
In this blog post, we will learn how to use Bitget, the sign-up process, KYC identity verification, deposit methods, and how to trade futures. Are you interested in cryptocurrency trading but worried about using overseas exchanges? Bitget is a global exchange with an easy-to-use interface and powerful trading features, making it relatively easy for beginners to access. However, even with a convenient platform, it's hard to make the most of it without knowing how to use it correctly. Especially for overseas exchanges, there are factors to consider at various stages such as registration, verification, asset management, and actual trading. In this article, we've systematically organized all the steps for those who are new to Bitget. We will cover everything you need for practical use, including signing up and essential security settings, KYC identity verification procedures, safe deposit methods, and the basics of leverage-based futures trading.

1. Signing up for Bitget
By signing up through the link below, you can receive a discount on futures trading fees.
You can sign up by entering your email address or mobile phone number, but signing up with an email address is highly recommended. The password should be at least 8 characters long and should be a mix of numbers, uppercase letters, and lowercase letters.
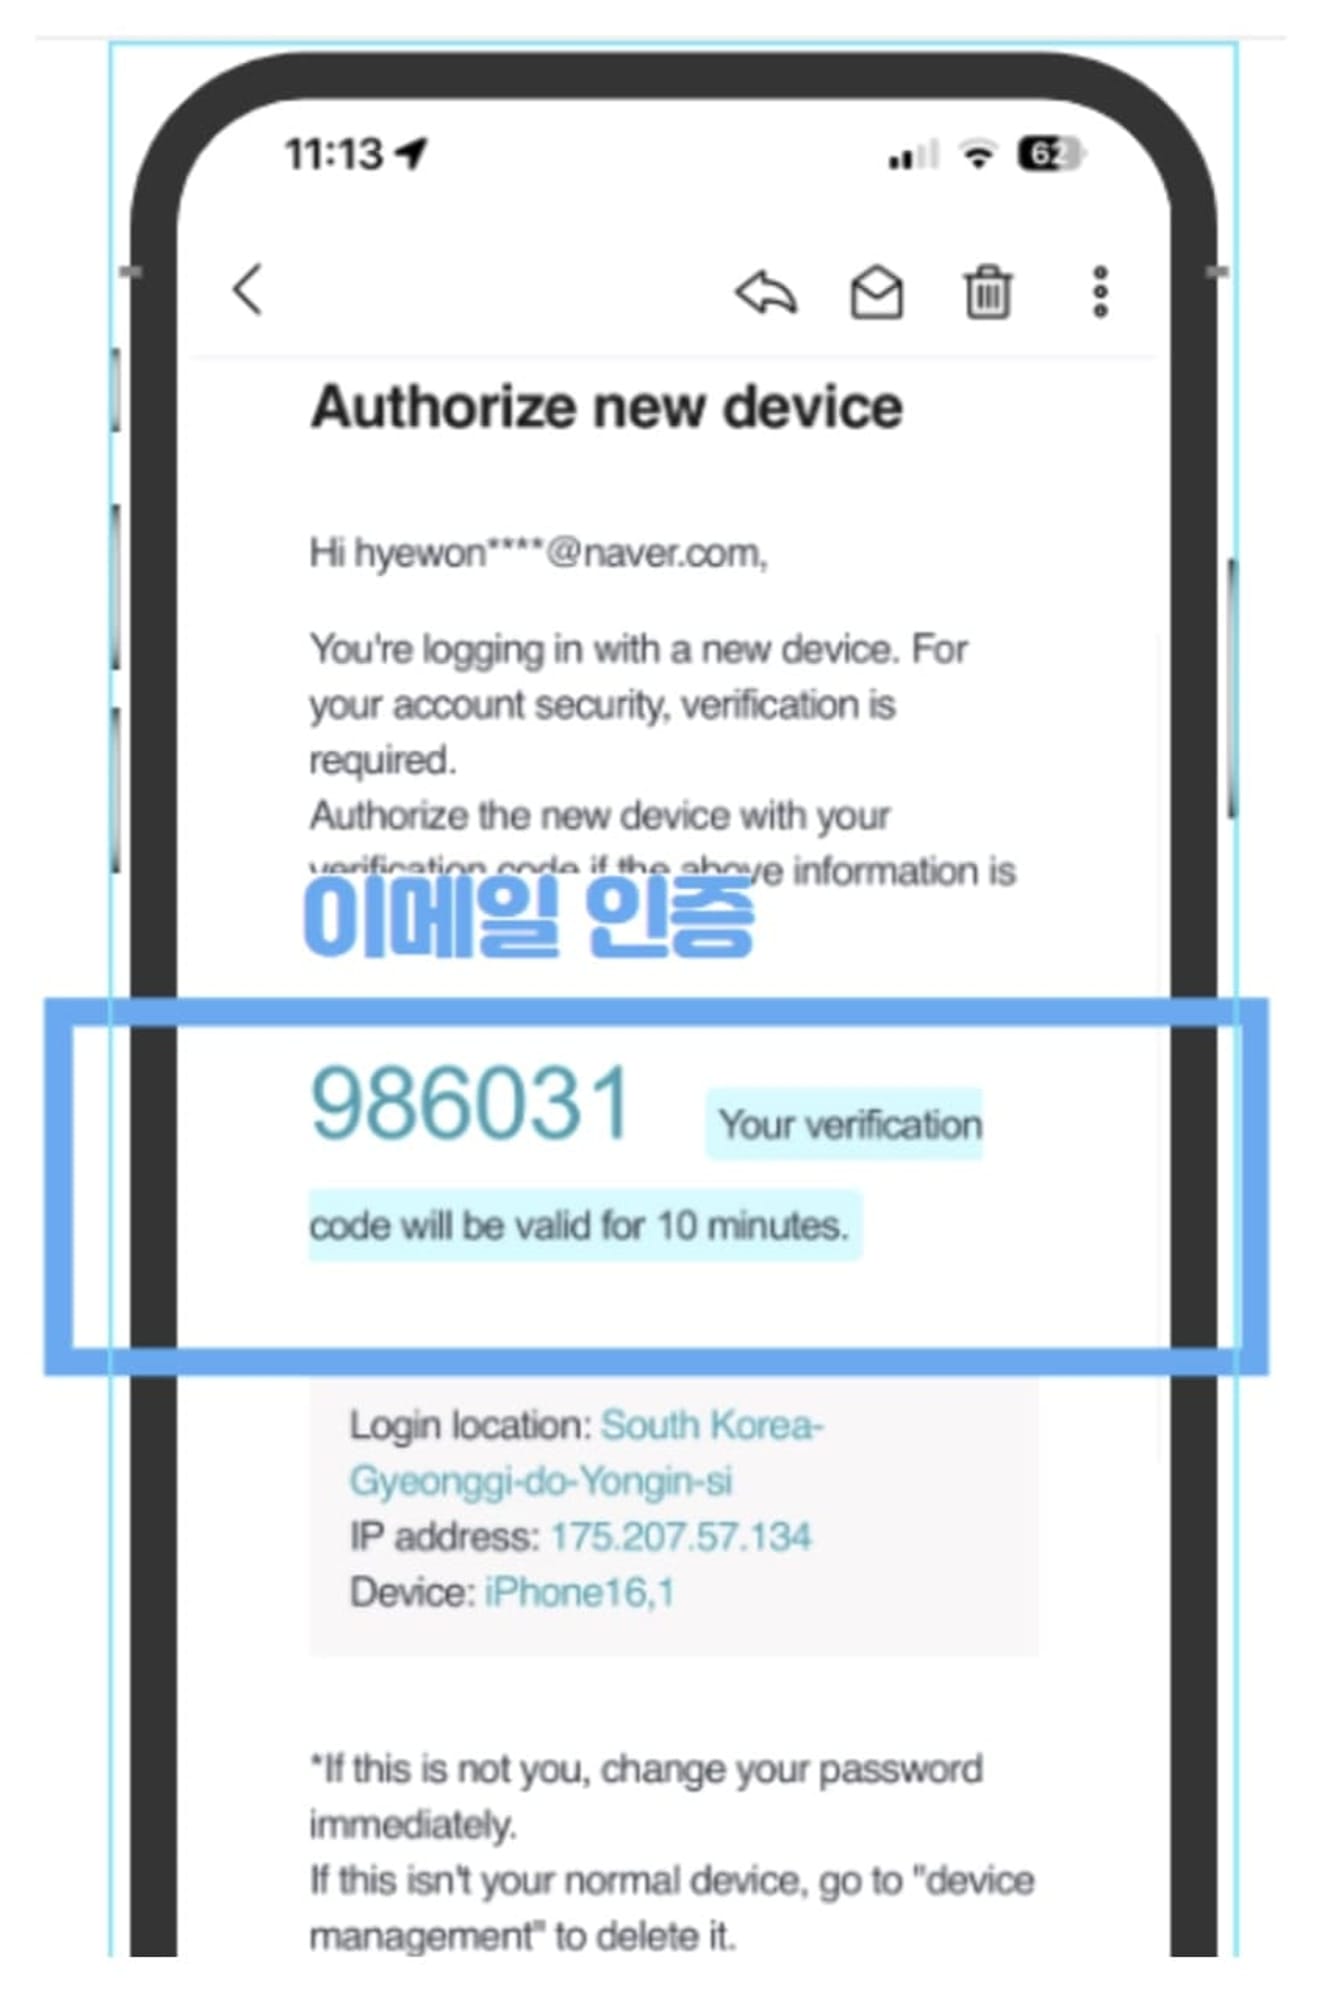
After that, a verification code will be sent to the registered email address, and you can complete the sign-up by entering it on the sign-up screen.
2. KYC Identity Verification
Now you need to proceed with identity verification.
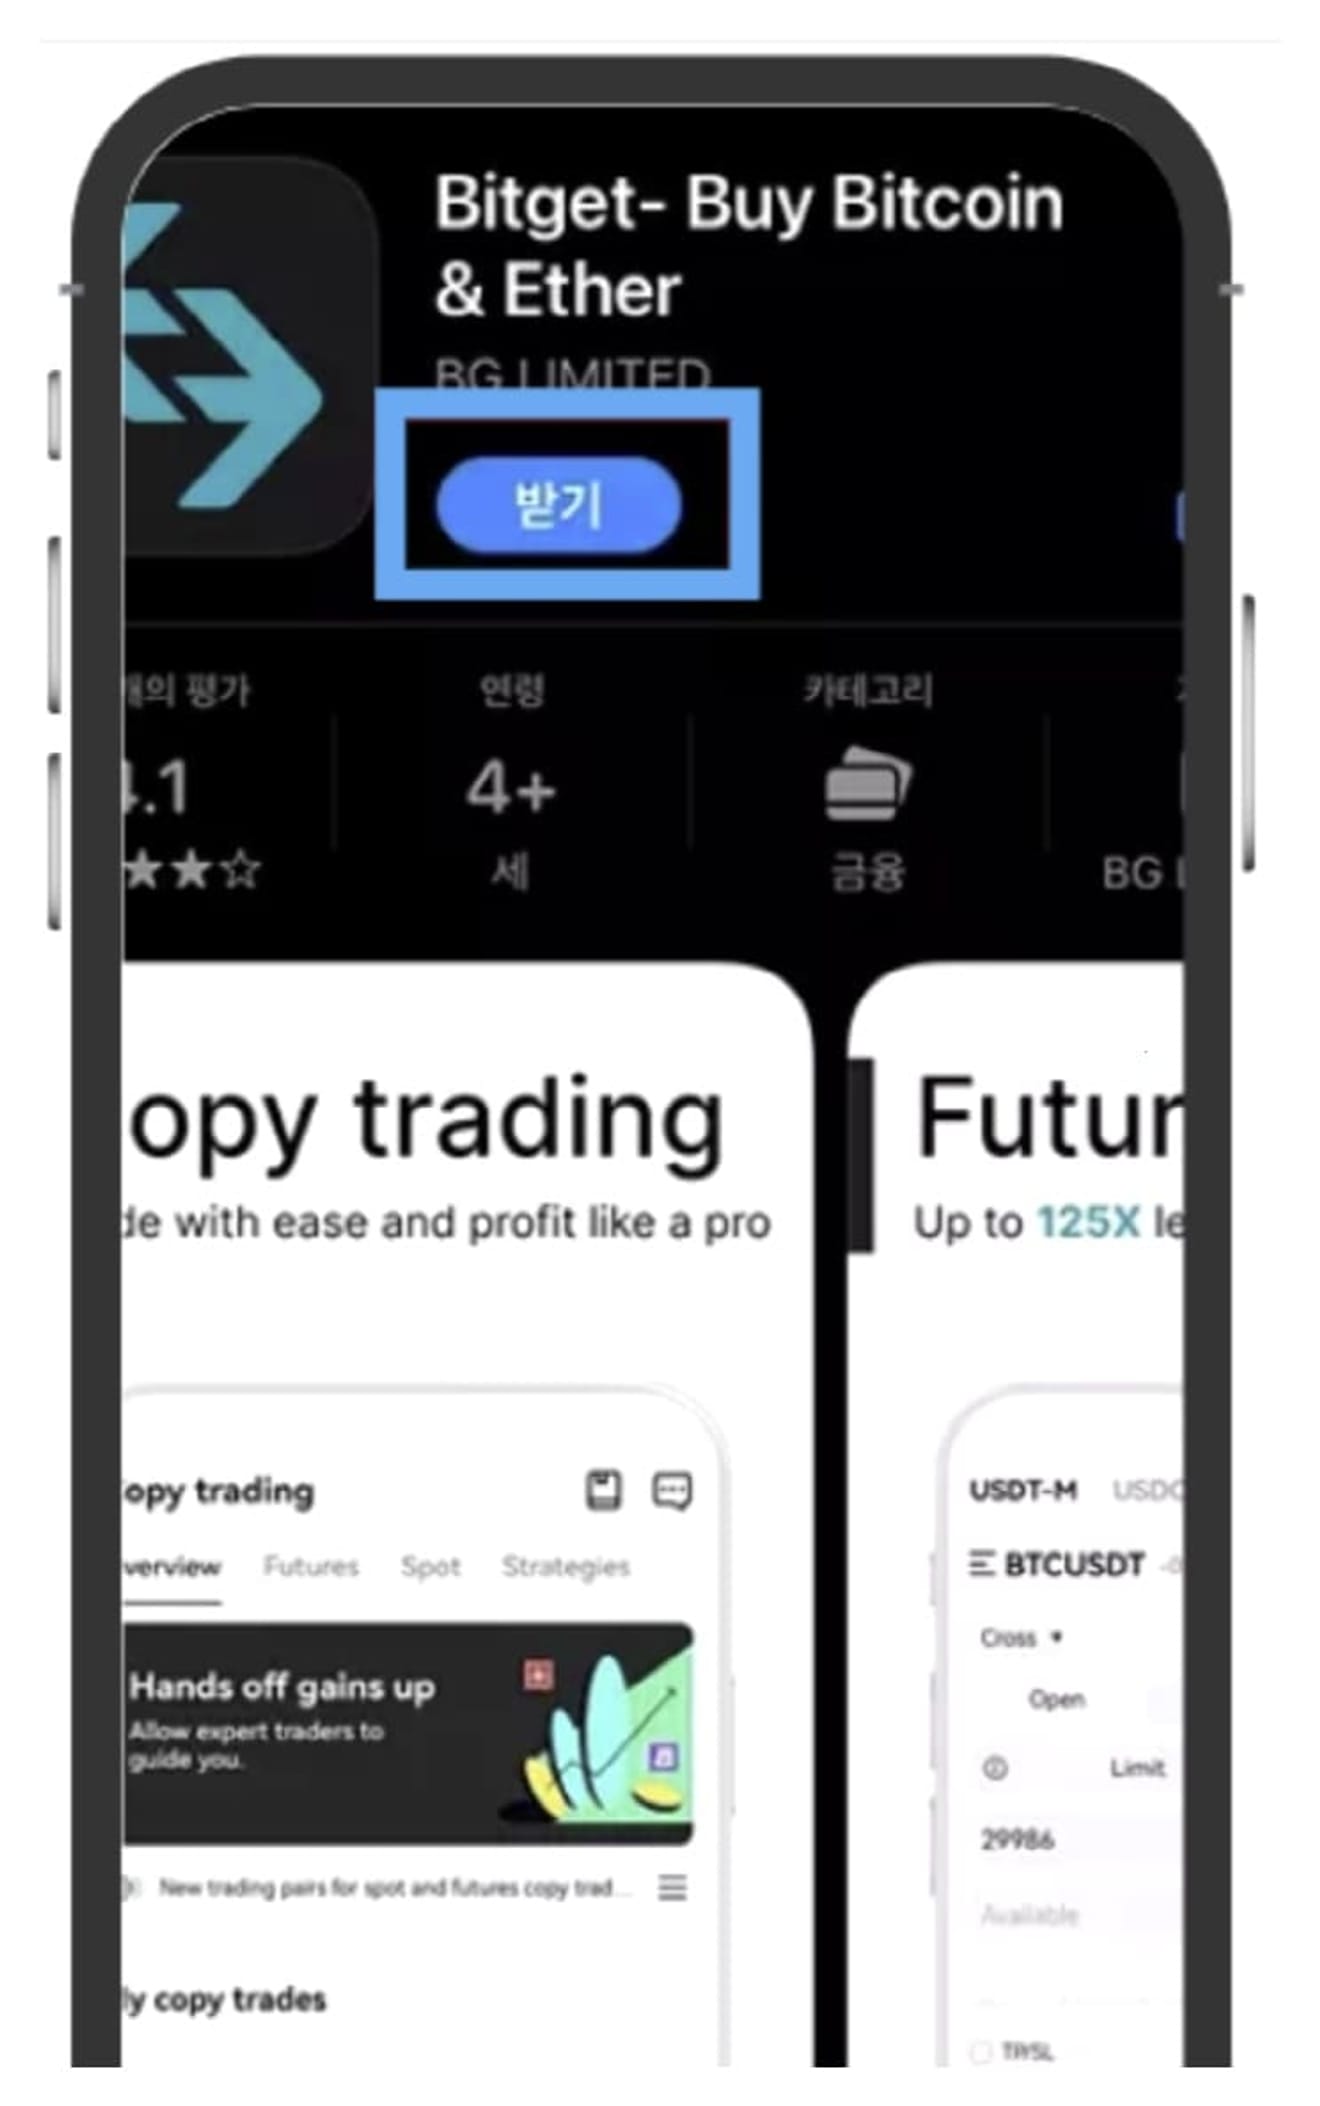
It is more convenient to download the Bitget app from the app store first and then proceed.
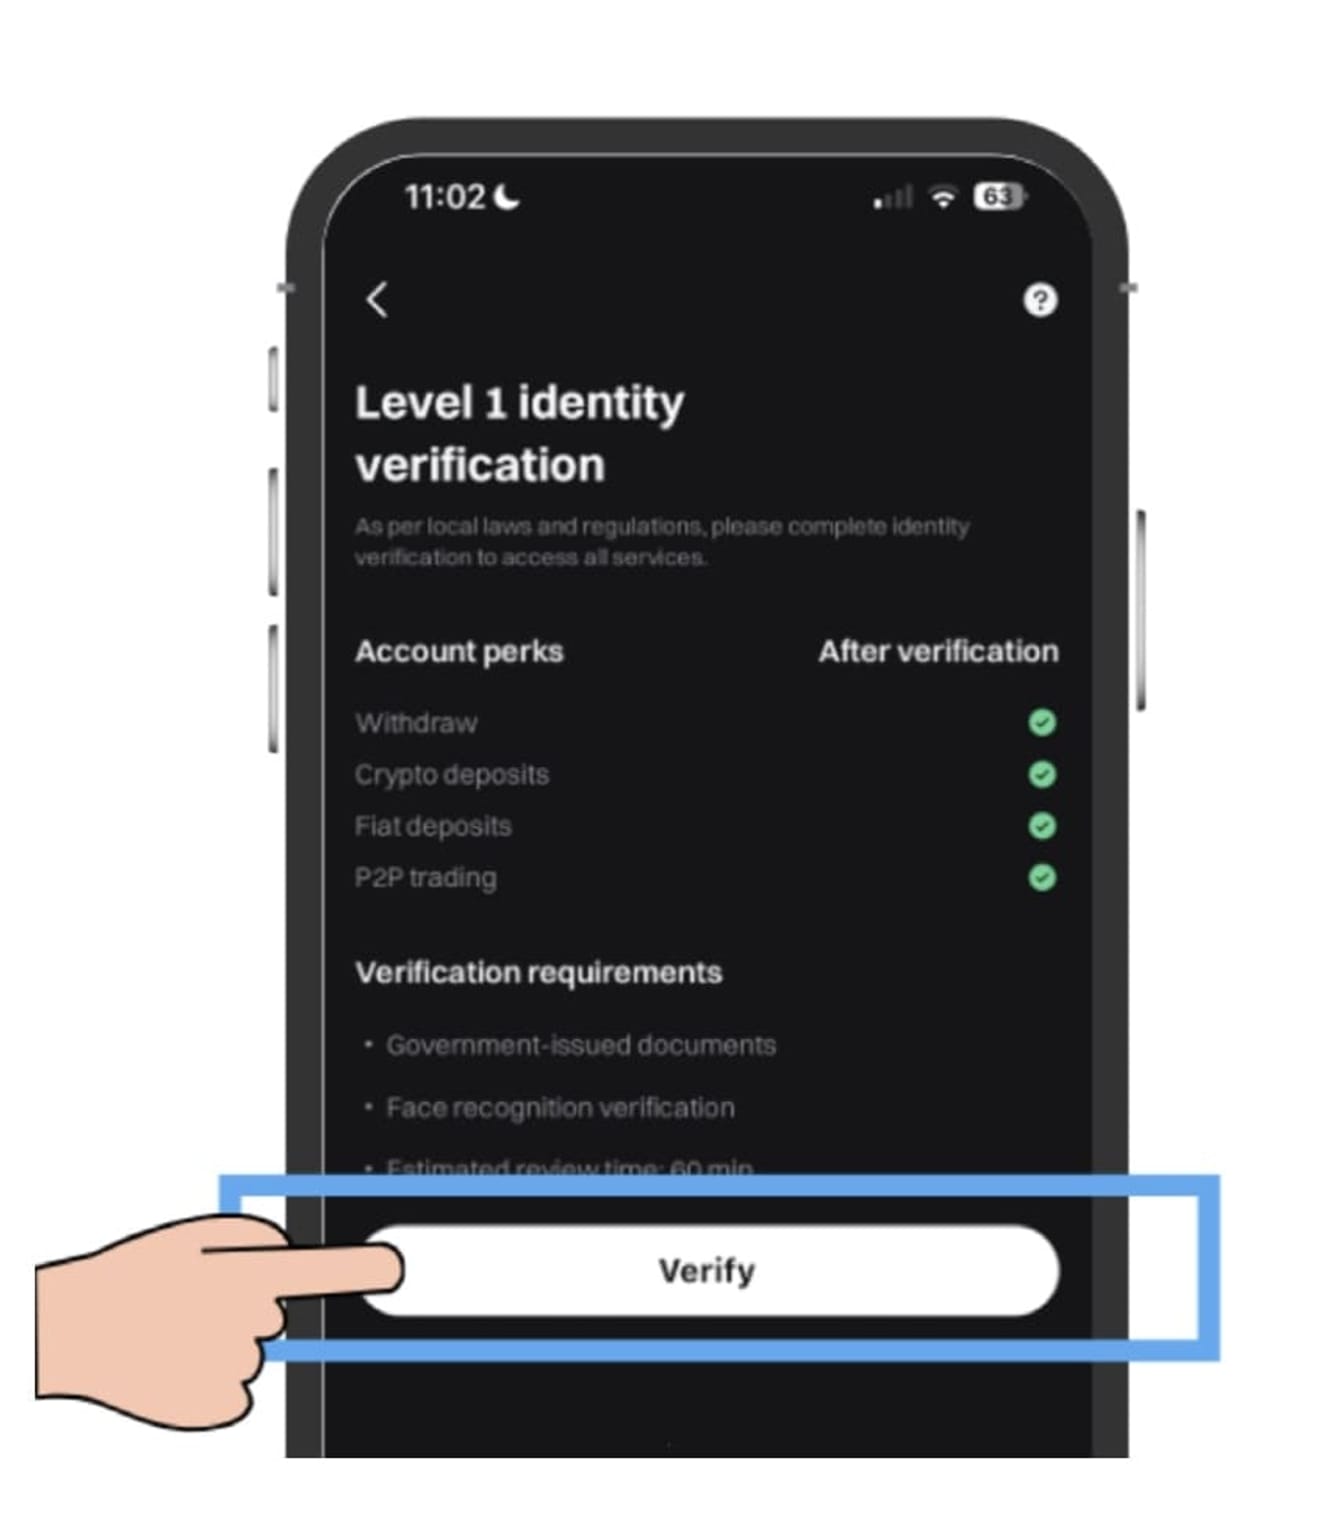
After logging in with the ID and password used during registration, click Verify to start identity verification.
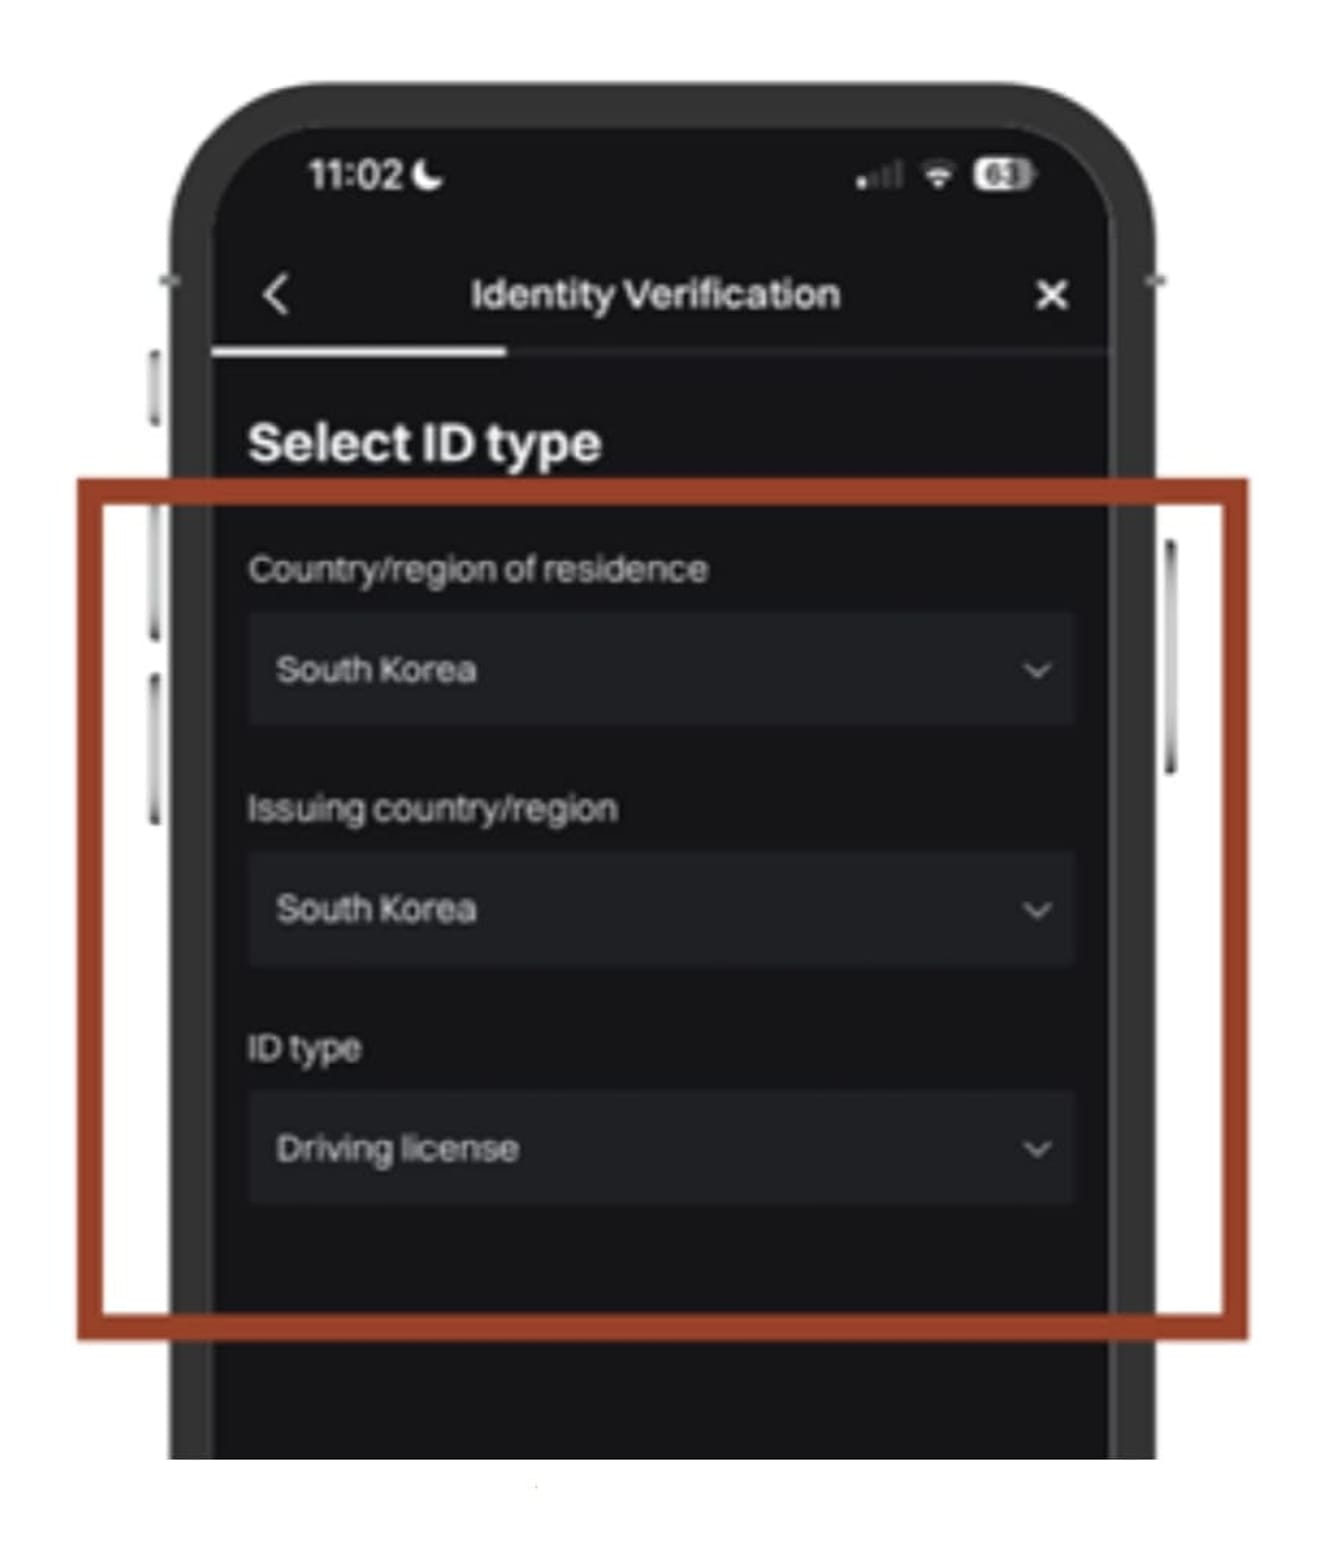
Set the country to South Korea, and you must upload an ID card (resident registration card, driver's license, passport, etc.) for identity verification. I chose a driver's license.
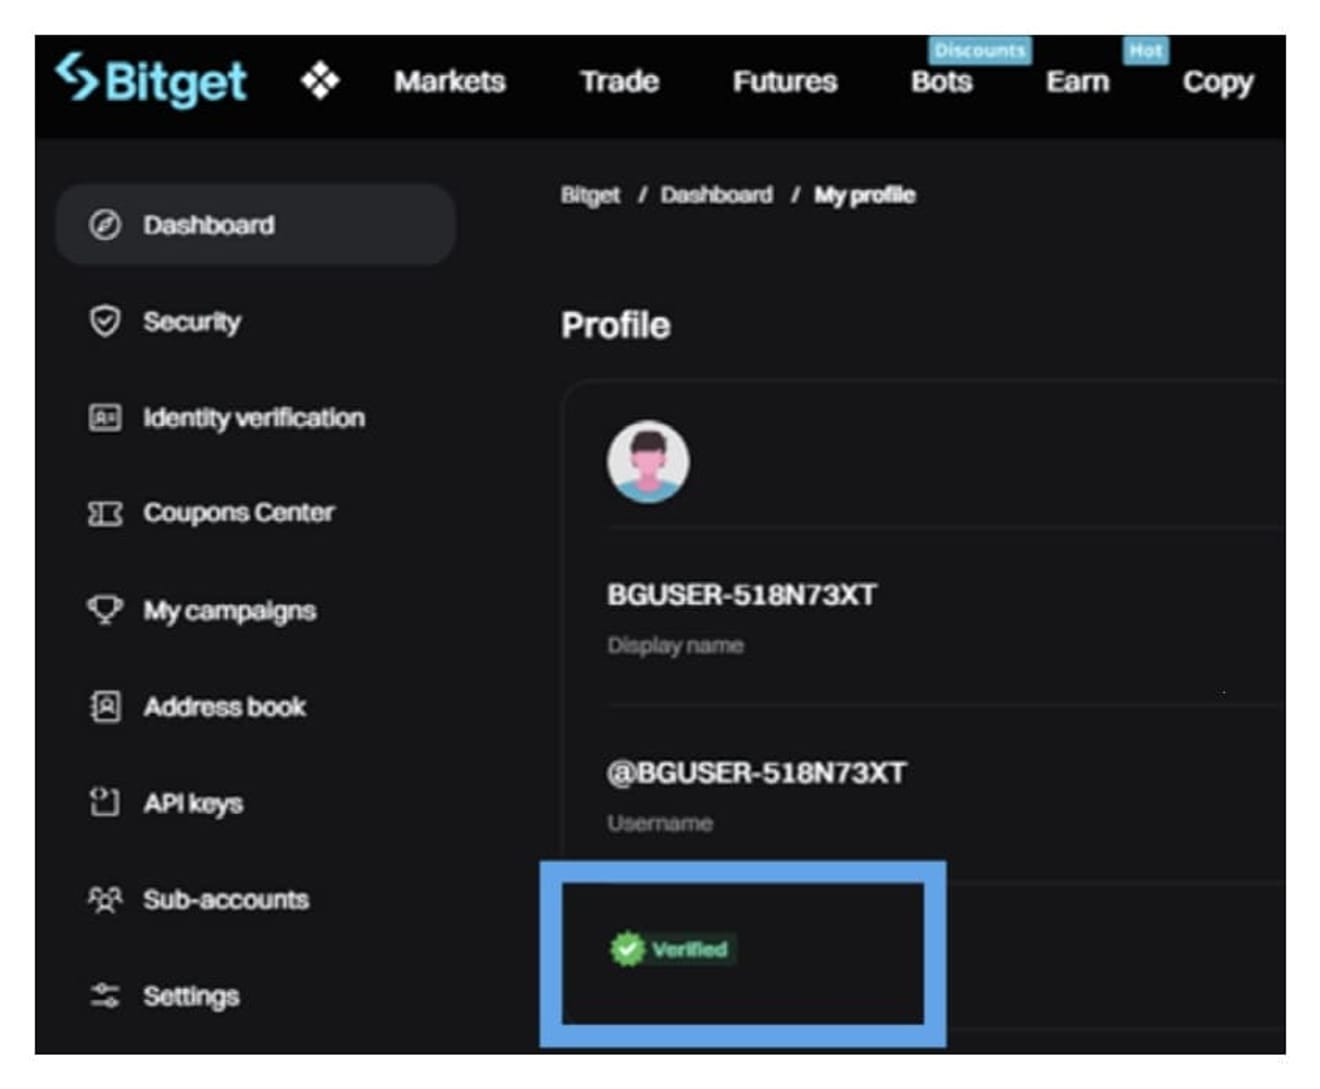
After completing the facial recognition procedure, identity verification is usually completed in 5 to 10 minutes, and the account status will then change to verified. Once the verification is complete, you can use all the features provided by Bitget, including futures and spot trading.
3. Security Verification
Finally, to secure your account, access the Bitget PC version and go to the Security menu.
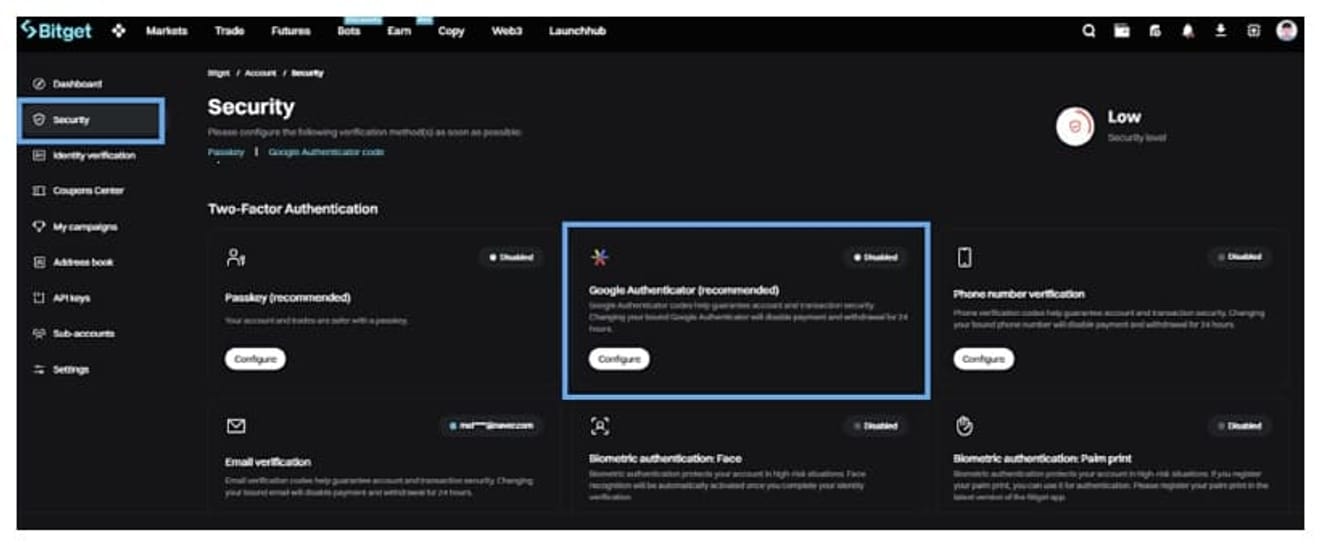
Click Google Authentication, and then download Google OTP from the Google Store to proceed with 2-step authentication.
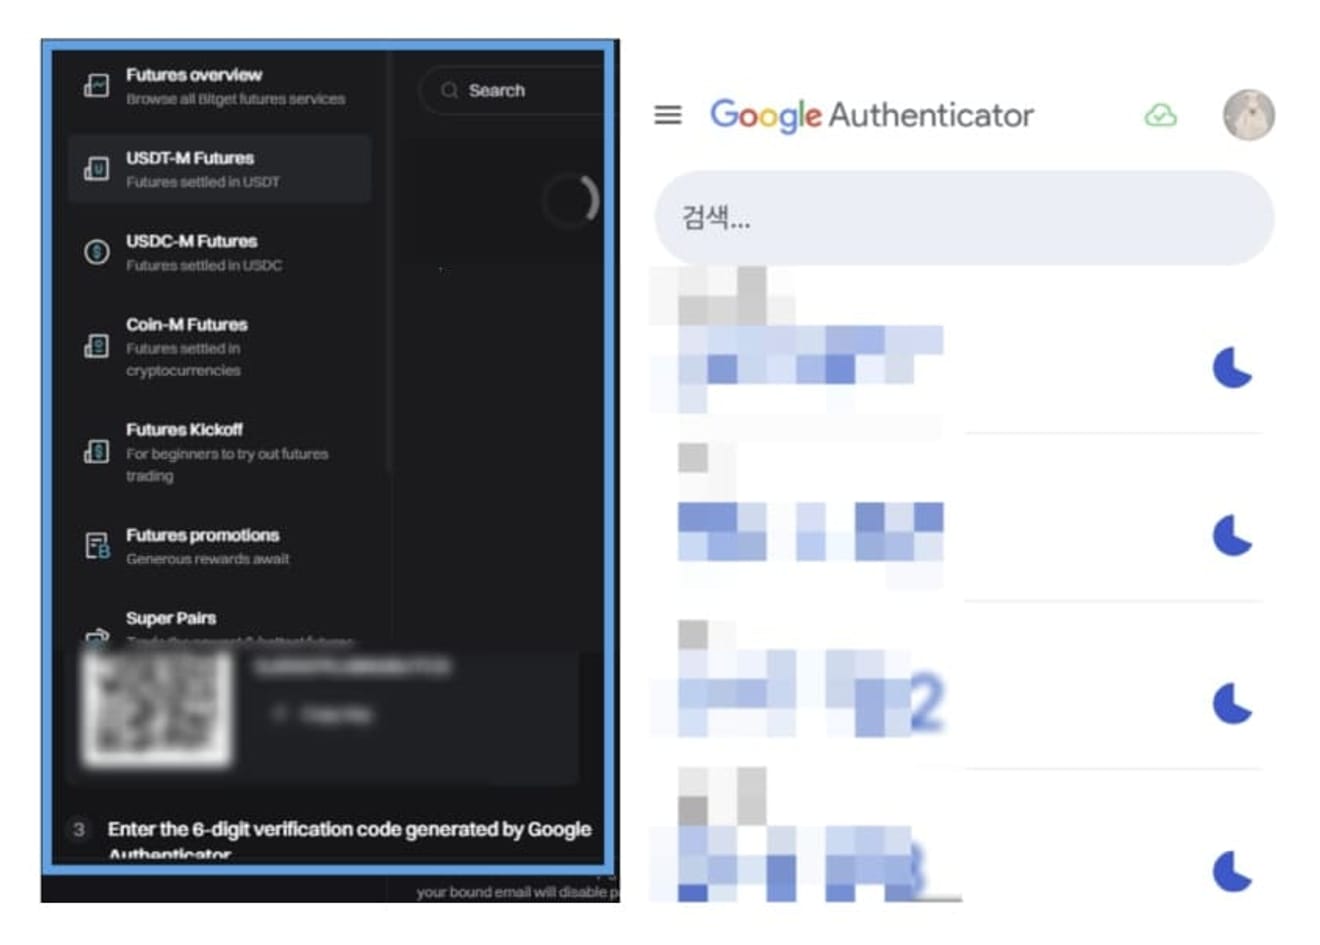
When the QR code is generated, a 6-digit authentication code is created in the mobile Google OTP. If you enter this code on your PC, Google OTP authentication will be completed. It is recommended that you definitely go through this process.
4. Deposit
Now, you need to deposit funds into Bitget to start futures trading.
You can deposit USDT from Upbit. If you don't have USDT, you can buy it from Upbit.
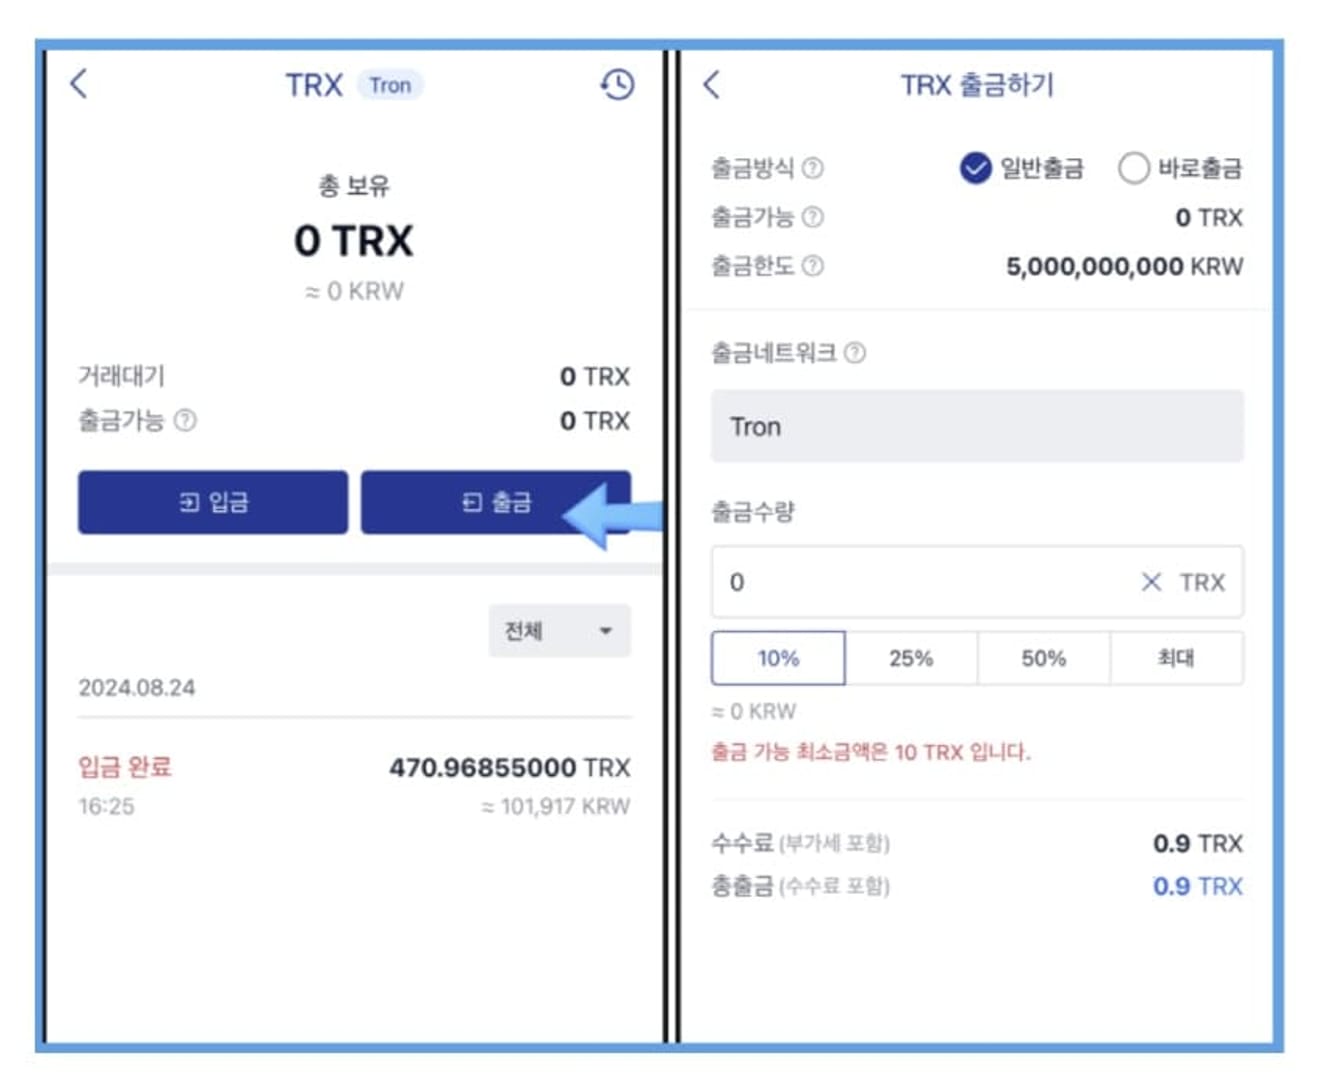
After purchasing USDT, request a withdrawal. At this time, please note that you must select Tron as the withdrawal network.
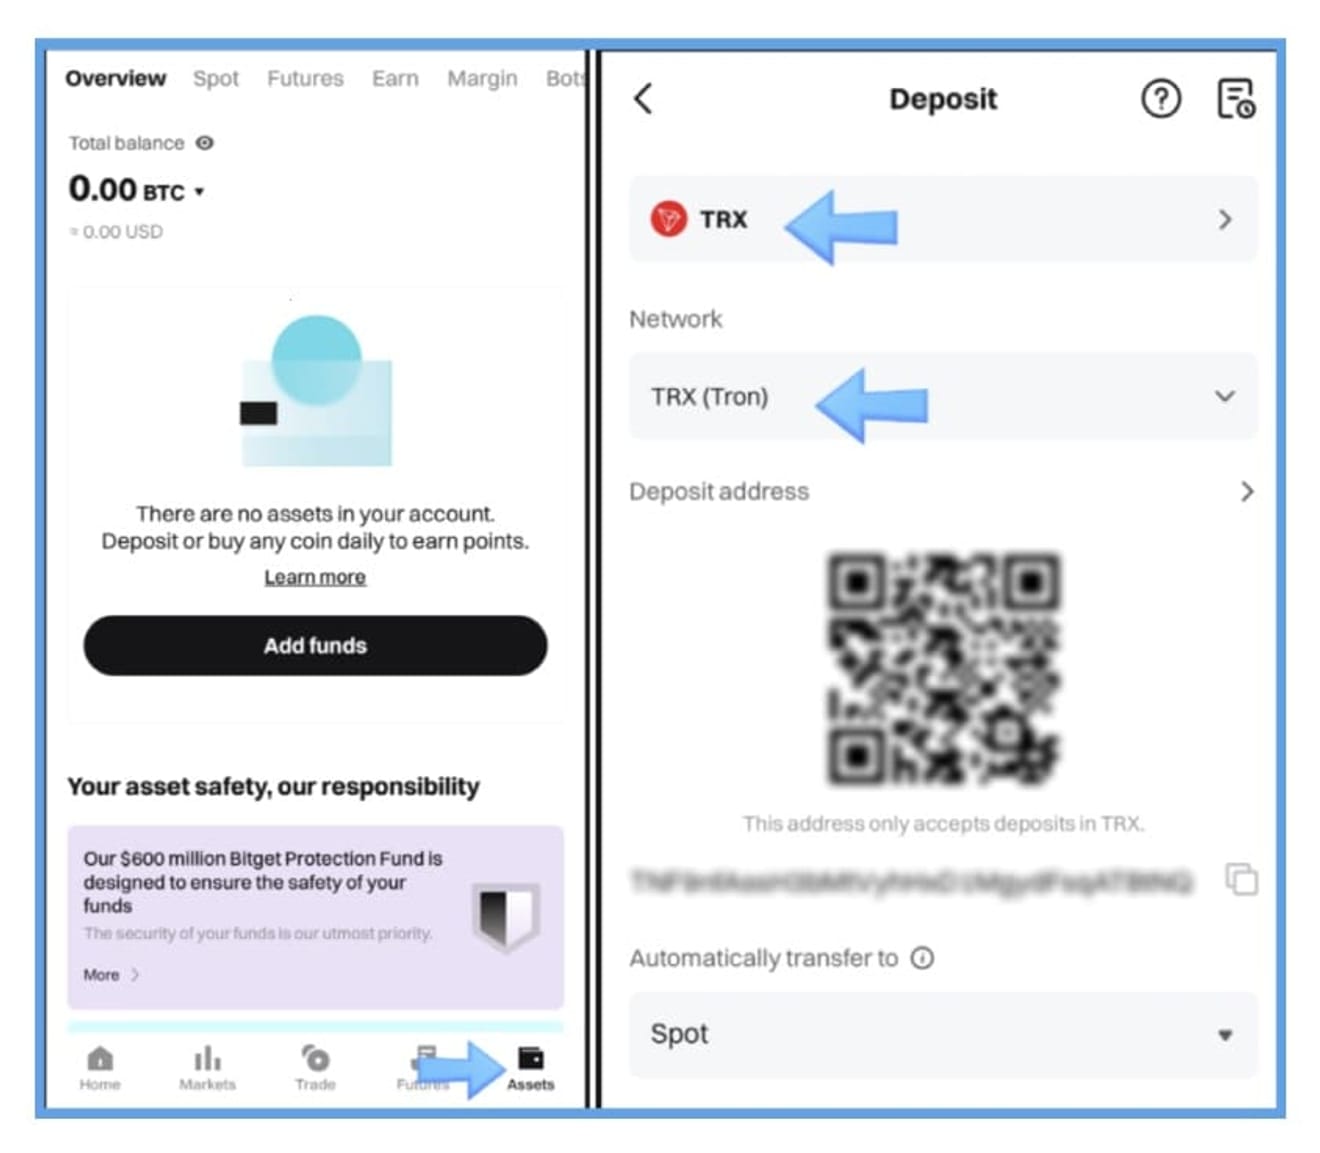
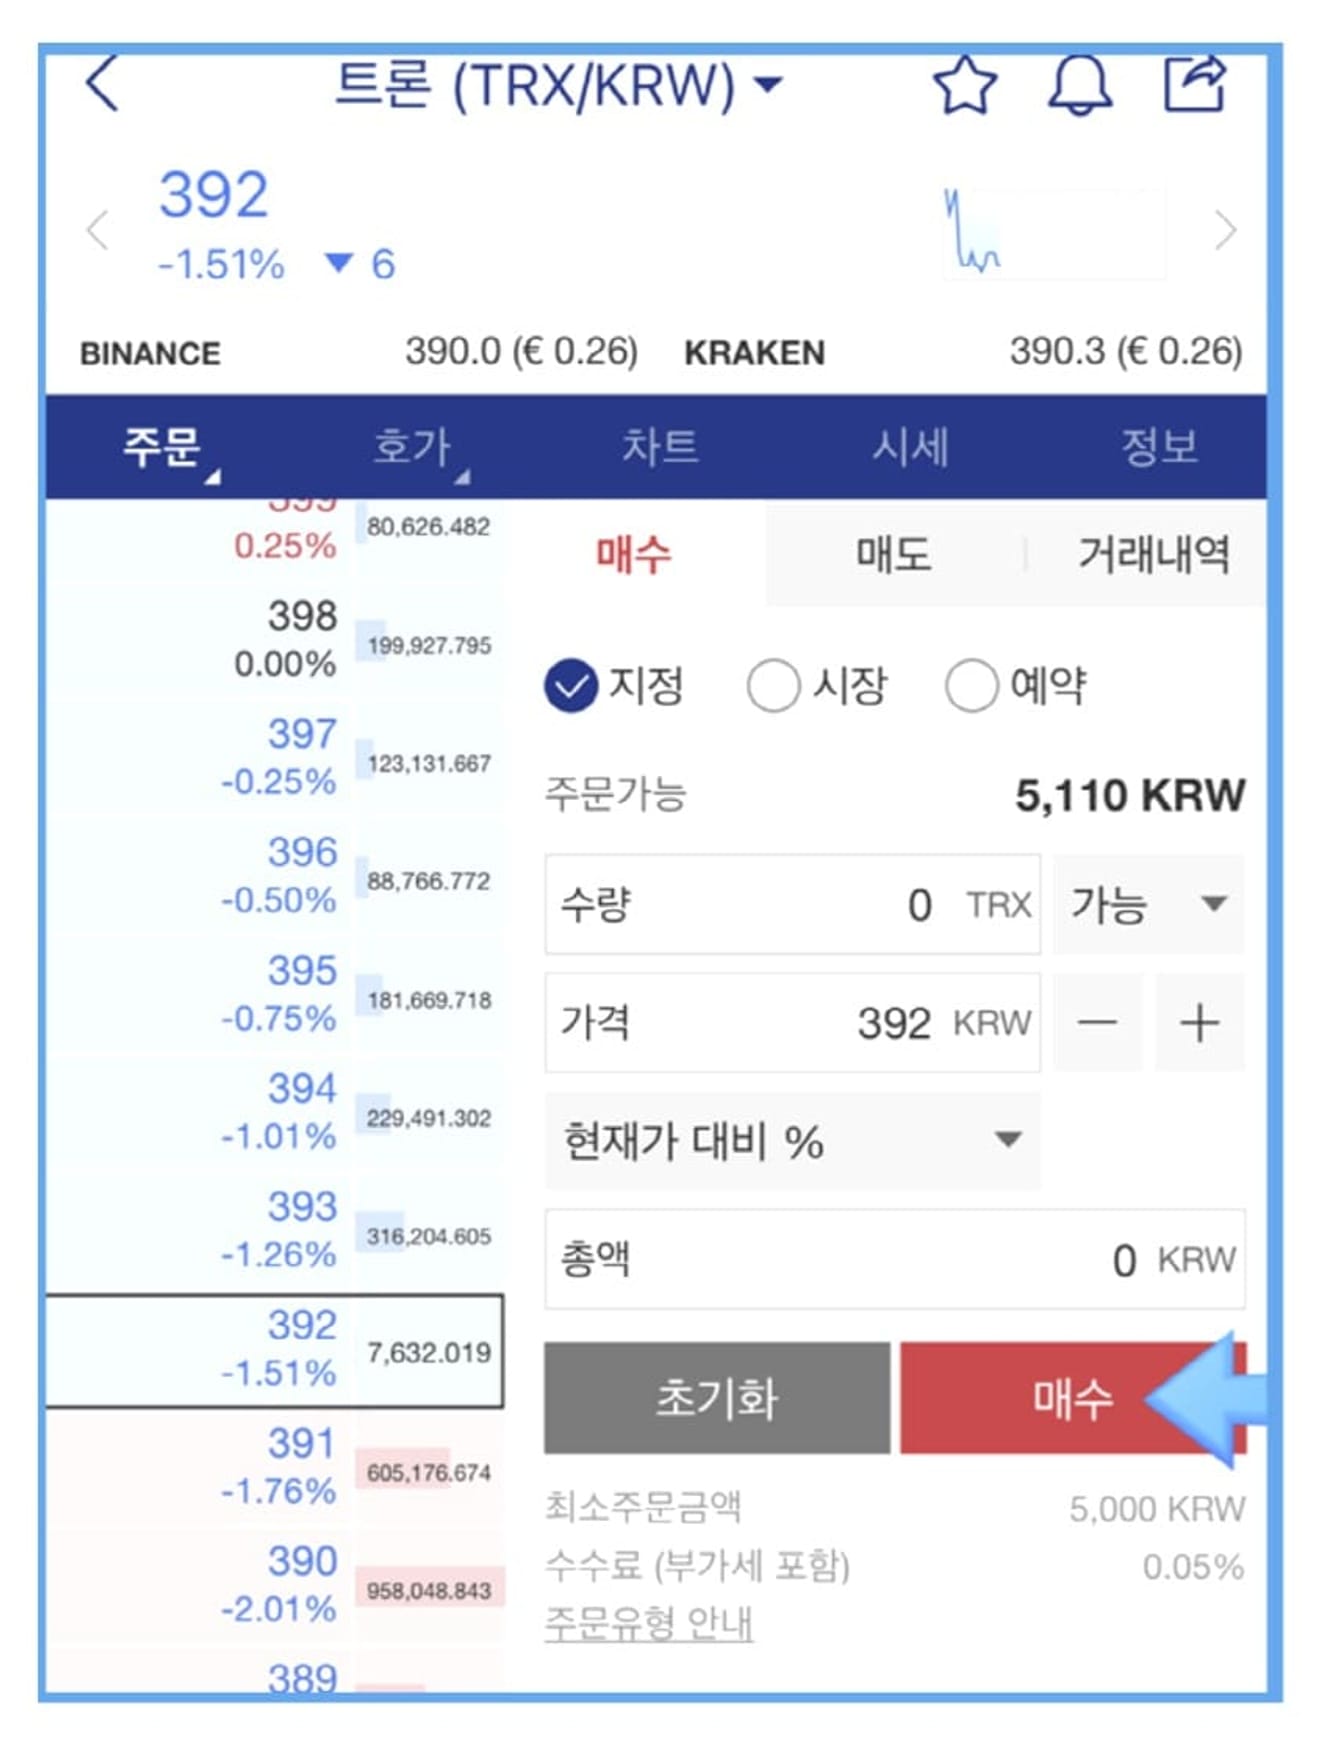
Next, connect to the Bitget app. In the Assets menu at the bottom of the app, click Add Funds and search for TRX (Tron). By clicking on this item, you can check the USDT deposit address (right photo). Copy this address and paste it into the withdrawal address field of Upbit, and the withdrawal request will be completed. USDT will be deposited into Bitget's spot wallet in about 3 to 5 minutes.
5. Moving to the Futures Wallet
The transferred USDT will be moved to Bitget's spot trading account.
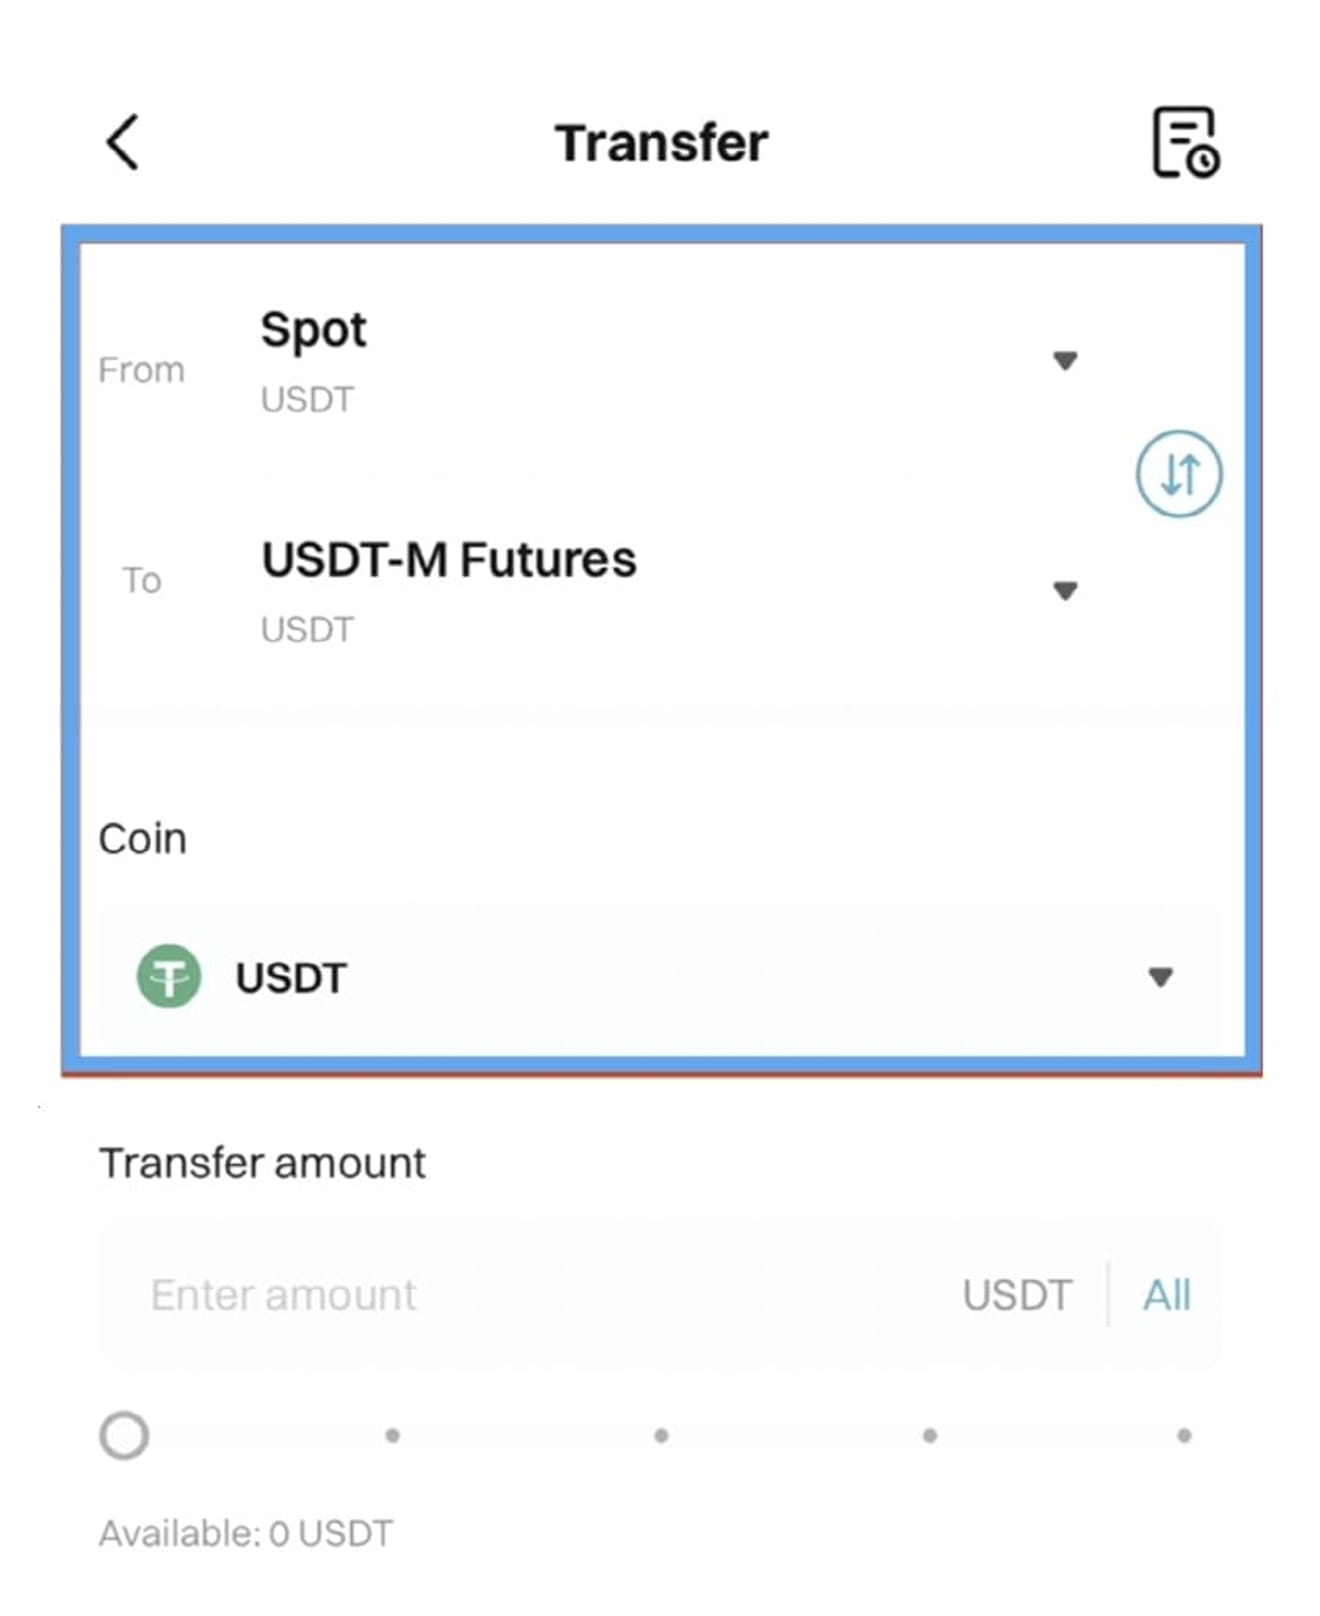
To proceed with Bitcoin futures trading, you must move this USDT to your futures wallet.
- From: spot
- To: USDT-M Futures
- Coin: USDT
After setting this up, enter the desired amount and move the USDT to the futures wallet. Once the transfer is complete, Bitcoin futures trading is immediately available.
6. Bitcoin Futures Trading
Bitget operates spot (Spot) and futures (Futures) accounts separately.
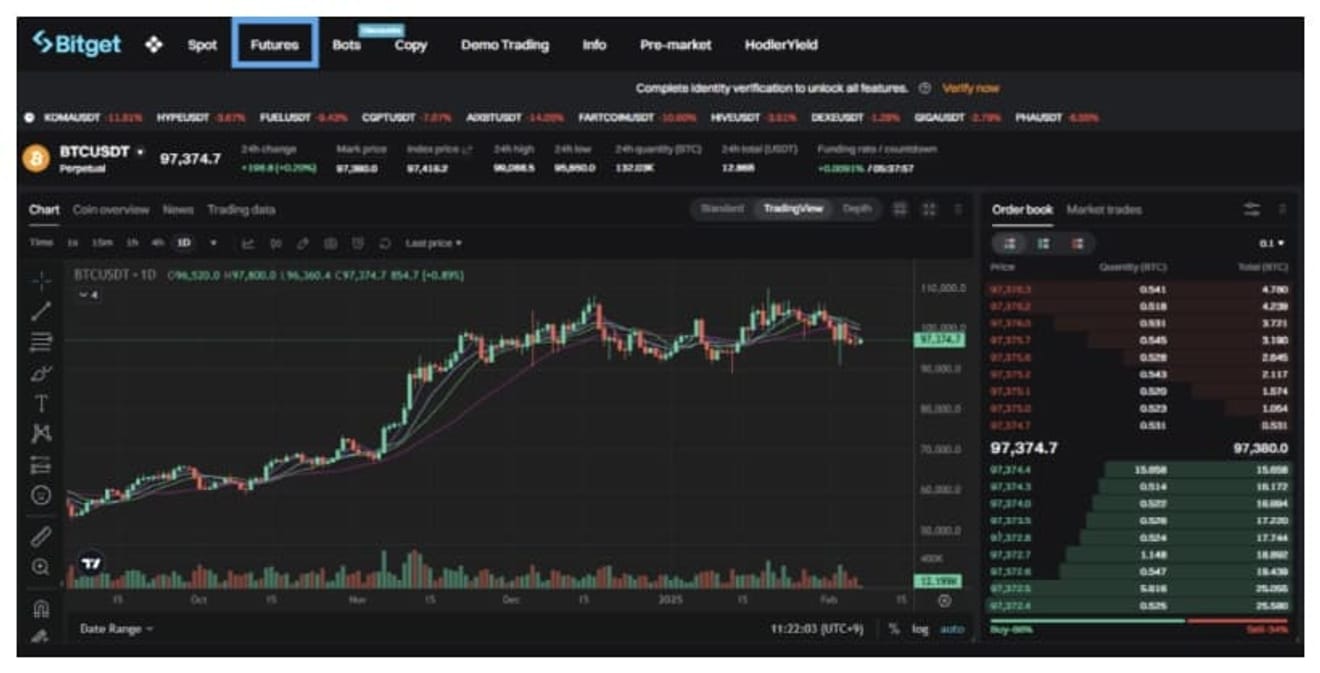
Now, I will explain how to trade Bitcoin futures on Bitget. You can set the following items by going to the Futures tab.
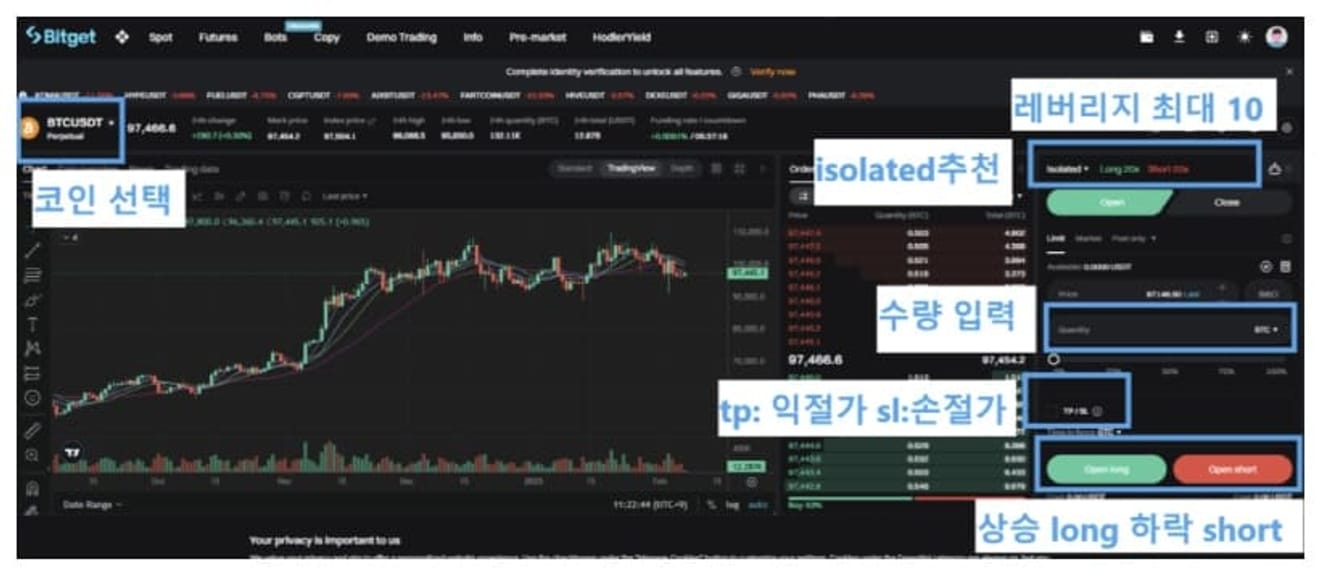
- Coin selection: Select the coin you want to invest in.
- Isolated setting: This is an isolated mode, a method of reducing risk by using collateral for only a specific position. I mainly use the isolated mode.
- Leverage setting: Bitget supports a maximum leverage of 125x, but it is recommended to set the leverage of 5x for altcoins and 10x for Bitcoin.
- Quantity input: After that, enter the quantity of the coin you want to invest in.
- Position entry: Select Long if you expect the coin you want to invest in to rise, and Short if you expect it to fall. At this time, the entry price is selected as the market price.
Also, don't forget to set TP (take profit) and SL (stop loss) to prevent losses and fix profits.