How to Trade HTX Futures | Sign Up | Leverage | Fee Discount
In today's blog, we will explore how to trade HTX futures, sign up, leverage, and fee discounts. Cryptocurrency futures trading is a powerful investment tool that can generate profit opportunities in both rising and falling markets. HTX is considered one of the platforms specializing in futures trading with various leverage options and competitive fees. However, futures trading carries high risks as well as the potential for high returns, so systematic preparation and accurate understanding are essential. In particular, a cautious approach is needed as significant losses can be incurred if leverage settings and risk management are not properly handled. This article provides step-by-step guidance on how to safely and effectively start trading HTX futures. It comprehensively covers everything from signing up and opening a futures account to the principles of leverage settings, practical application methods, and fee discount methods to minimize trading costs.

How to Trade HTX Futures
Before trading HTX futures, please sign up for an account on the exchange and deposit funds for futures trading.
You can receive a 35% fee discount when you sign up through the link above. Let's convert the coins deposited into HTX to USDT by selling them in the USDT market.
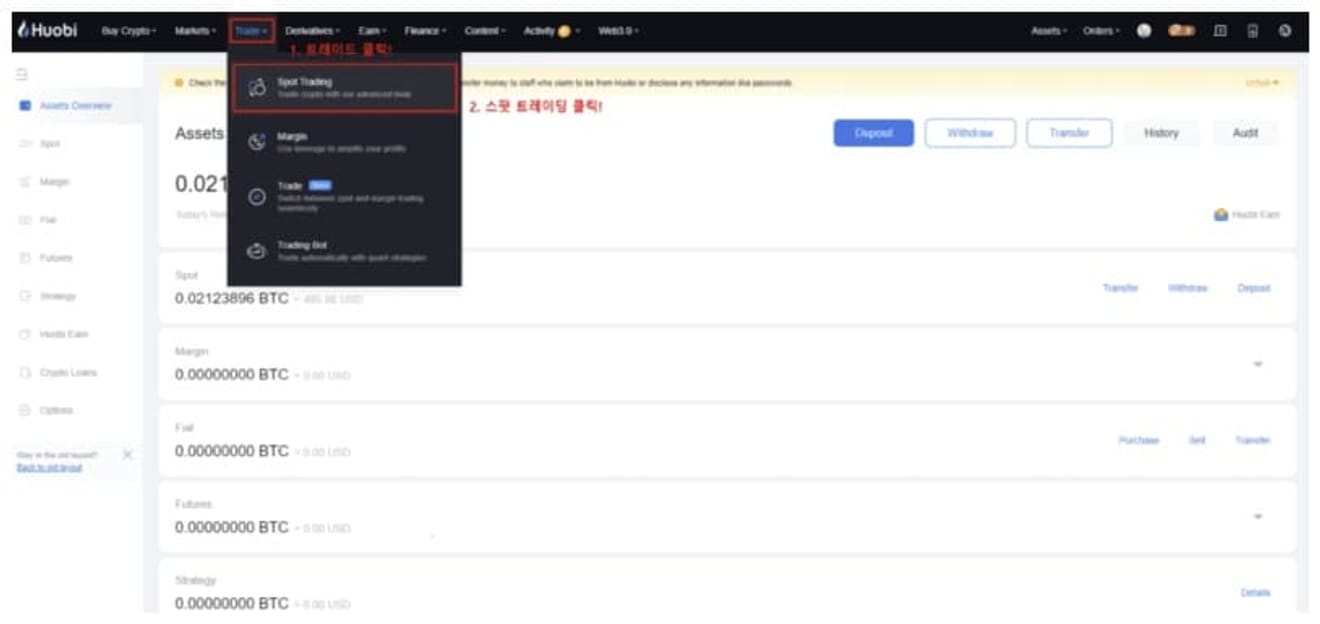
I will explain based on the USDT-M futures trading method, which is widely used by people. First, click Trade at the top left of HTX, then click Spot Trading.
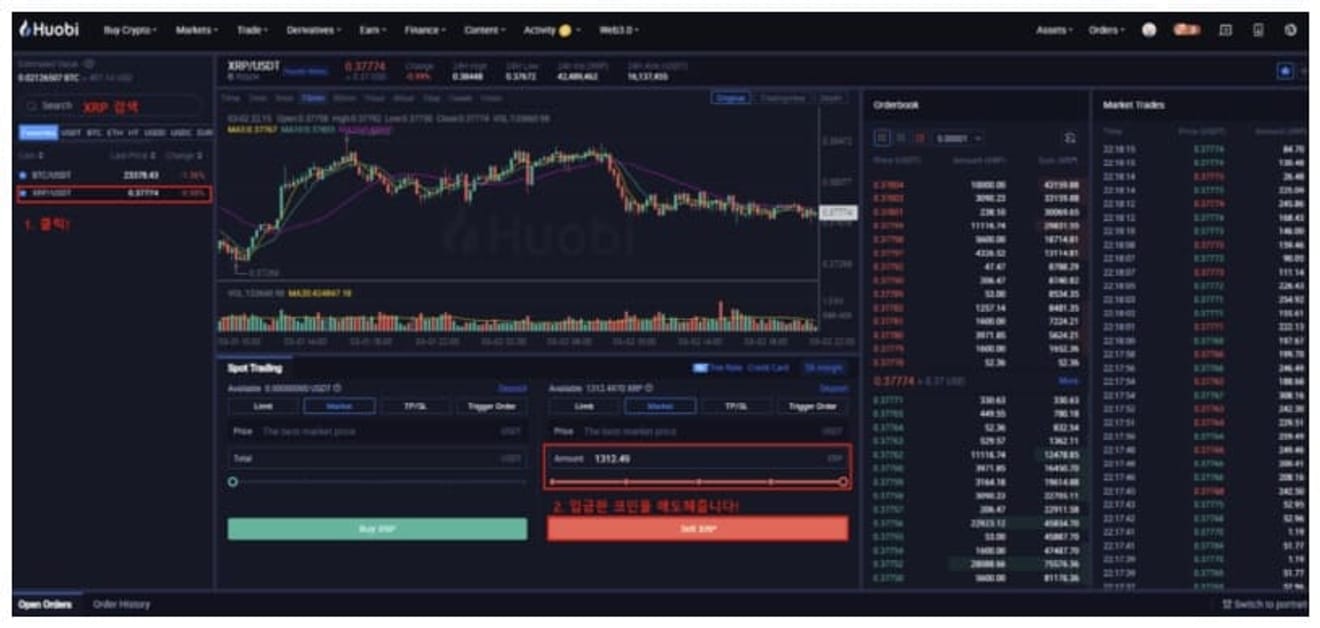
Then, search for the coin you want to convert to USDT and sell it. I used Ripple (XRP), which is fast and has low fees. Now, let's transfer USDT to the HTX USDT-M futures wallet.
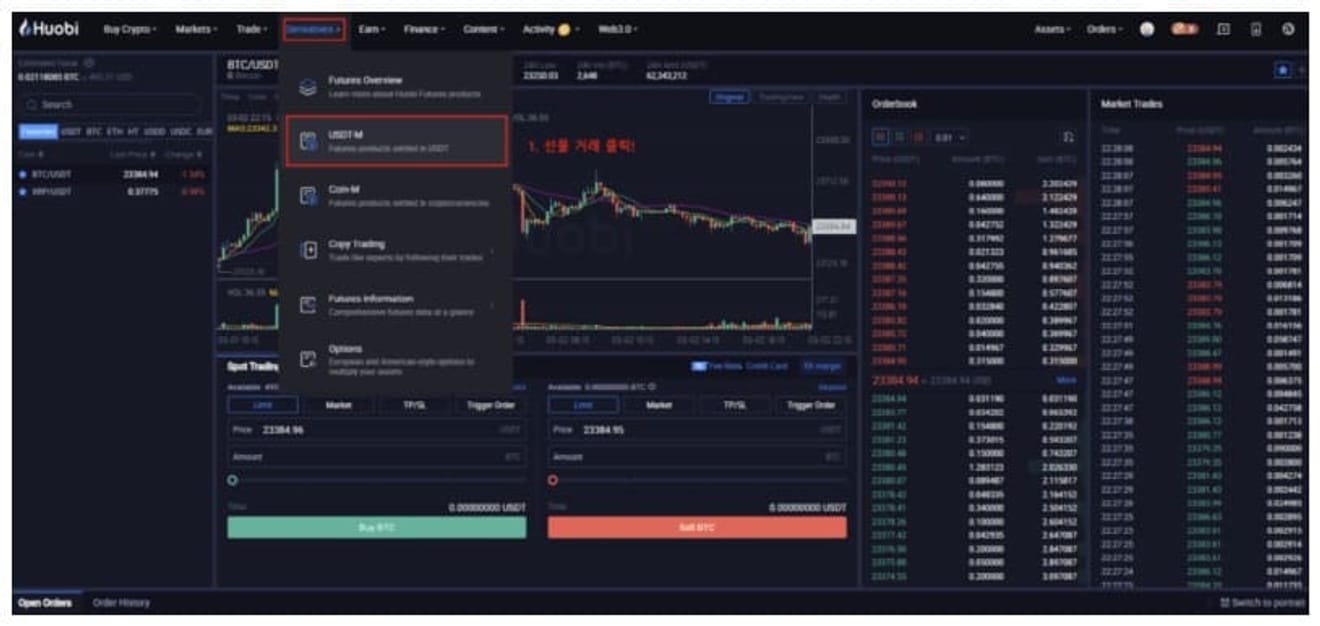
First, click Derivatives, then click USDT-M.
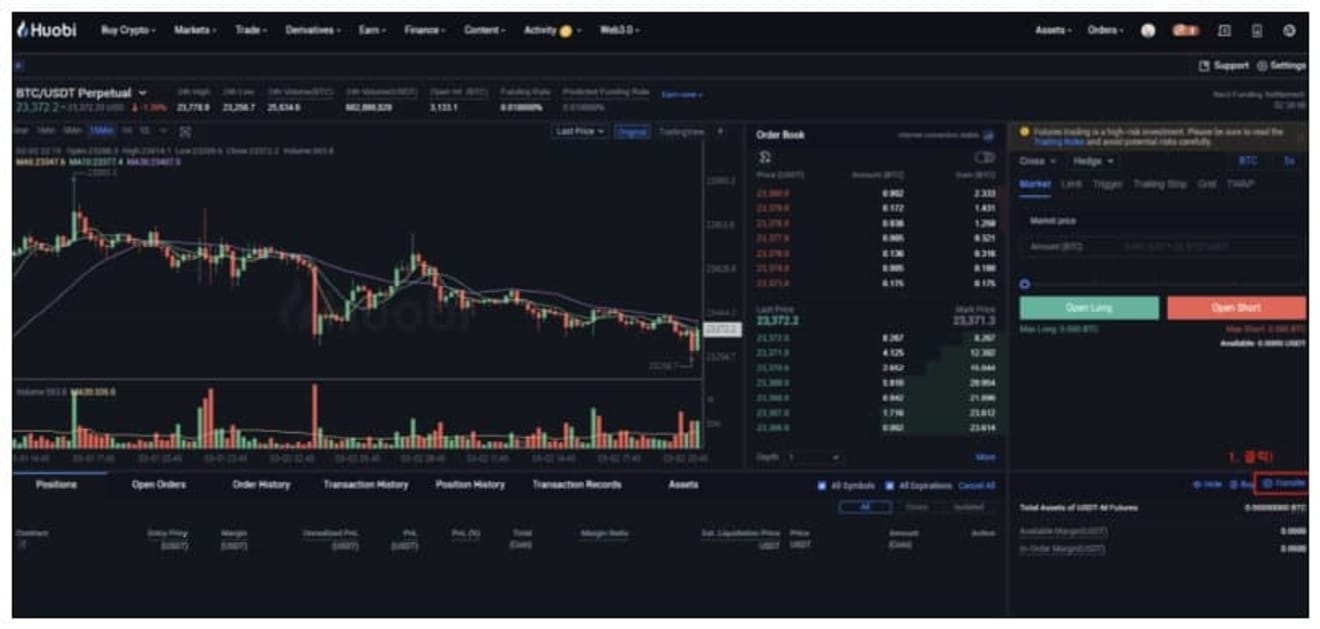
Then, click the Transfer button.
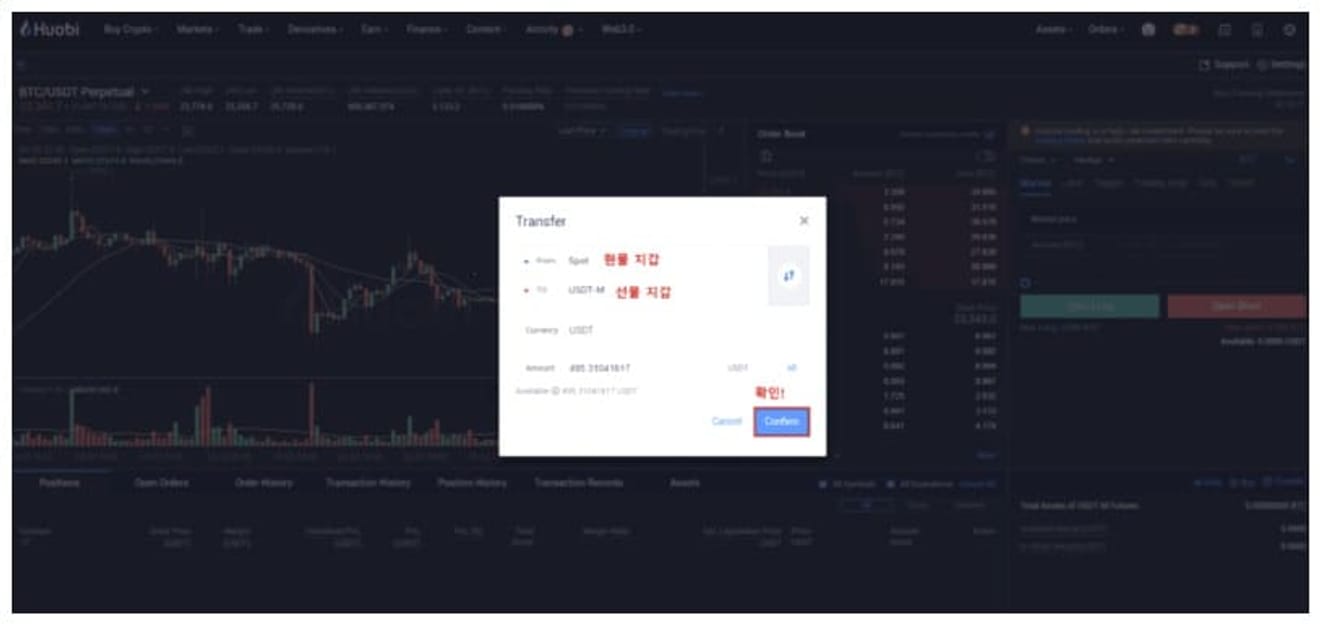
As shown, set it from the spot wallet to the futures wallet, enter the quantity, and press Confirm. You can check the futures wallet balance at the top right: Assets -> Futures.
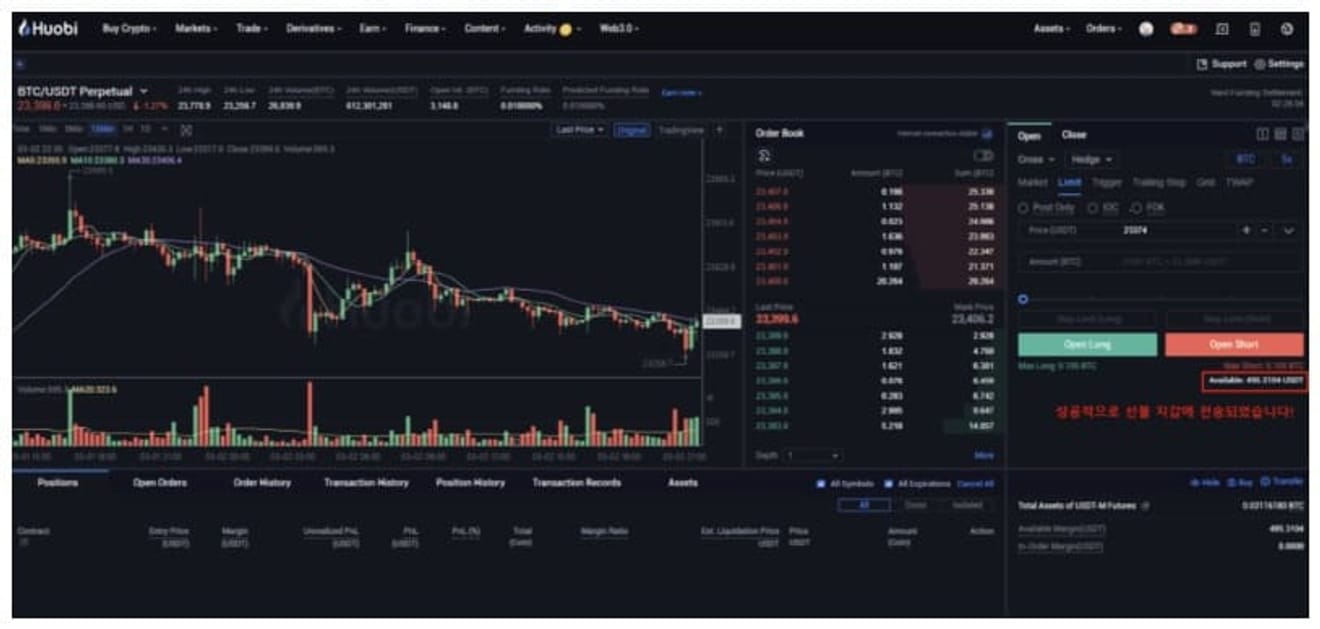
I have confirmed that it has been successfully transferred to the futures wallet.
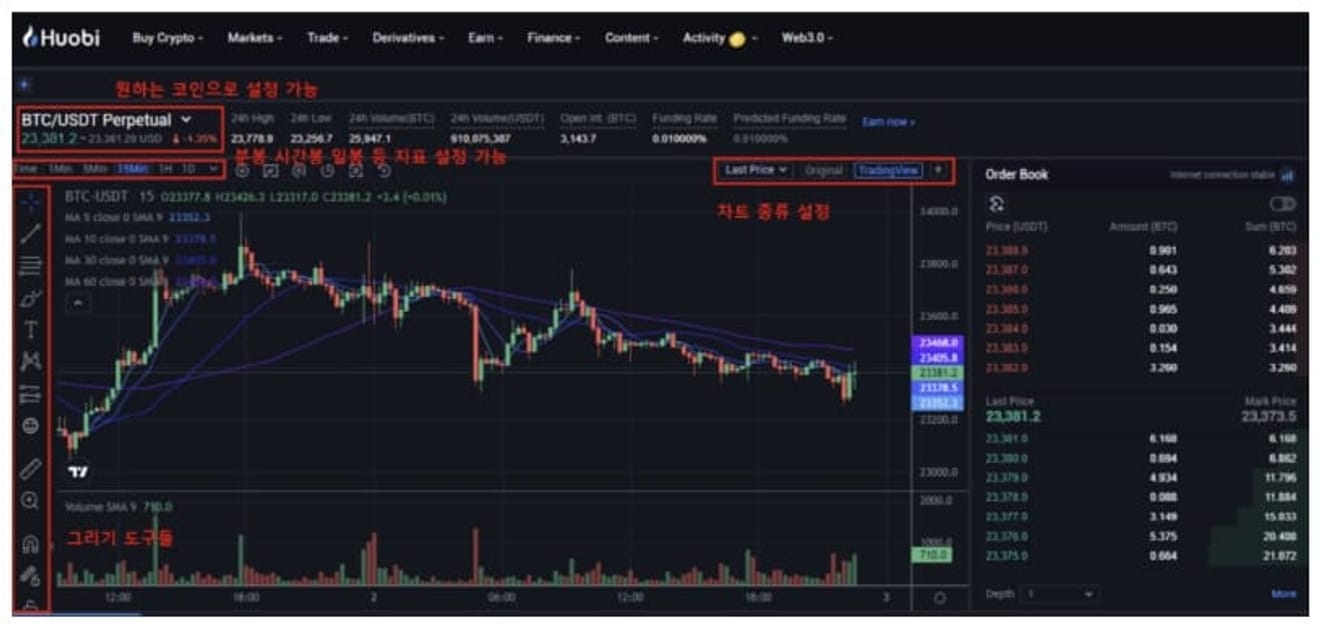
You have entered the USDT-M futures trading window. I have attached a basic interface explanation in the picture above for those who are new to futures trading or are using HTX futures trading for the first time.
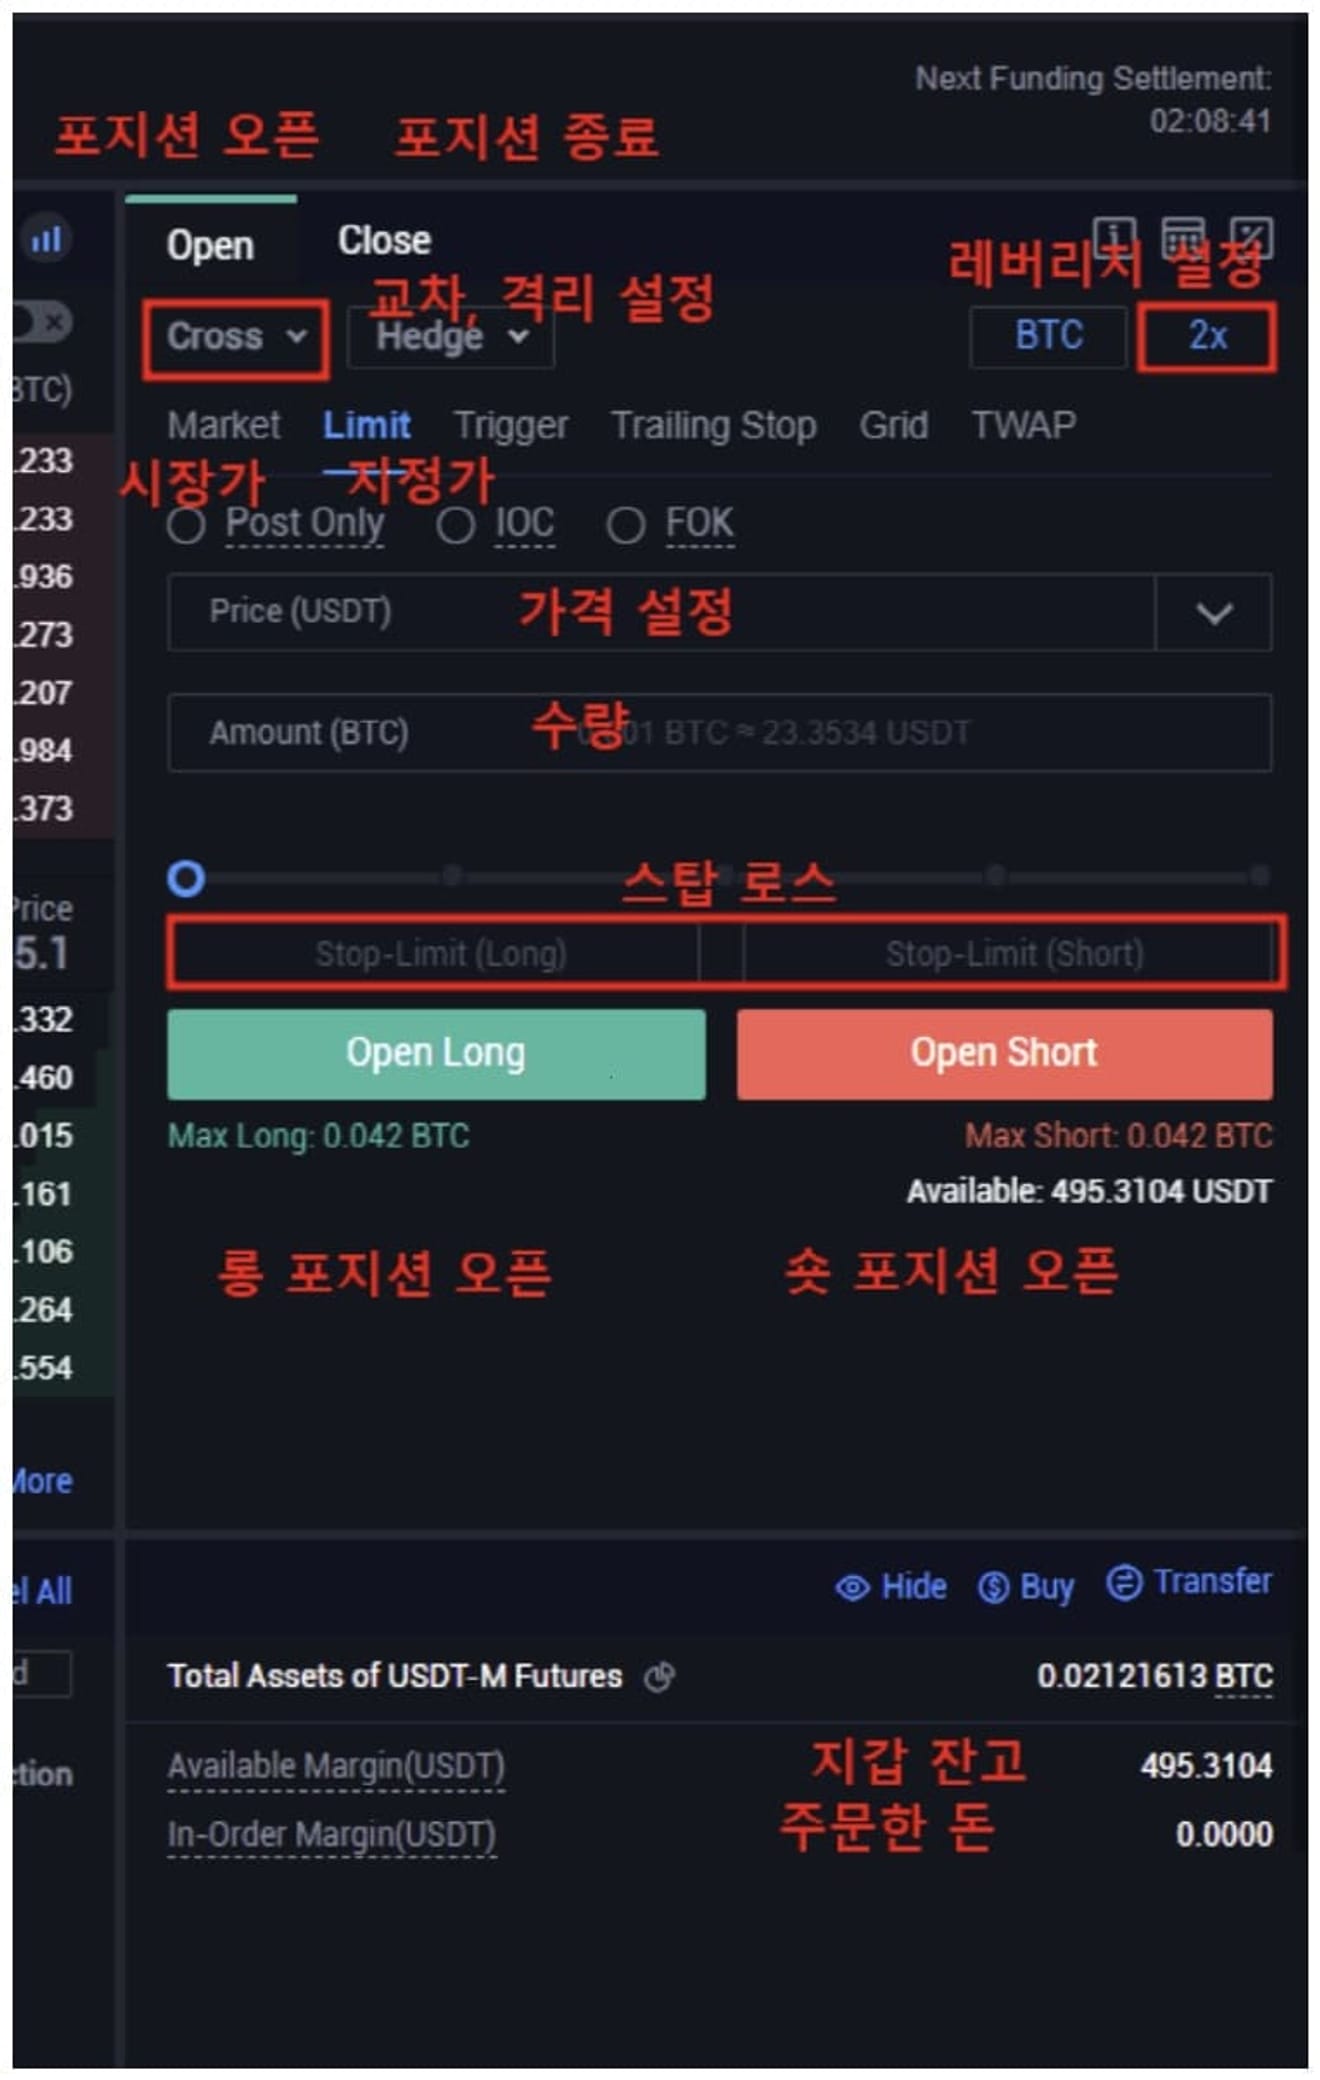
This is the order interface window.
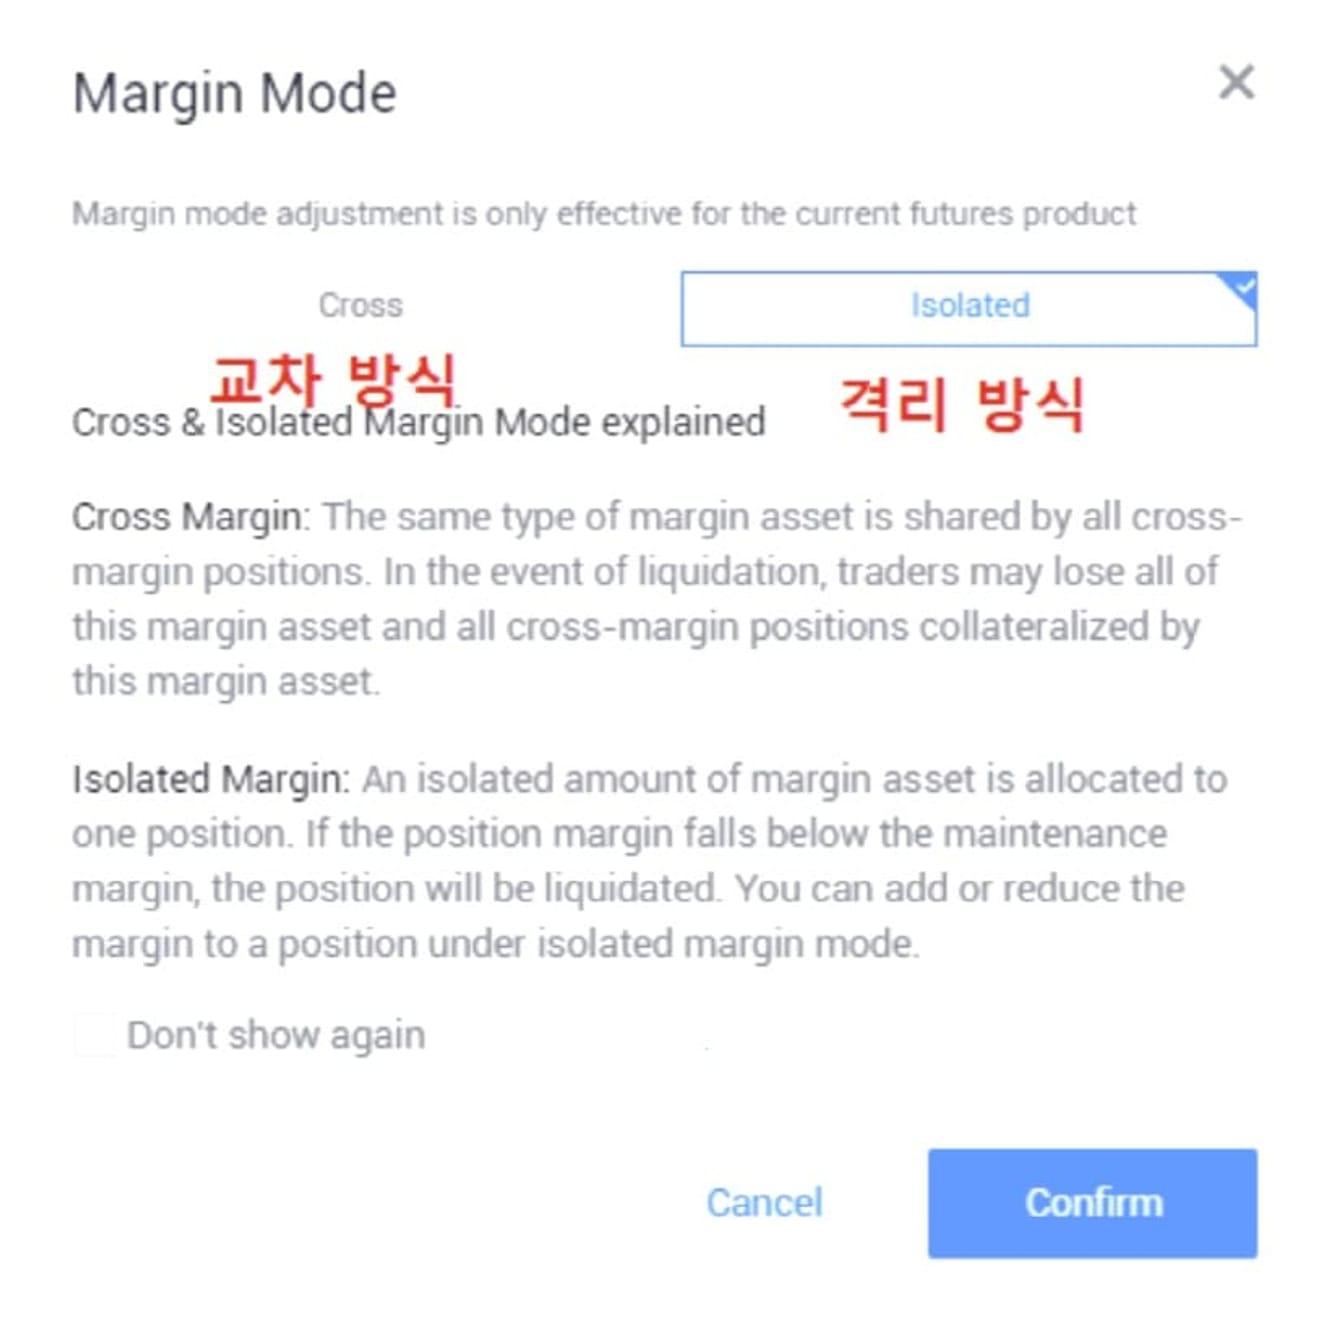
If you click Cross at the top, you can select Cross (Cross) mode and Isolated (Isolated) mode. In Cross (Cross), all cross positions of the same margin asset share the cross margin balance of the same asset. In other words, all the balances in the futures wallet balance are captured as a position.
All balances in your futures wallet can be forfeited upon liquidation. In Isolated (Isolated), the margin specified for that position is limited to a specific amount when trading. In other words, trading is done only with the amount entered. Only the amount entered is forfeited upon liquidation. For those who are new to futures trading, I recommend Isolated (Isolated).
Let's trade HTX futures directly. First, setting leverage.
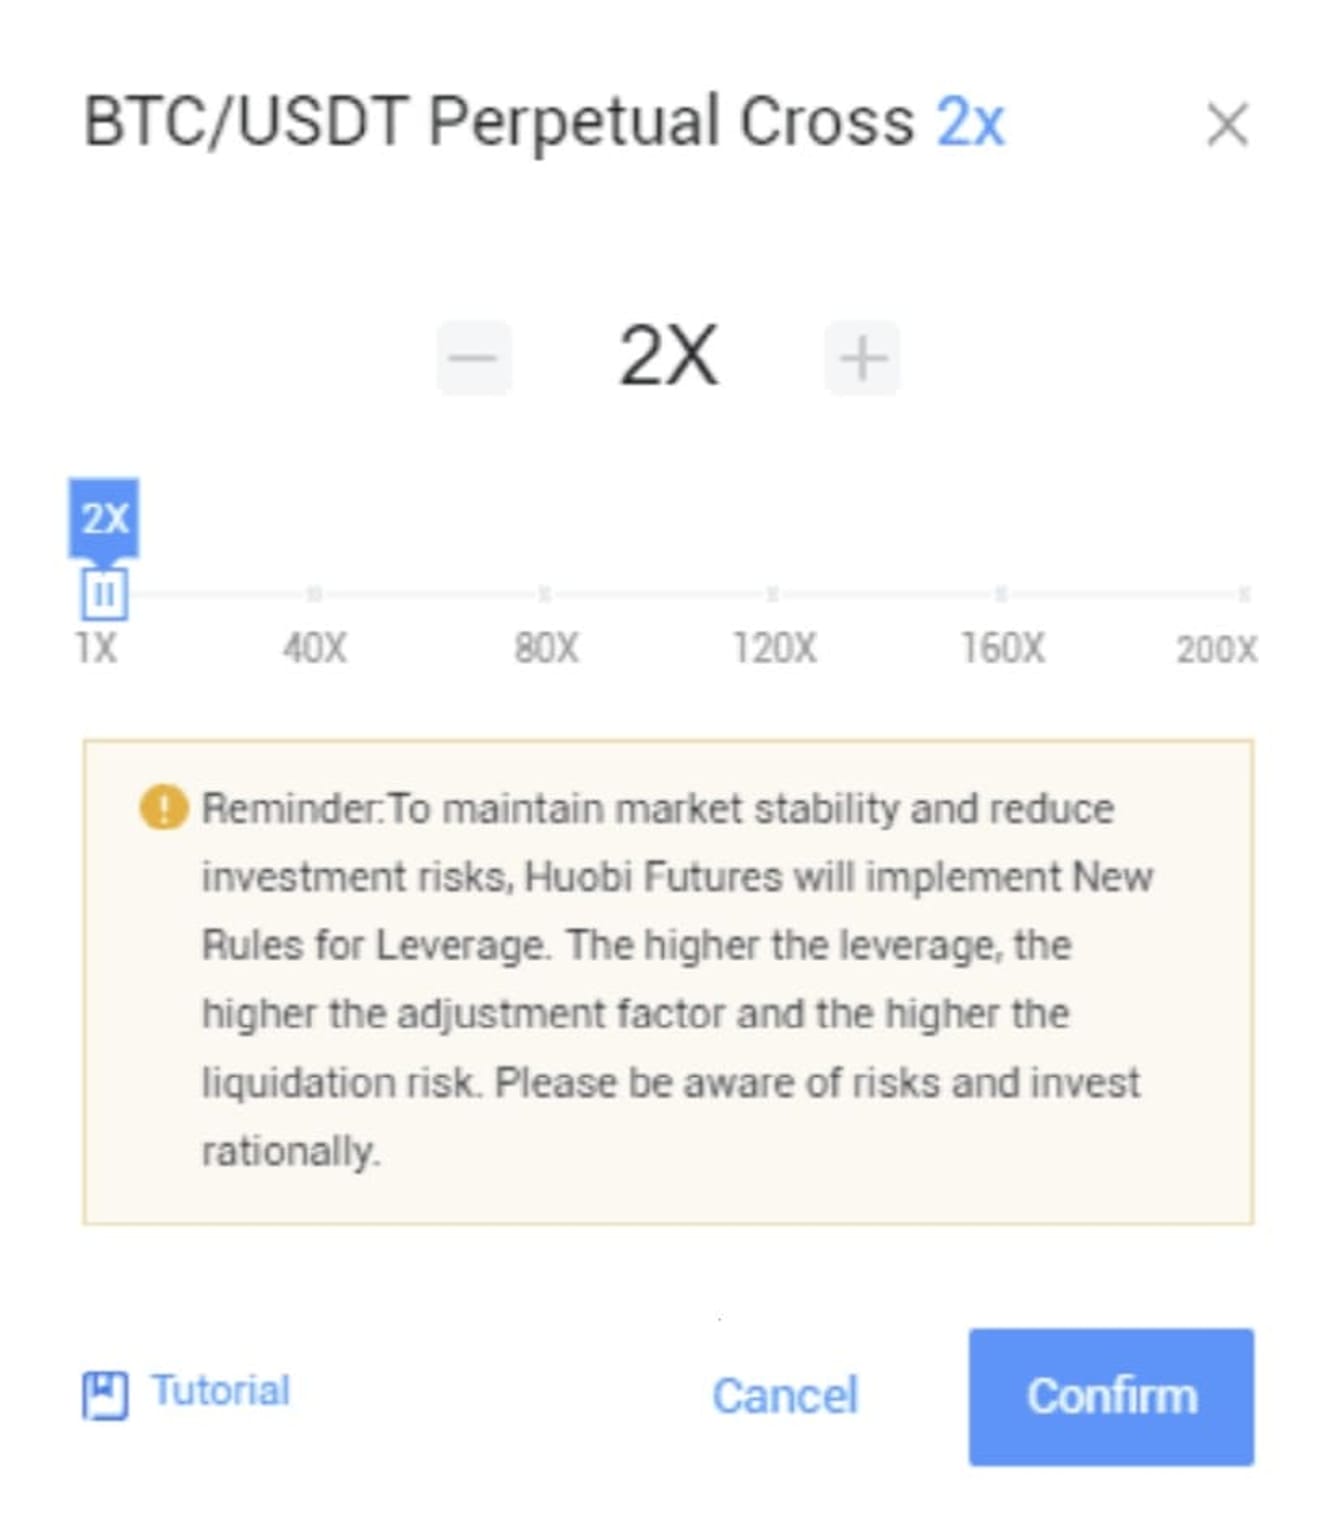
Once you have selected the cross and isolated modes, you need to set the leverage. HTX exchange supports up to 200x. However, high leverage exceeding 10x is not recommended for beginners.
If you set the leverage to 10x, you can assume that 10% of the margin moves when Bitcoin moves 1%. If you long trade with 10x leverage and the price goes up by 10%, you can expect to gain 100%. Conversely, if it falls by 10%, you will be liquidated with -100%.
So, high leverage is not recommended. Now, let's select the desired coin and open a position.

I entered a long position using BTC (Bitcoin) coin in cross mode & 2x leverage.
1. Entry price: Entry price
2. Margin: Position amount
3. PnL: Unrealized profit and loss
4. Eat Liquidation Price: Liquidation price
5. Market: Close market price position
6. Limit: Close limit price position
Please refer to the above picture for smooth trading.

Open Orders confirms unexecuted orders, and you can cancel unexecuted orders. Order History confirms executed orders, and you can also check the actual profit and loss.