How to Use the OKX Exchange
In this blog post, we will explore how to use the OKX exchange, the KYC verification process, how to deposit funds, and how to start futures trading. With the rapid growth of the cryptocurrency market, choosing a safe and reliable exchange is becoming increasingly important. OKX is one of the world's leading cryptocurrency exchanges, offering various investment options such as spot trading and futures trading, and is particularly popular among Korean investors. However, for investors who are new to OKX, the process from account creation to actual trading can feel complicated. There will be many questions about how to complete KYC verification, how to deposit funds safely, and how to start futures trading, which has high profit potential but also high risk. This article will guide those who are using the OKX exchange for the first time through all the steps, from account creation to KYC verification, deposit methods, and futures trading. We will provide precautions and useful tips for each step to help you use OKX safely and efficiently.

1. Registering for OKX Exchange
To start trading on OKX, you must first create an account. You can complete registration within 5 minutes by following the steps below.
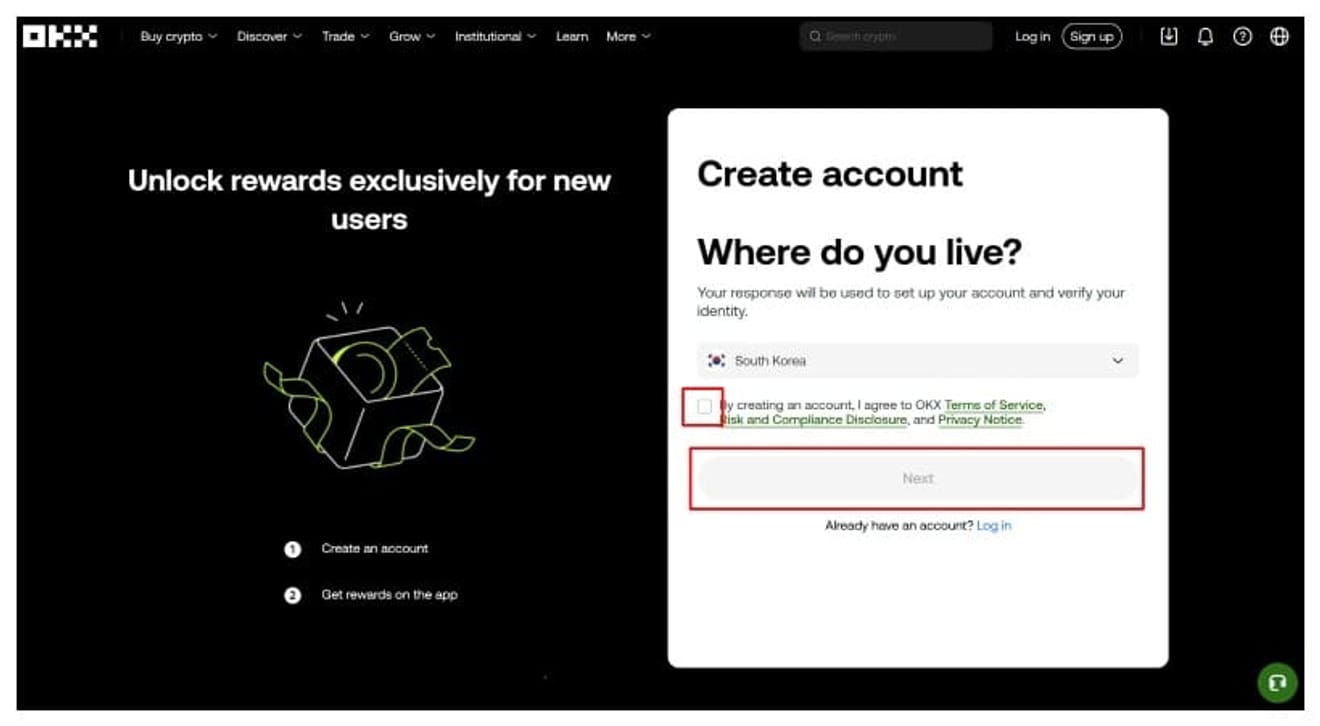
Please click the OKX registration link. You will receive a commission discount if you sign up through this link. Select your country to register and agree to the terms and conditions, then click the next button.
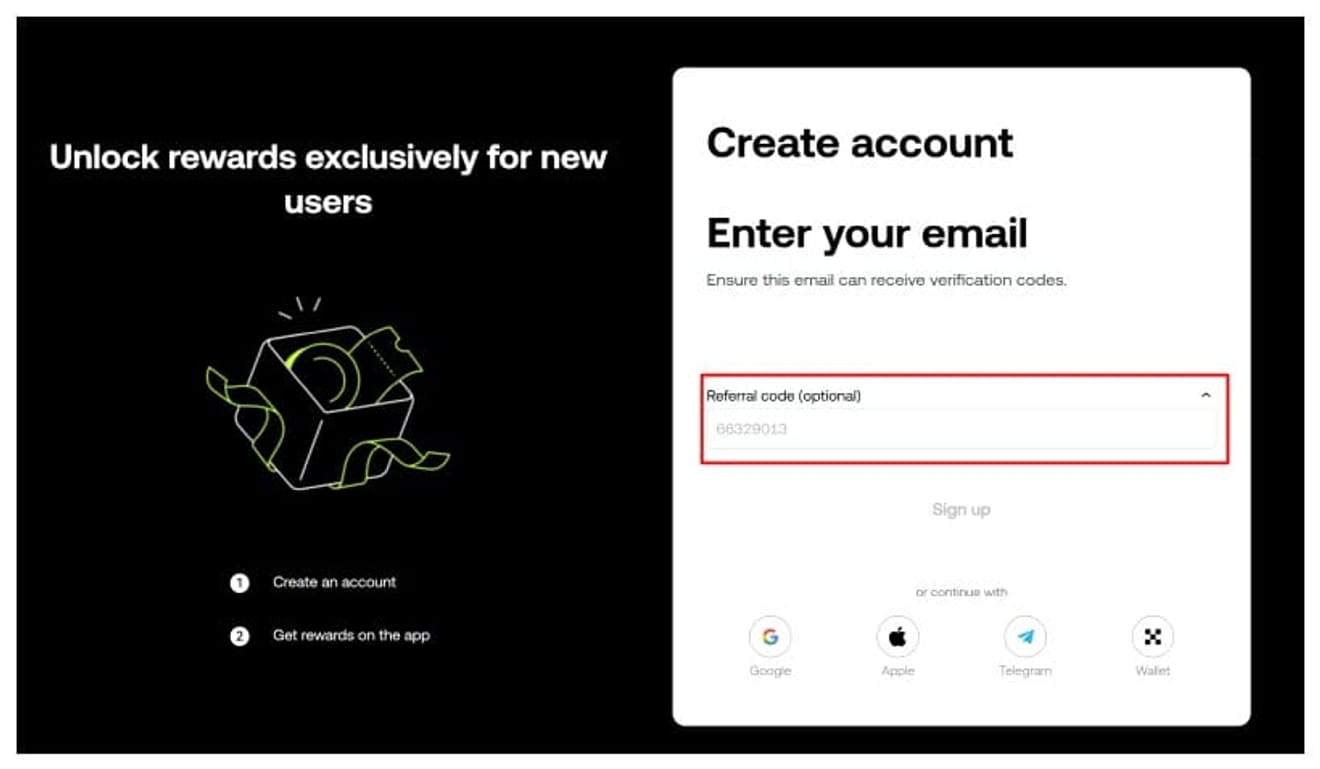
2. Enter Your Email Address
Next, you will enter your email address for login. At this time, the referral code must be entered as follows for the commission discount to apply. While you can register without a referral code, the discount will not apply if you don't have one, so please keep this in mind.
3. KYC Verification
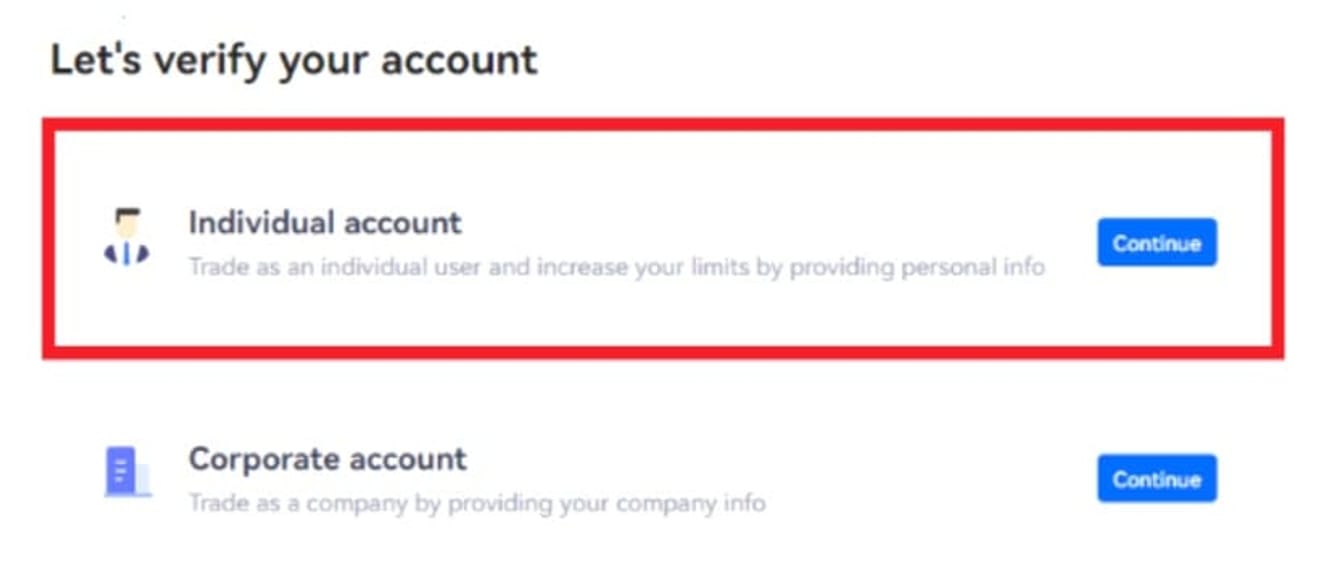
You can think of KYC verification as an identity verification process. Since identity verification is required to transfer funds from a domestic exchange to OKX, it is convenient to do KYC verification immediately when registering. To verify your ID, you can prepare one of the following: driver's license, resident registration card, or passport, take a photo, and upload it. Then, proceed with another selfie verification. First, click the Verification button.

Then, click on Individual Account.
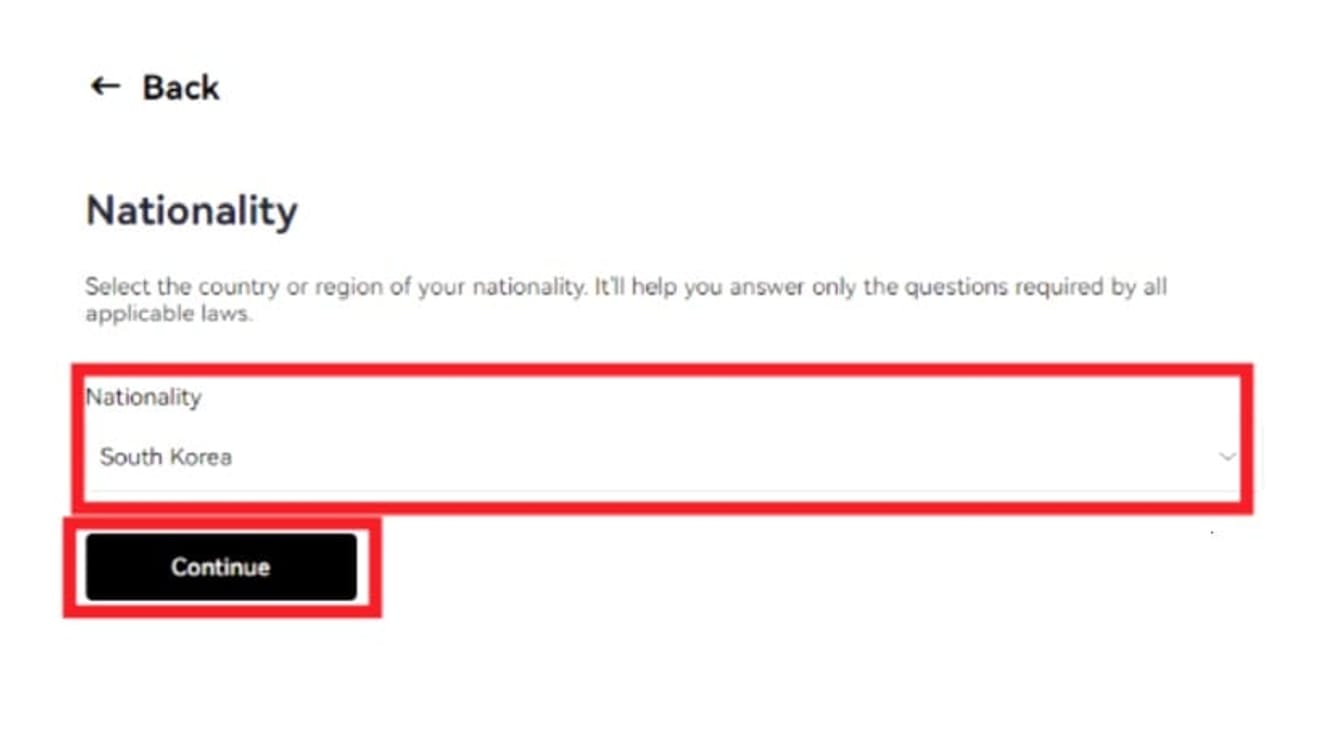
After confirming your country, click the confirm button. Select South Korea for the Republic of Korea.
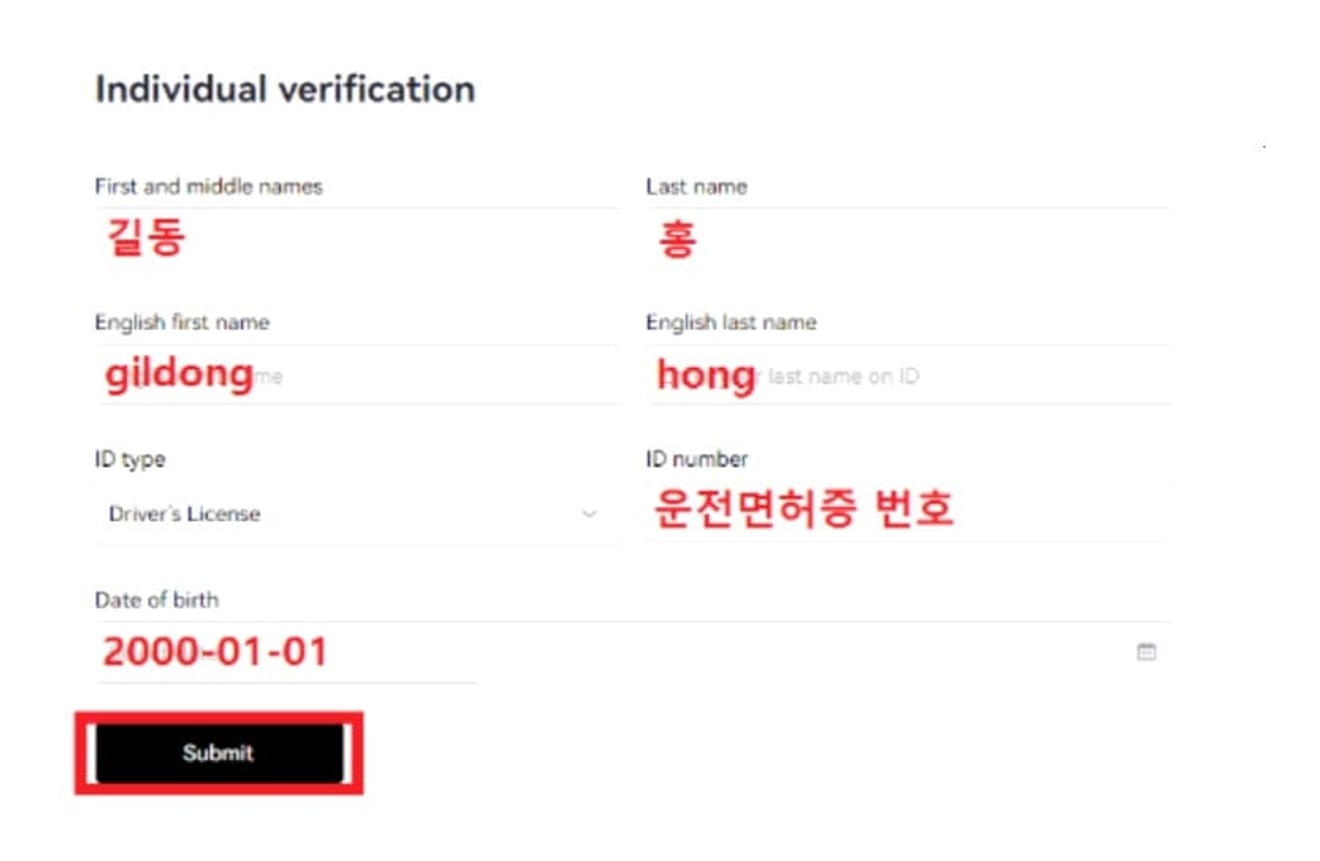
You can enter the information in the following order. I used my driver's license. If you are using a resident registration card, you can enter your resident registration number.
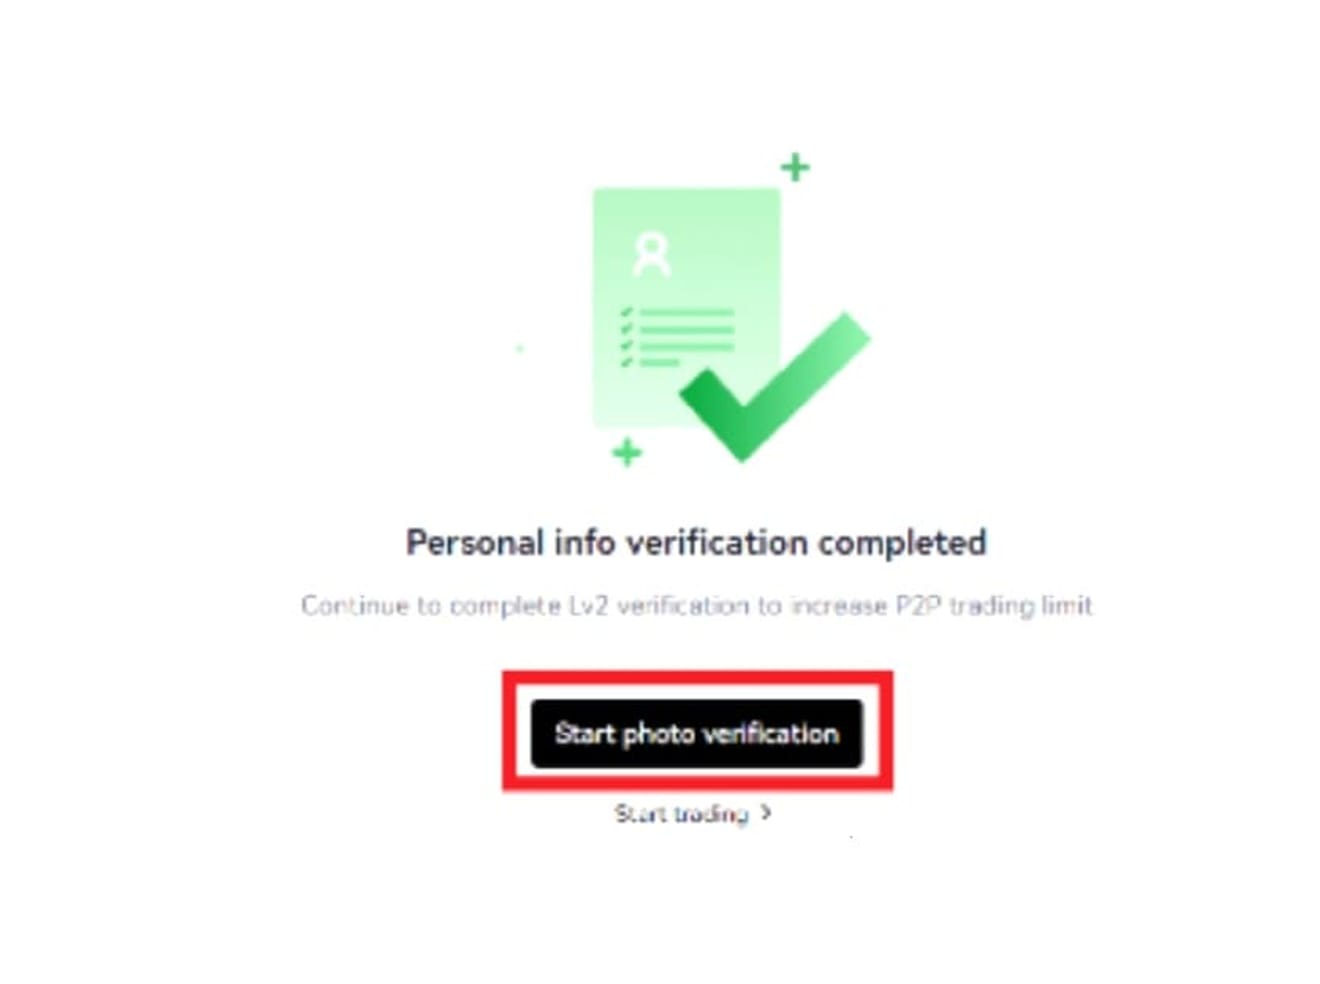
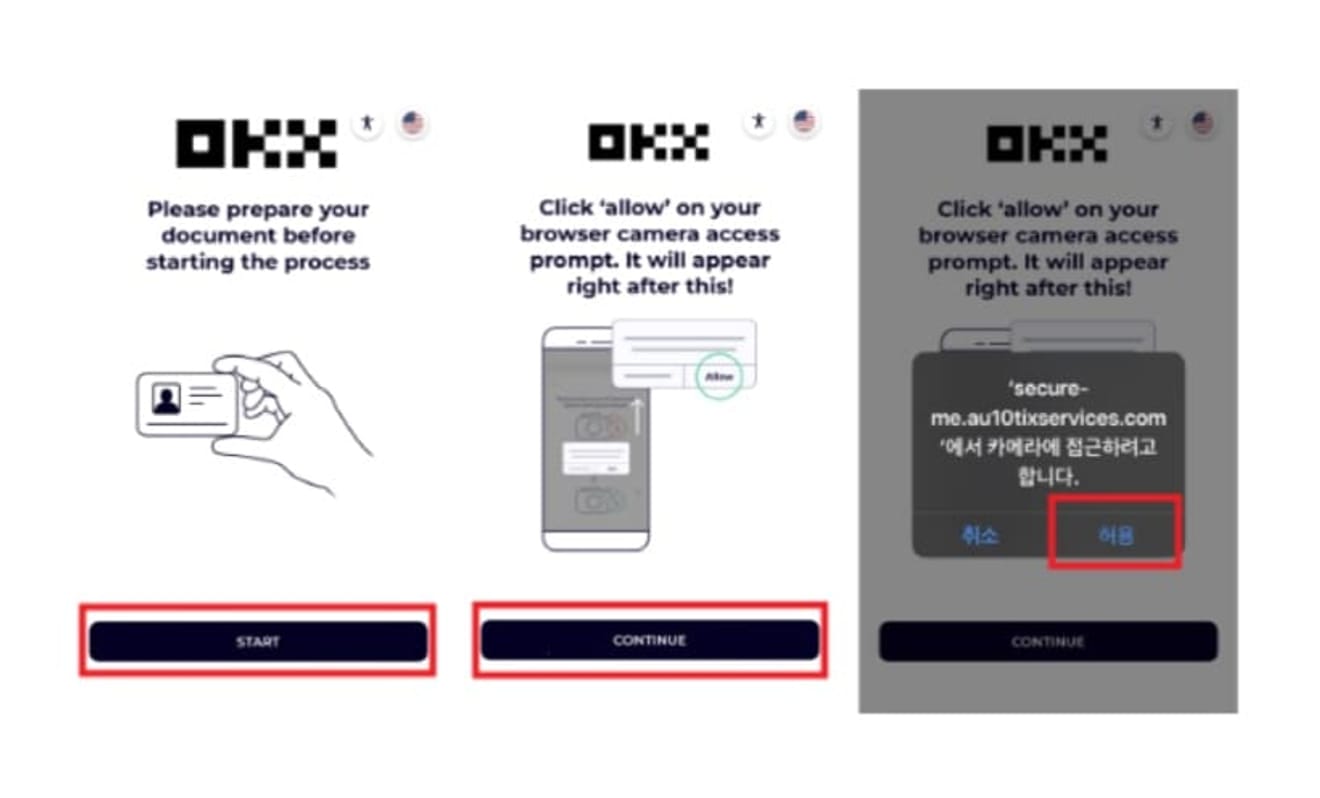
Please click the Start photo verification button below for photo verification.
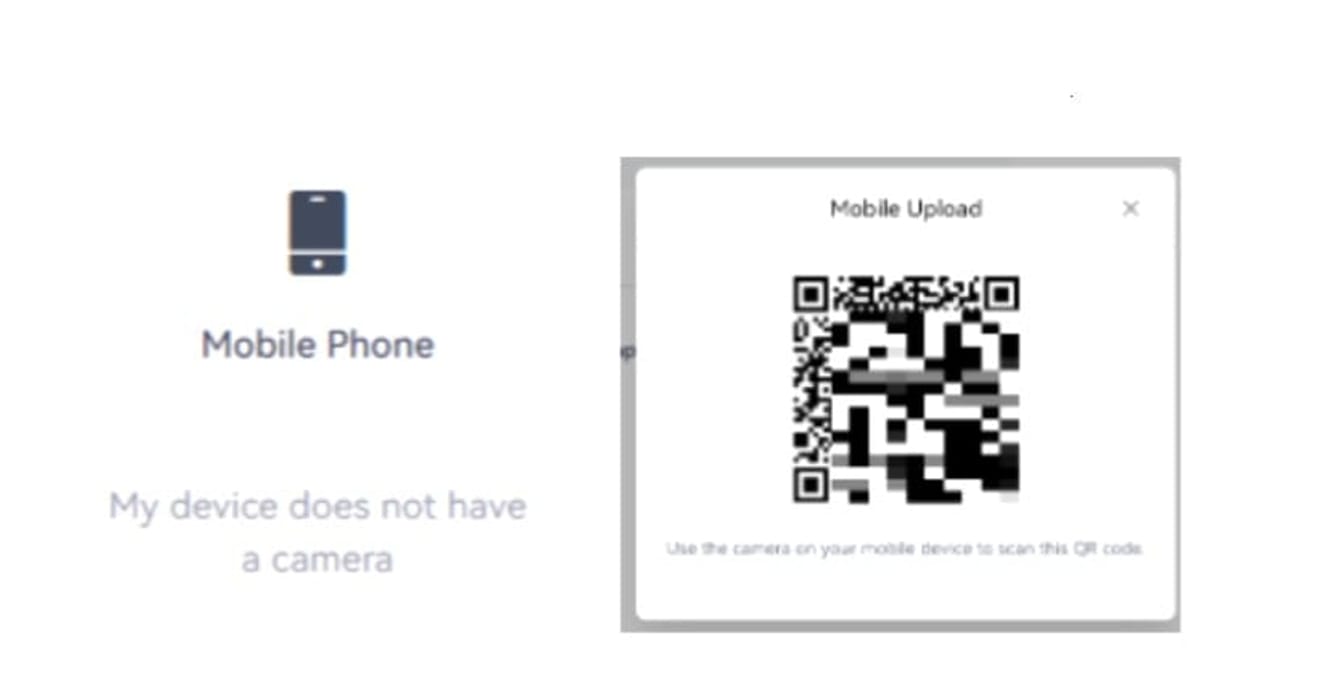
Click the Mobile Phone button at the bottom of the page and scan the QR code with your mobile device.
Now, proceed with the identity verification on your mobile device. Agree to take a picture of your ID.
Take photos of the front and back of your ID and your face.
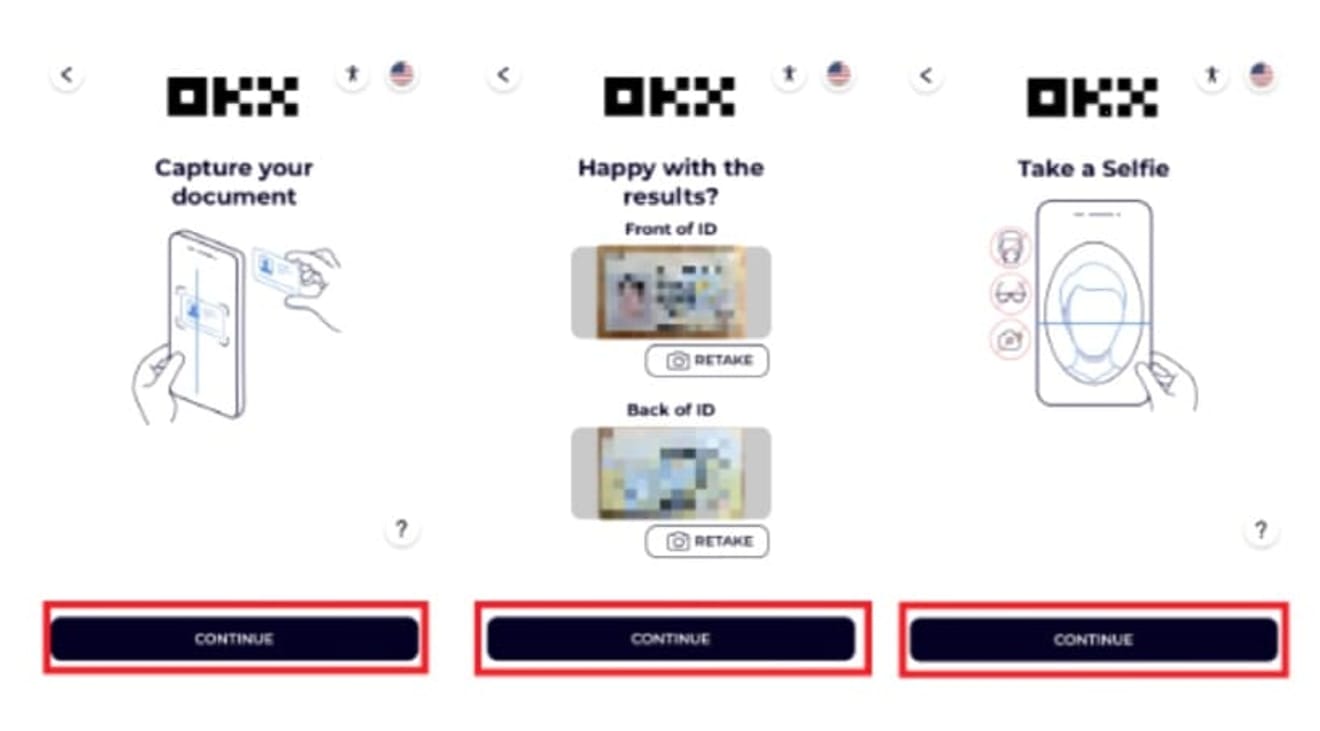
KYC identity verification is now complete.
3. Depositing to OKX Exchange
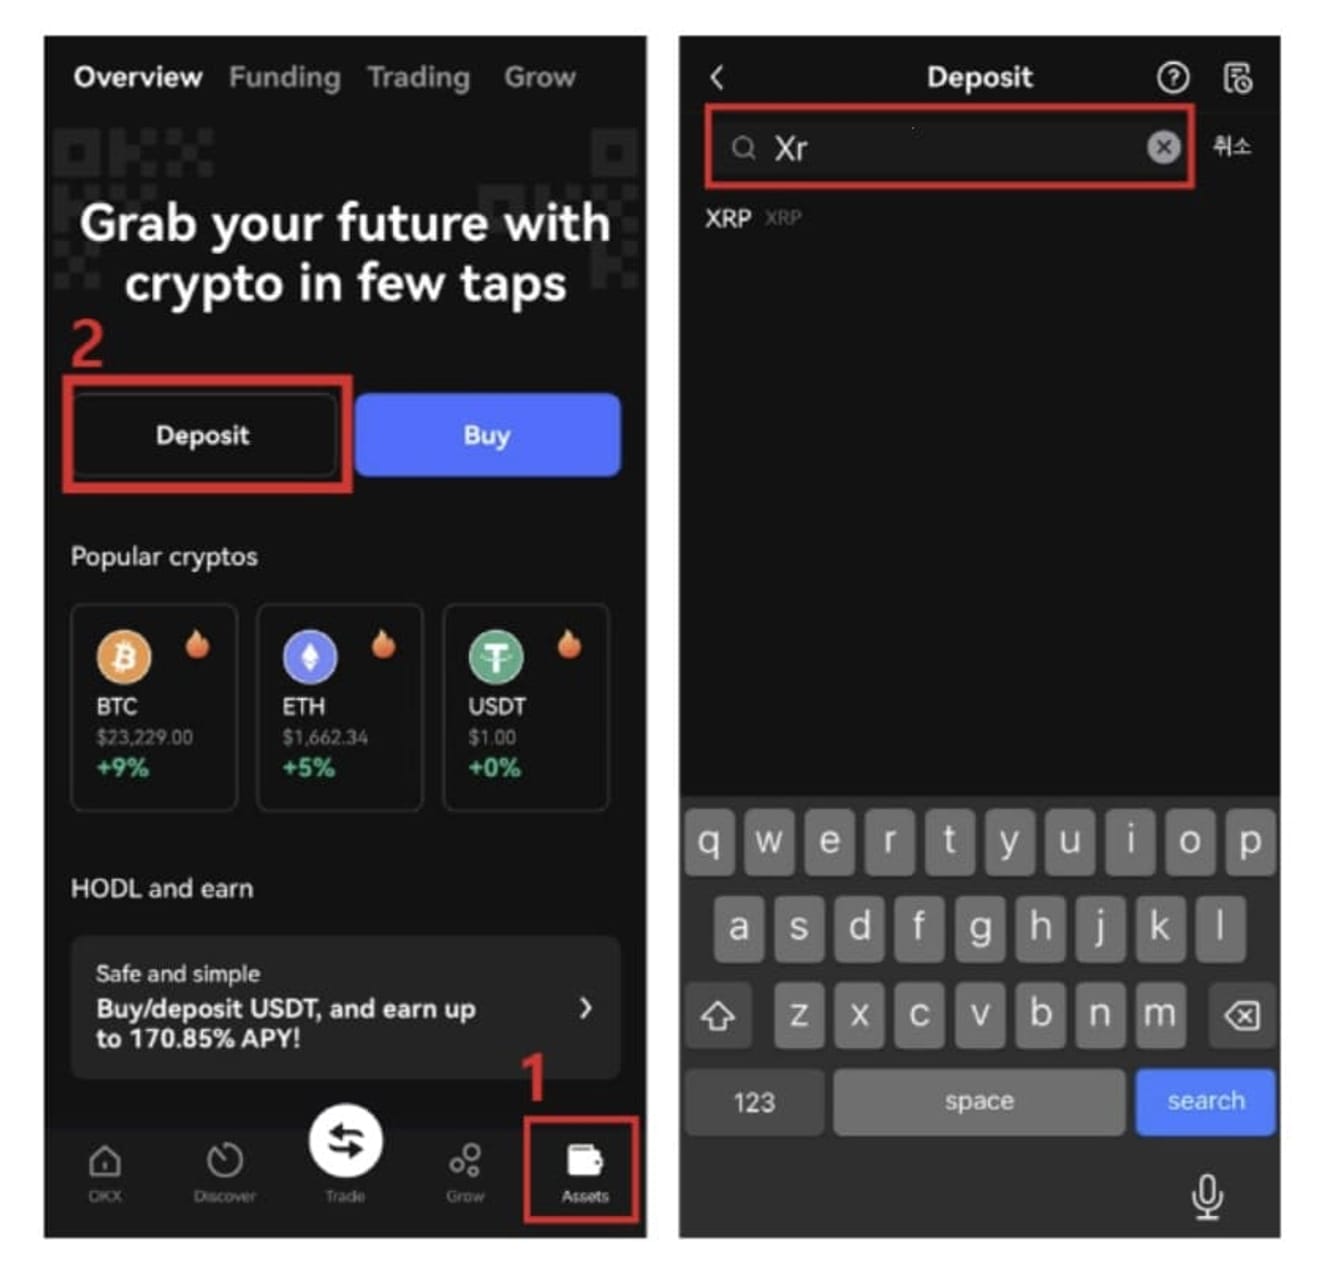
After logging into the OKX app, click Assets and select Deposit. Then, select the cryptocurrency you want to deposit on the next page. Generally, Ripple and Tron are widely used because of their fast transfer speeds and low fees.
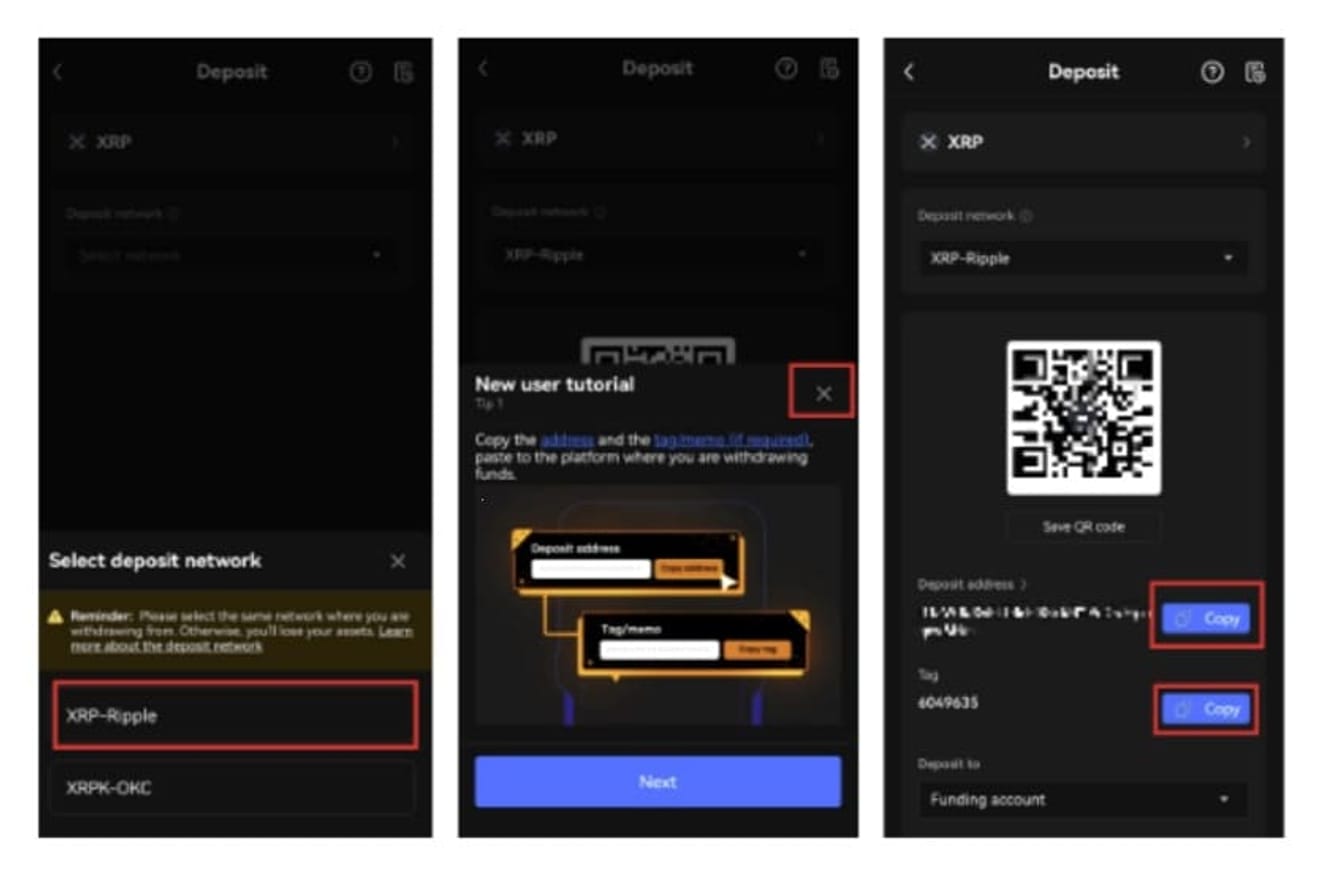
Select after confirming the network. You can delete the explanation in the middle. Please check the deposit address and destination tag. A destination tag is only required for Ripple.
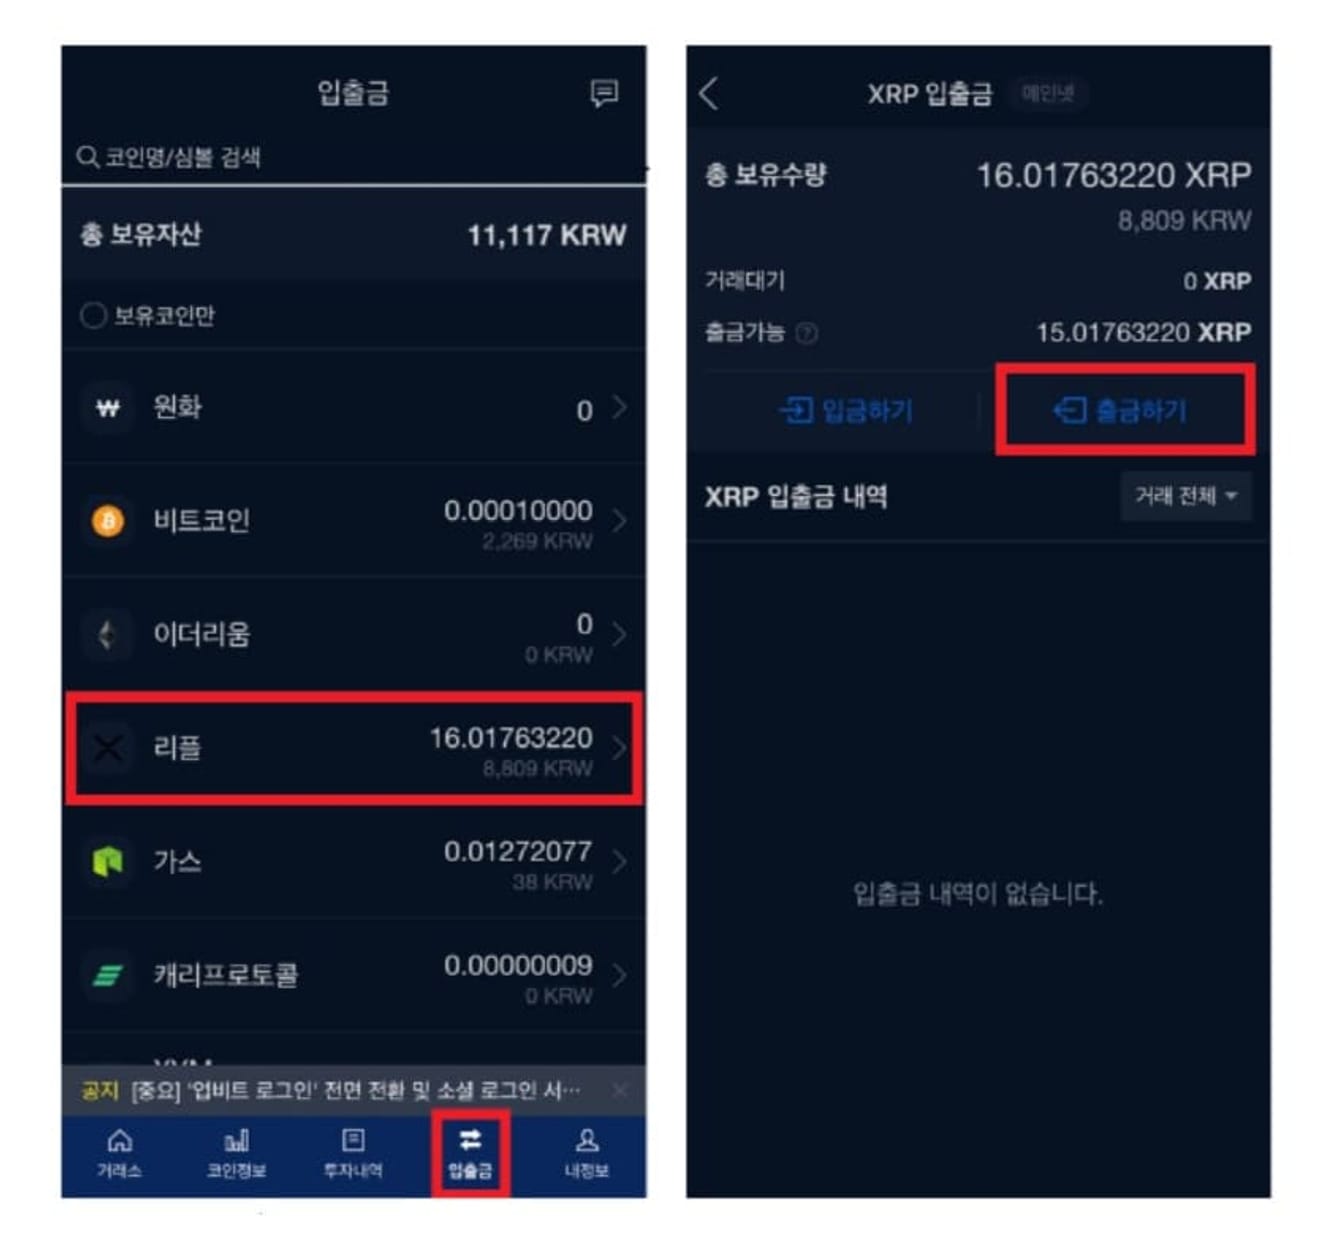
There is a way to use Upbit as a deposit method. This time, we will look at the deposit procedure through Upbit. After logging into the Upbit site, click Deposit/Withdrawal. After selecting the cryptocurrency to deposit, click Withdraw.
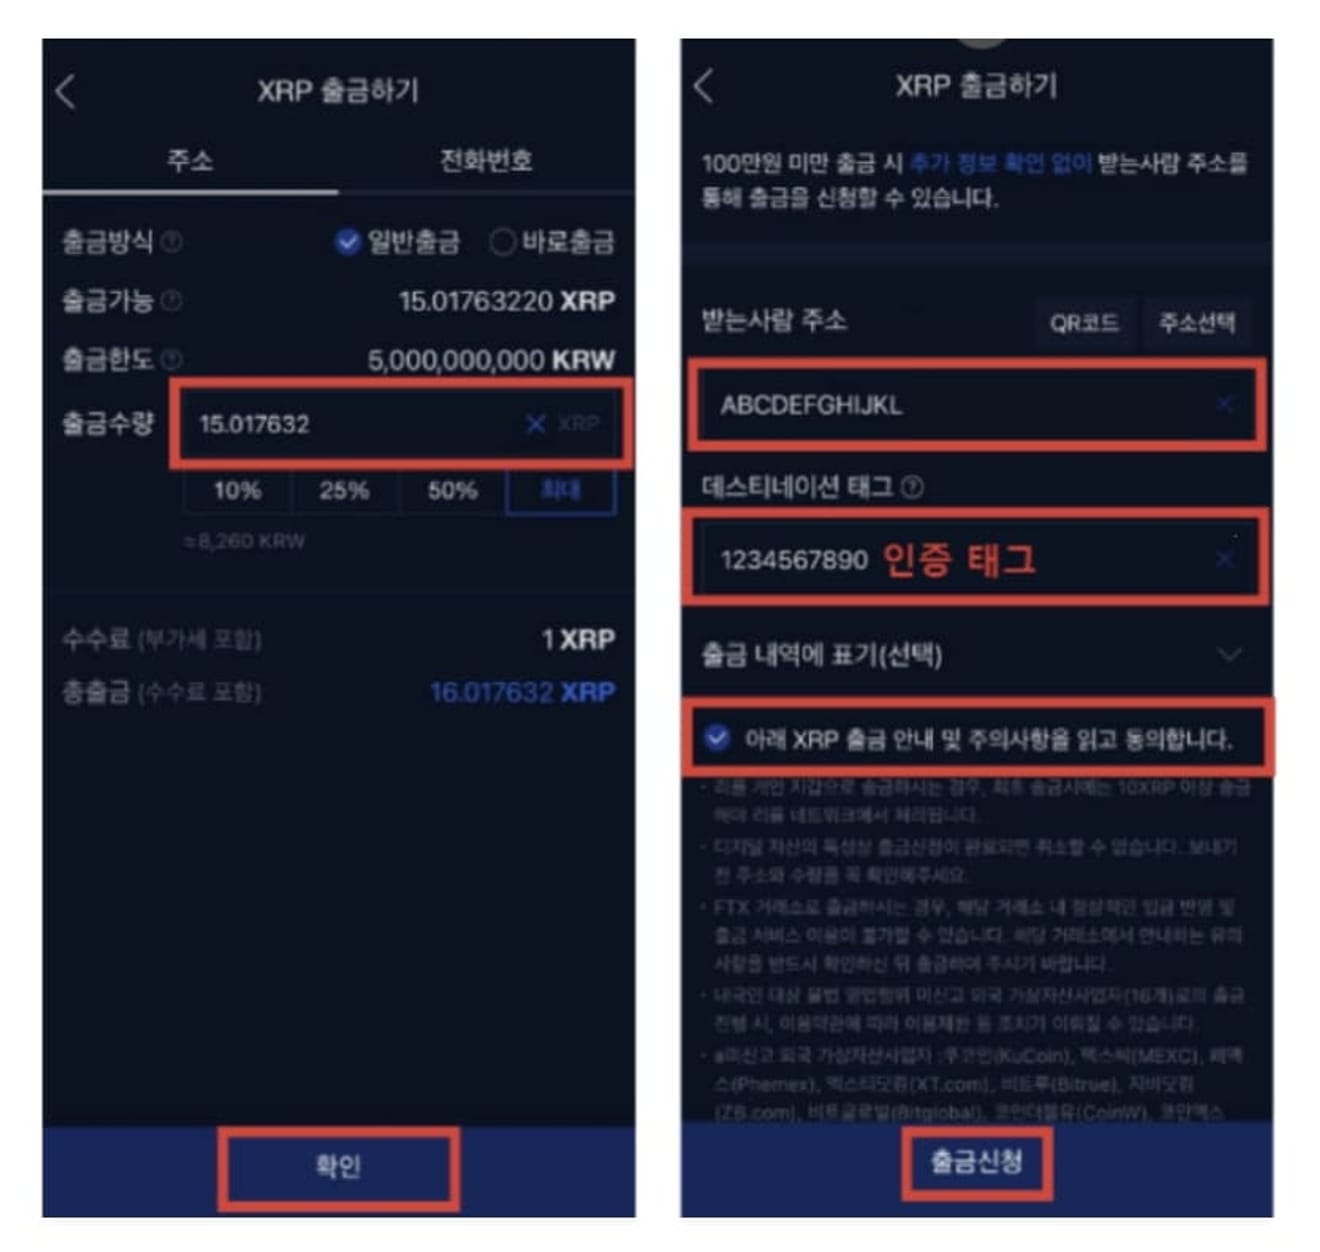
Enter the amount to withdraw and click the confirm button. On the next page, enter the OKX deposit address you confirmed earlier, and if there is a destination tag, enter it. Destination tags are only for Ripple.
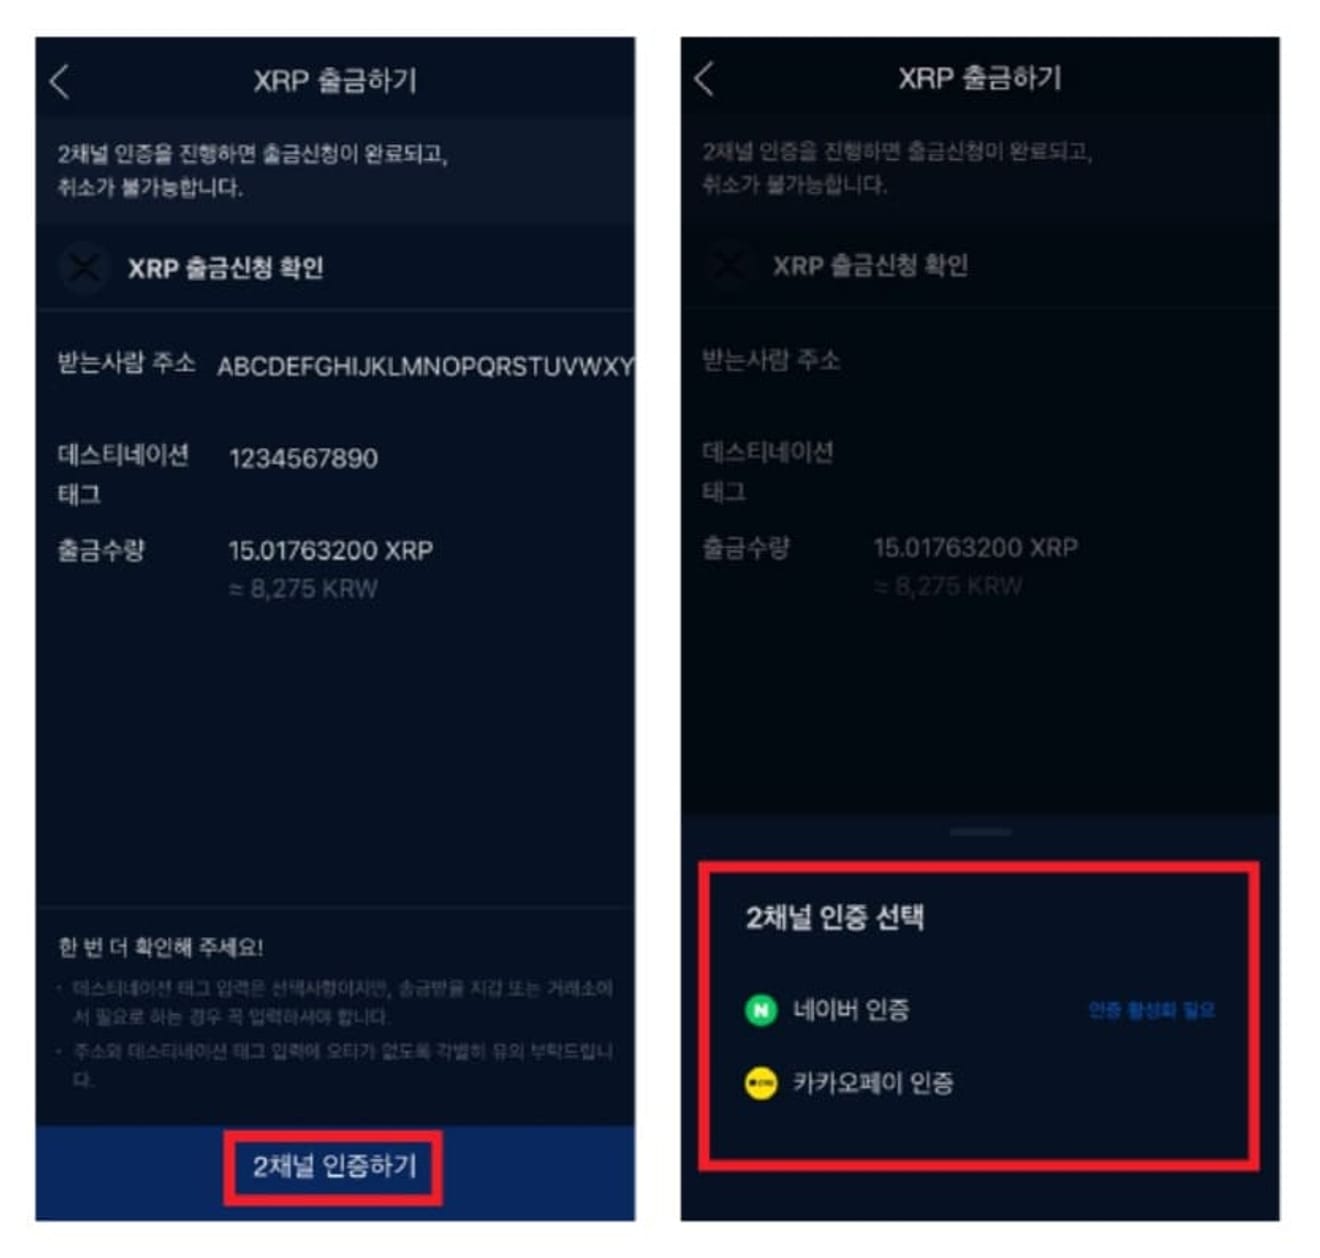
Click the 2-channel authentication button, and then complete the 2-channel authentication to complete the deposit application.
4. OKX Futures Trading
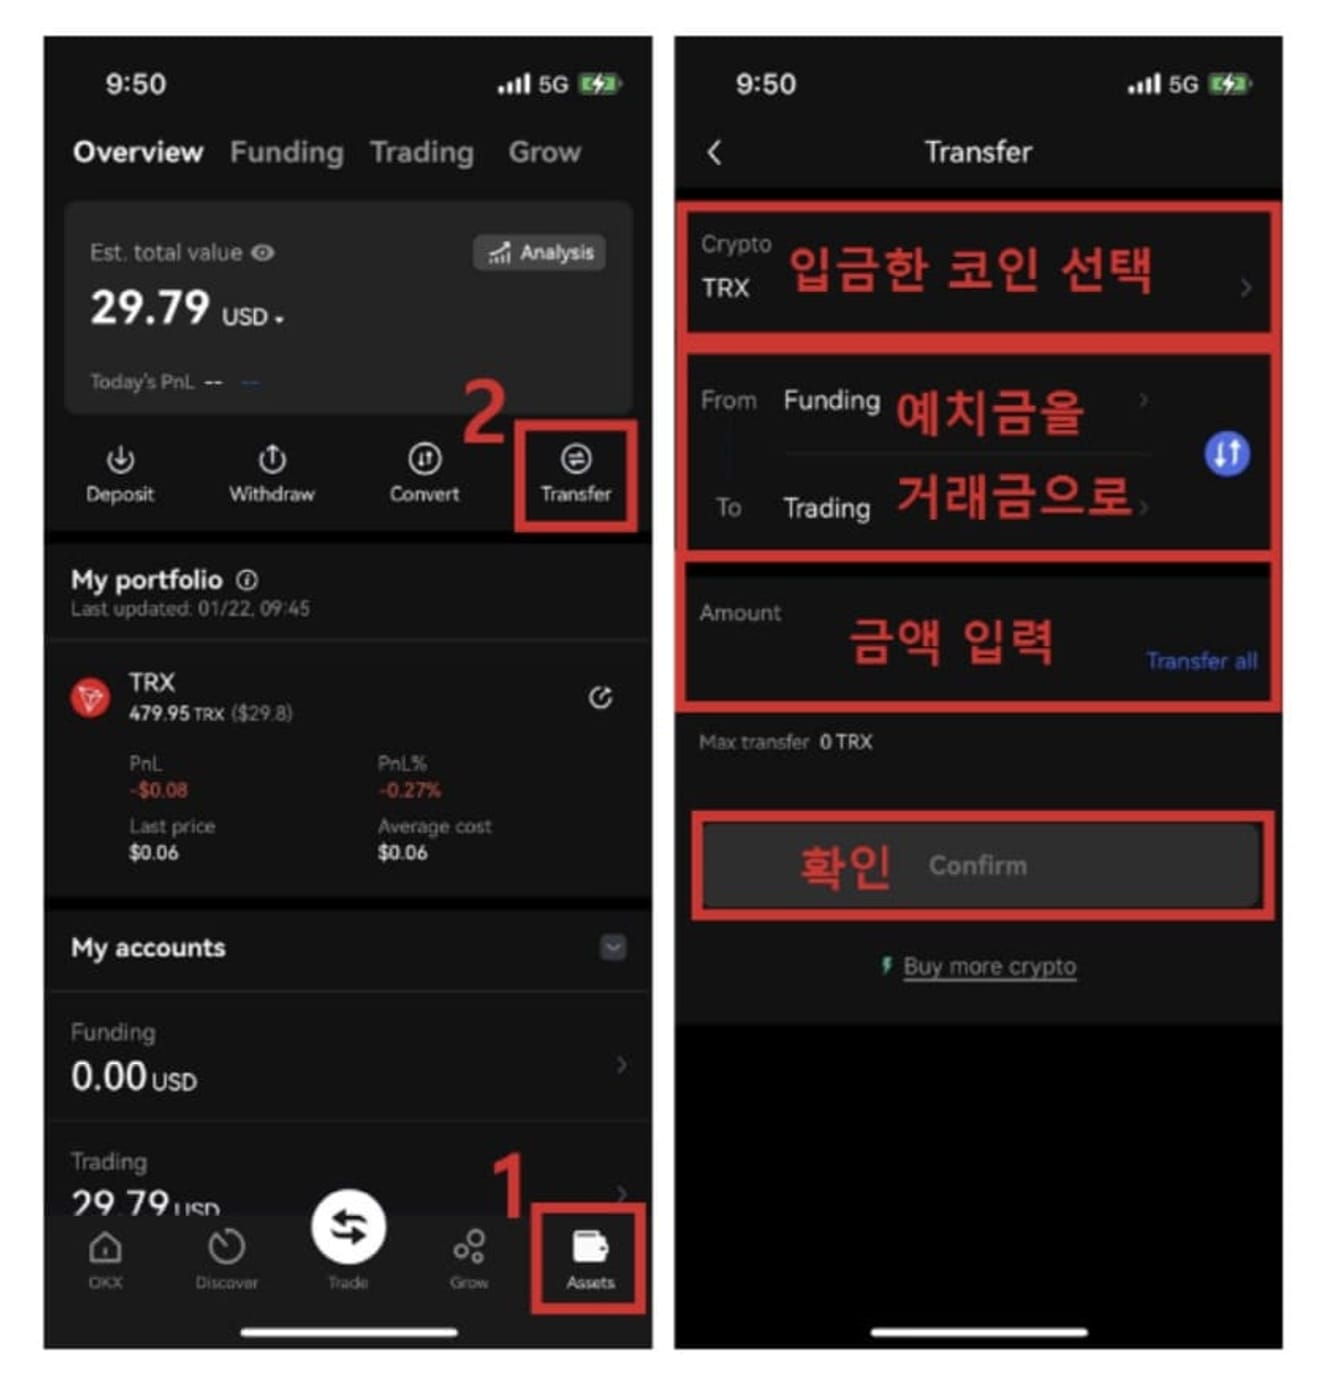
After logging into the OKX app, click Assets at the bottom right and select Exchange. Select the coins you deposited previously and enter the amount to convert from Funding to Trading, then click Exchange.
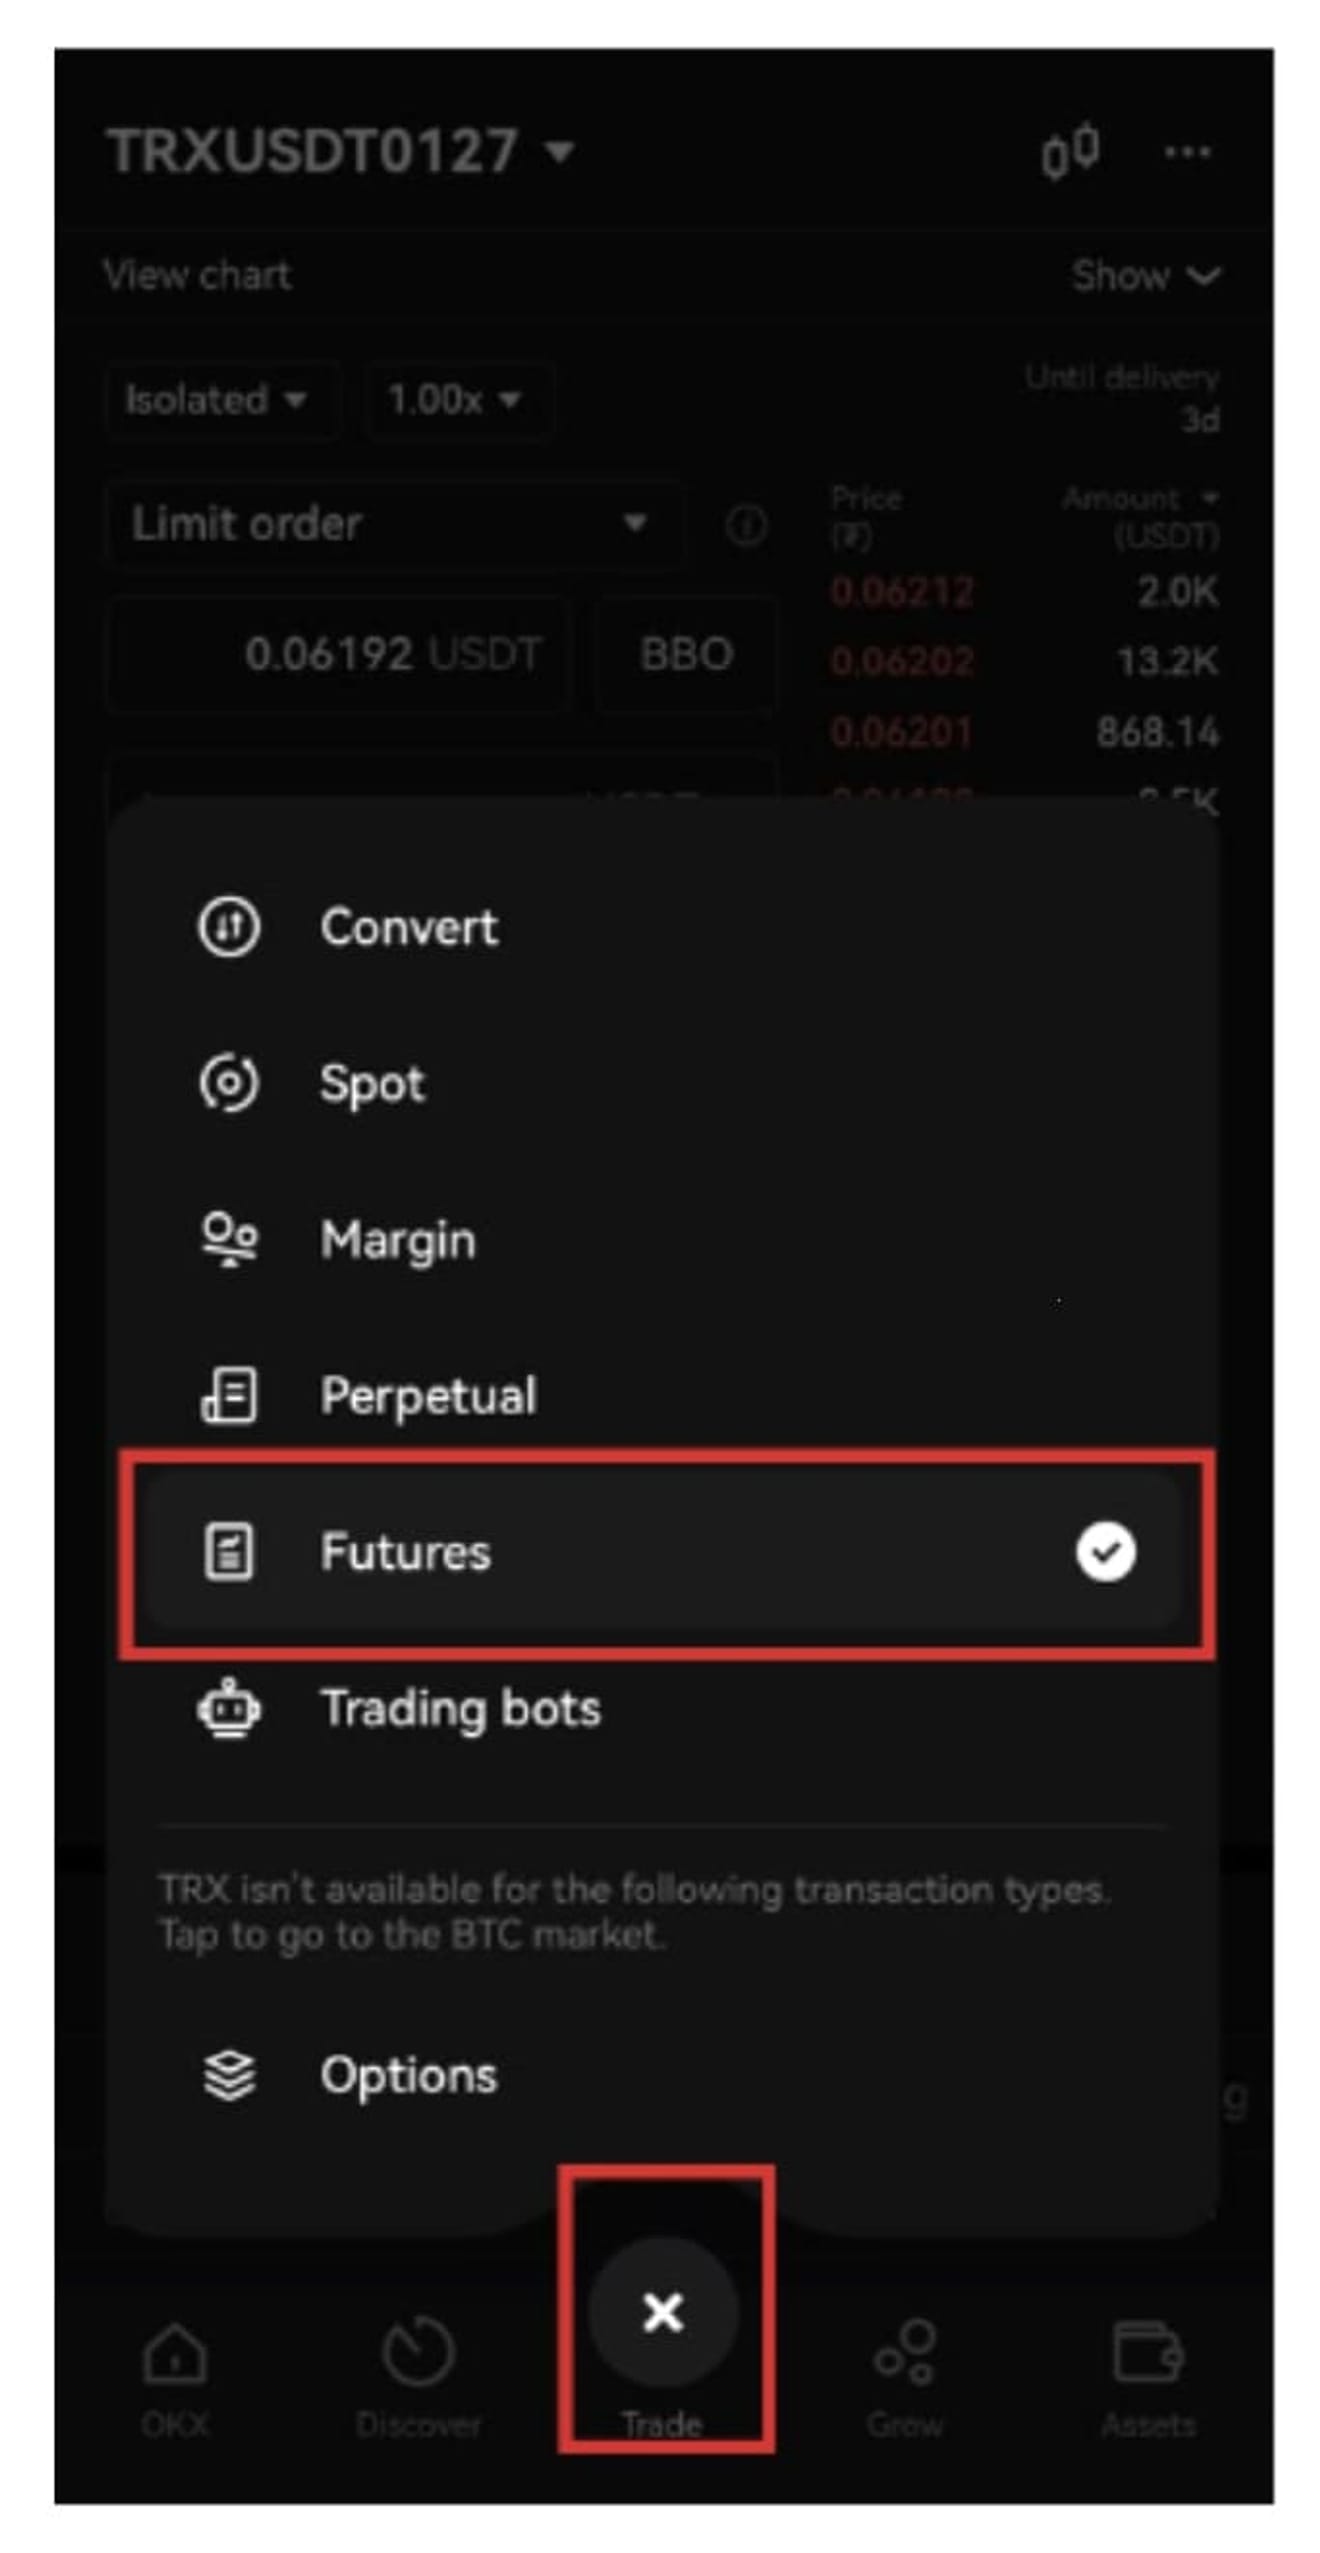
Click Futures in the Trade section in the center.
Select the trading pair you want to trade in the upper left corner.

Select margin mode and leverage. You must trade in Perpetual mode.
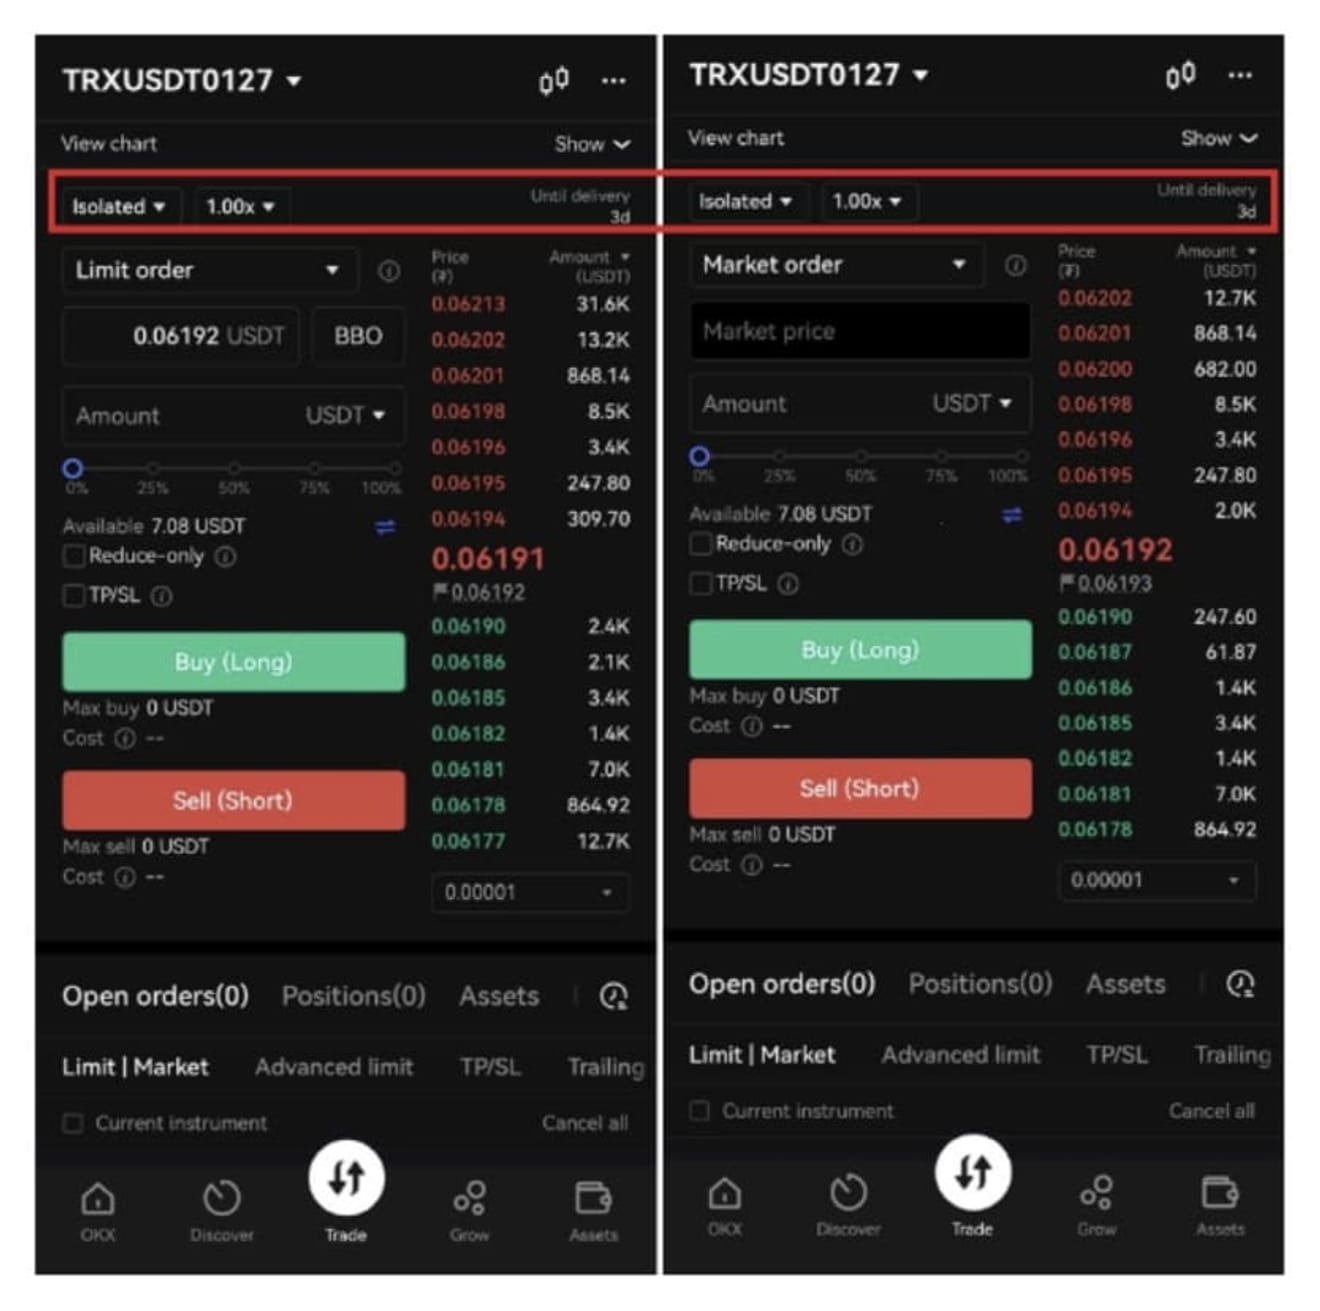
1. Cross: This mode uses the futures wallet as collateral in addition to the contracted amount. If liquidated, the amount in the futures wallet will also be liquidated.
2. Isolated: Only the contracted amount is used as collateral. When liquidated, the contracted amount will be completely extinguished.
3. Leverage: It refers to the multiple of the trade. You can apply a multiple through leverage settings. The 3.00x part on the screen above is that. This means trading with 3x leverage (assuming the trading amount is 3 times). Beginners with little experience are recommended to use low leverage.
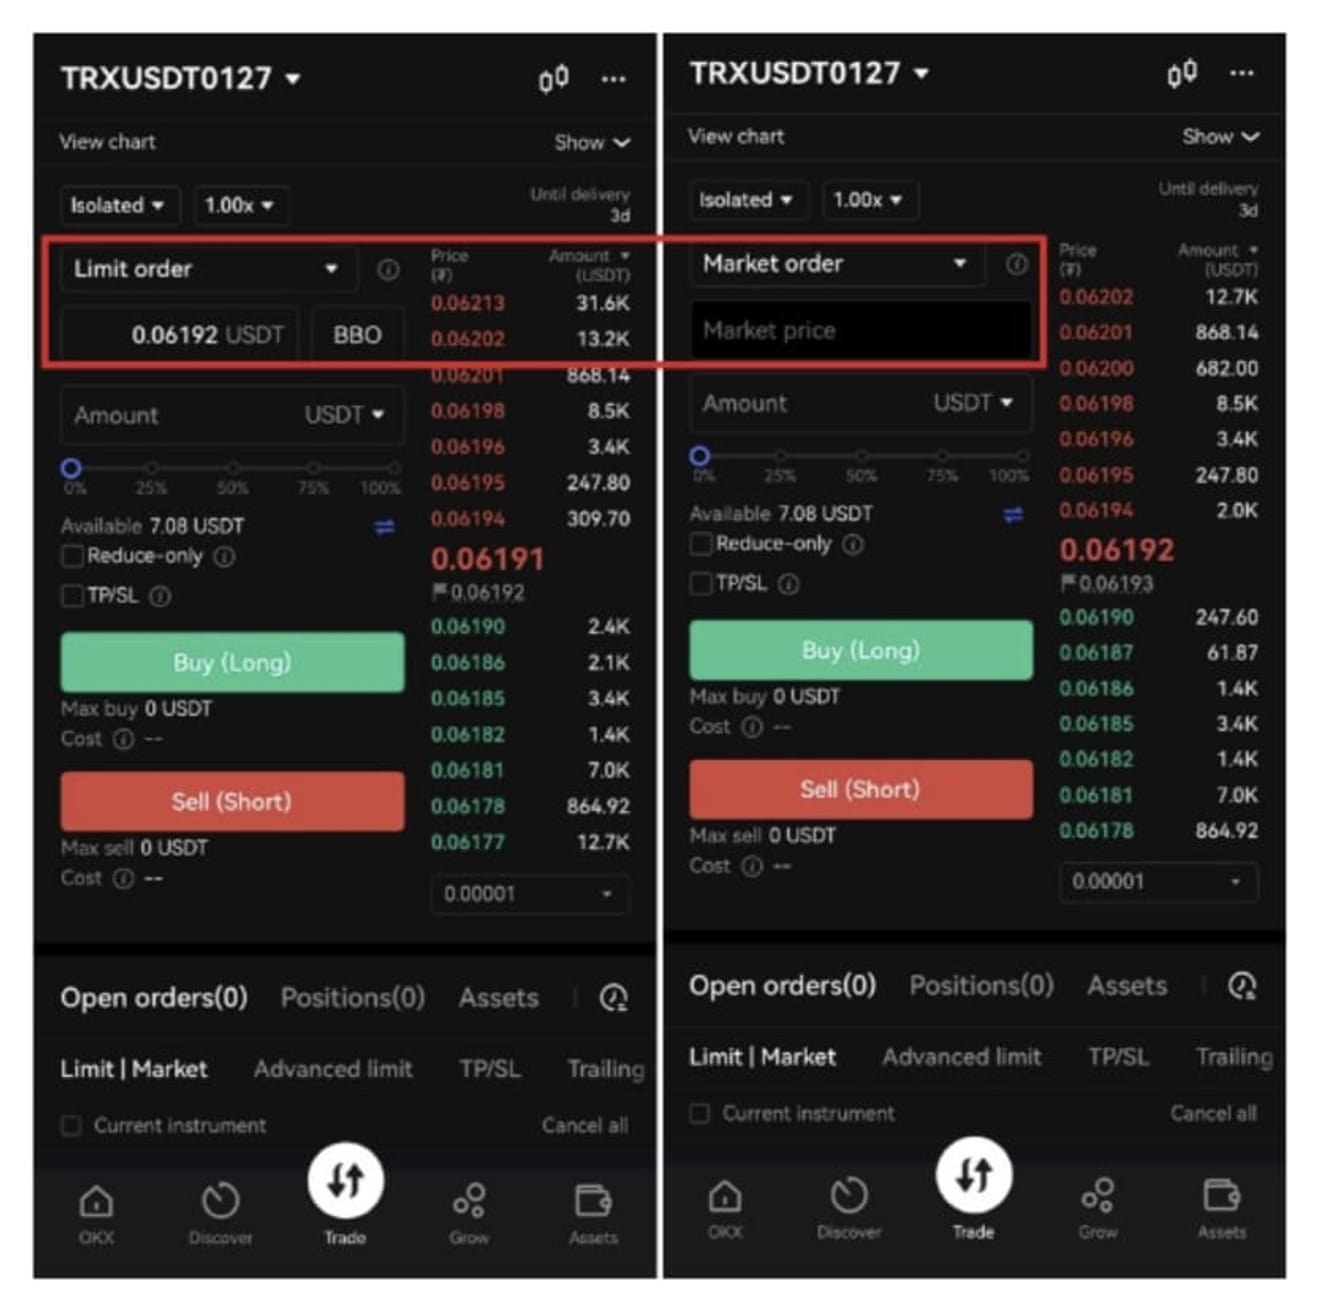
Please choose between Limit order or Market order. A Limit order allows a buy or sell to be executed at a specific price entered by the user. A Market order is bought or sold in real-time at the market price.
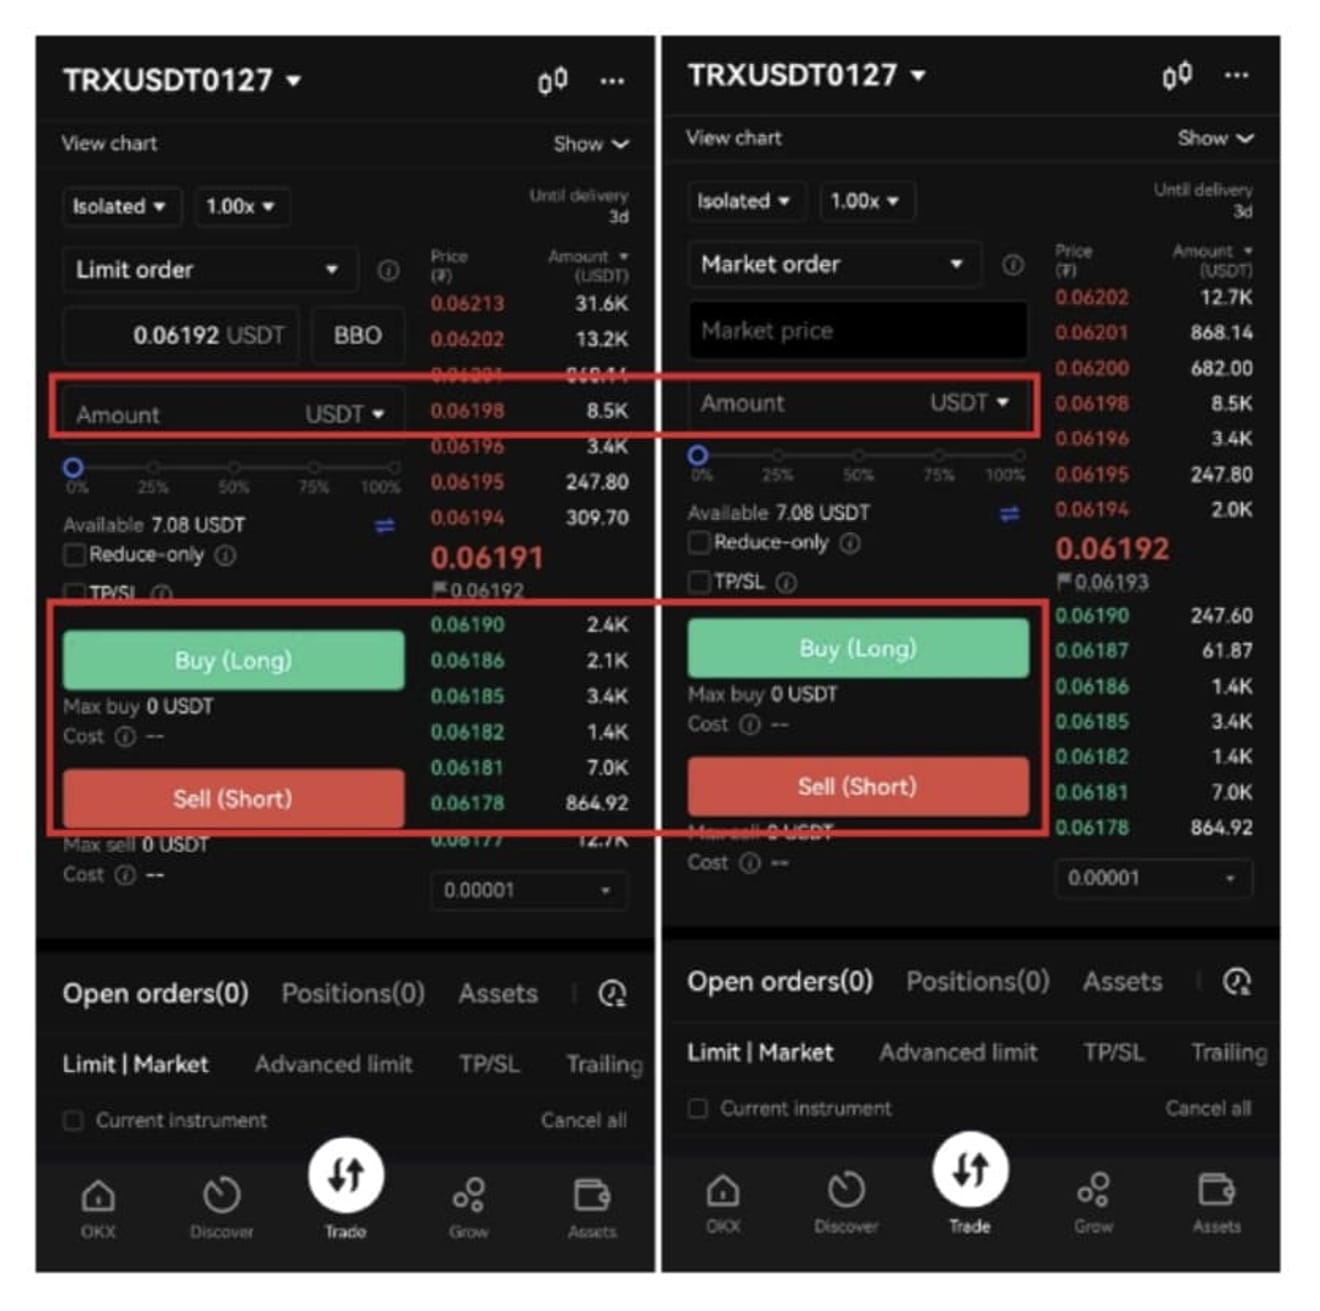
After entering the trading volume, you will choose between going long (buy) and going short (sell).
1. Going long (long): This is an investment method that aims for a price increase, and it is a form of investment that anticipates the price will rise after the point at which you bought. (Profit occurs if the stock price rises after purchase)
2. Going short (short): This is an investment method that targets a price decrease, and it is a form of investment that anticipates the price will fall after the point at which you bought. (Profit occurs if the stock price falls after purchase)
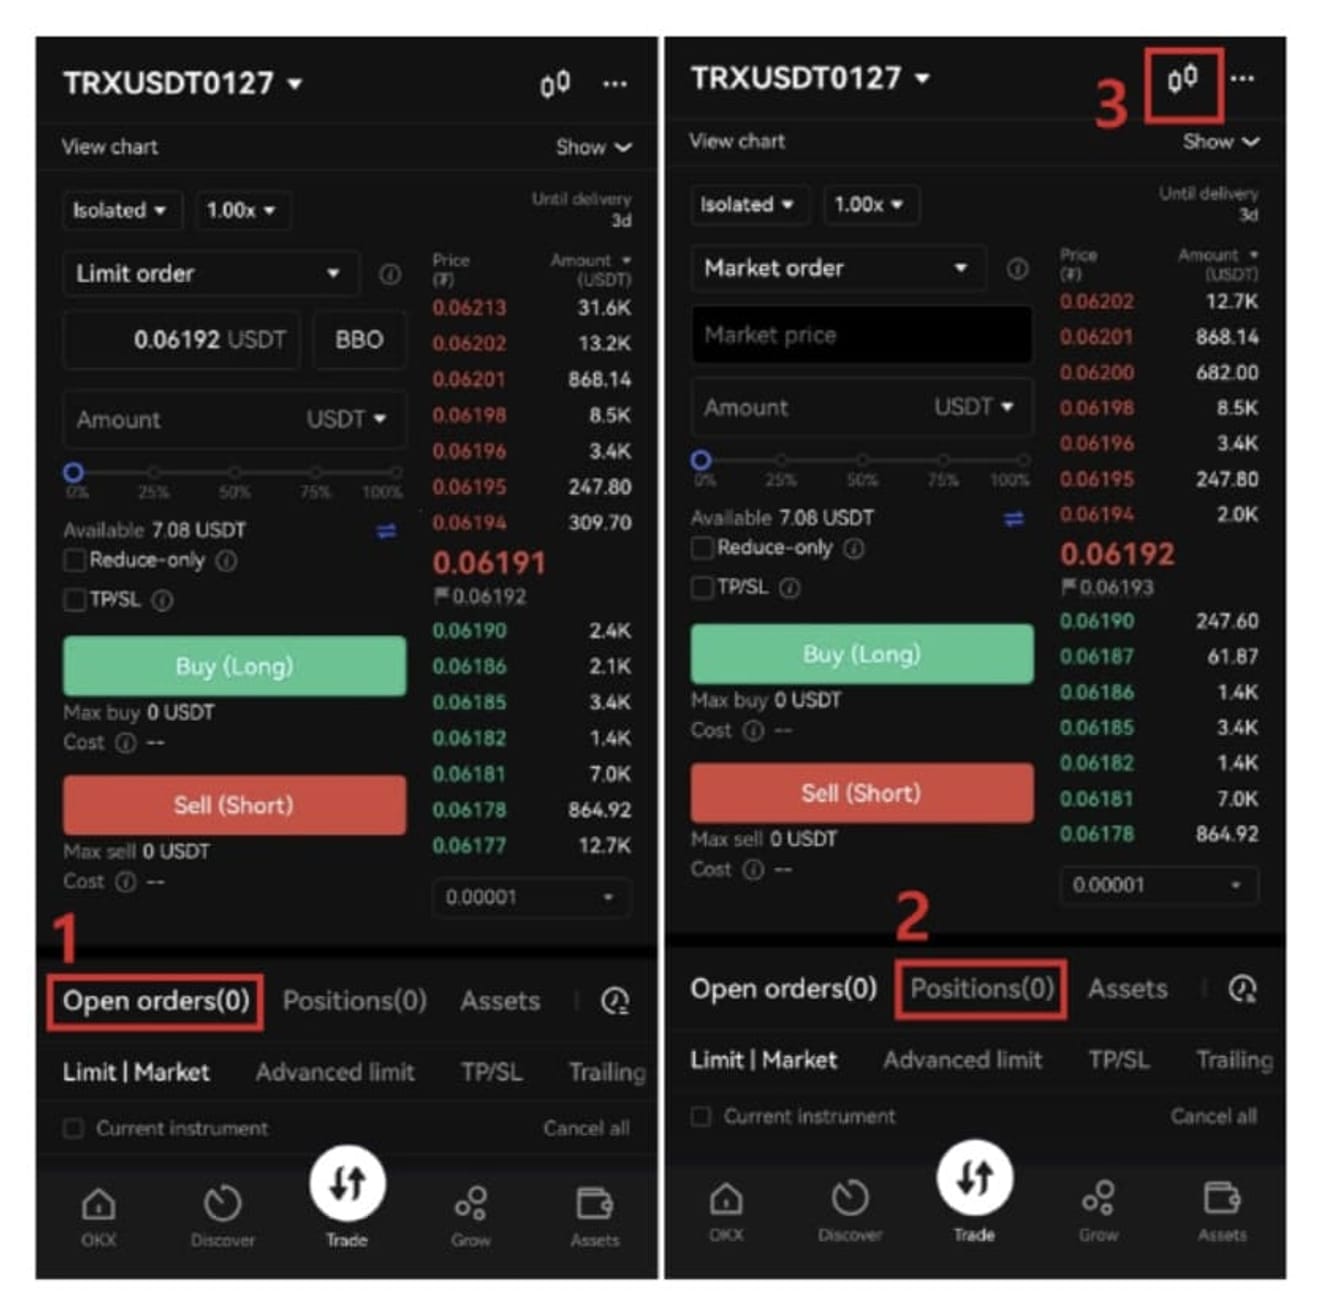
Next, here's how to check the chart and transaction history.
1. This is the record of the limit order that has been placed but not yet executed.
2. You can check the coins you currently hold that have been executed.
3. This is the button to open the chart.